


4
www.observint.com
© 2014 Observint Technologies. All rights reserved.
5.
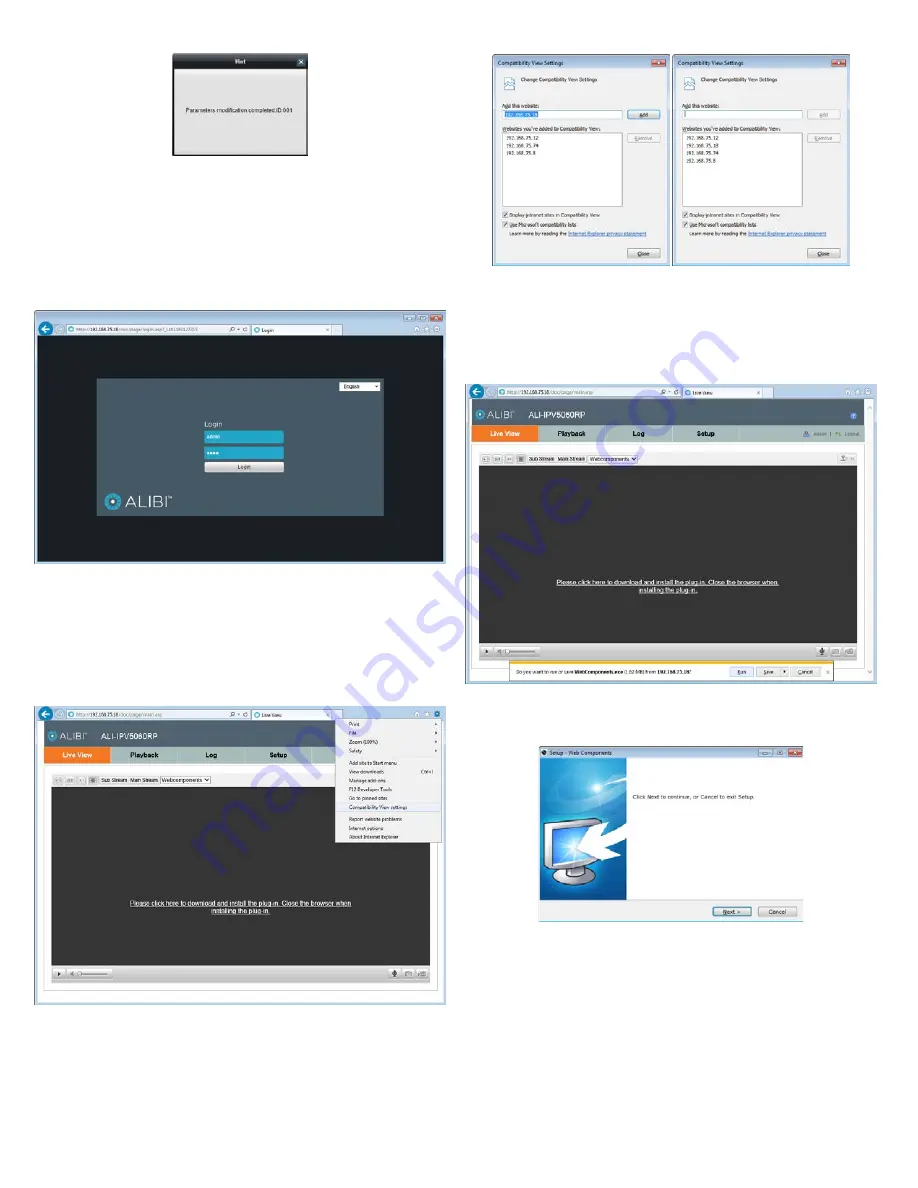
The new IP address, port, etc. settings will appear in the list with the device you modified.
Step 6. Initial remote login
To access the camera from a computer on the LAN for the first time:
1.
Open your Microsoft Internet Explorer browser on your compute and enter the IP address of the
camera in the URL field. In the example below, the IP address of the camera is 192.168.75.18.
2.
In the login window, enter your
User Name
and
Password
in the appropriate fields, then click
Login
. The default
User Name
and
Password
for ALIBI cameras is
admin
and
1111
.
3.
If this is the first time you are logging into the camera at this IP address AND you are using Internet
Explorer 10 or newer, you must configure IE for Compatibility mode:
a.
In Internet Explorer, click the Tools icon (located to the right of the tabs), then select
Compatibility View settings from the drop-down menu.
b.
In the Compatibility View Settings window, ensure that the IP address of your camera is in the
Add this website
field, then click
Add
.
c.
After clicking
Add
, the IP address will appear in the Websites list. Click
Close
.
d.
If a message on the screen requesting that you install a plug-in (see below), click on the
message and continue with the following sub-steps. A message box will appear at the
bottom of the window to install the WebComponents plug-in. Otherwise, continue with step
“Step 7. Setup Fisheye Parameters” on page 5.
e.
In the message box, click
Run
to install WebComponents.exe. The following pop-up window
will open. When this window appears, close the browser.
f.
Click
Next
to install WebComponents. Allow the plug-in installation to complete. When the
following window appears, click
Finish
.


