


A Tour of the IMultiMix16 USB
2
17
onboard effects processor, AUX B is used to control the level of
the channel’s signal being routed to the processor.
6) EQ
The iMultiMix gives you three bands of EQ per channel. Using
these knobs, you can tailor the channel’s signal by boosting some
frequencies and cutting others. The LO and HI controls are
shelving controls with fixed frequencies of 80 Hz and 12 kHz
respectively. The MID control has a peaking response fixed at 2.5
kHz.
“Shelving” means that the mixer boosts or cuts all frequencies past
the specified frequency. “Peaking” means that frequencies above
and below the specified frequency fall off, forming a peak in a
graphical representation.
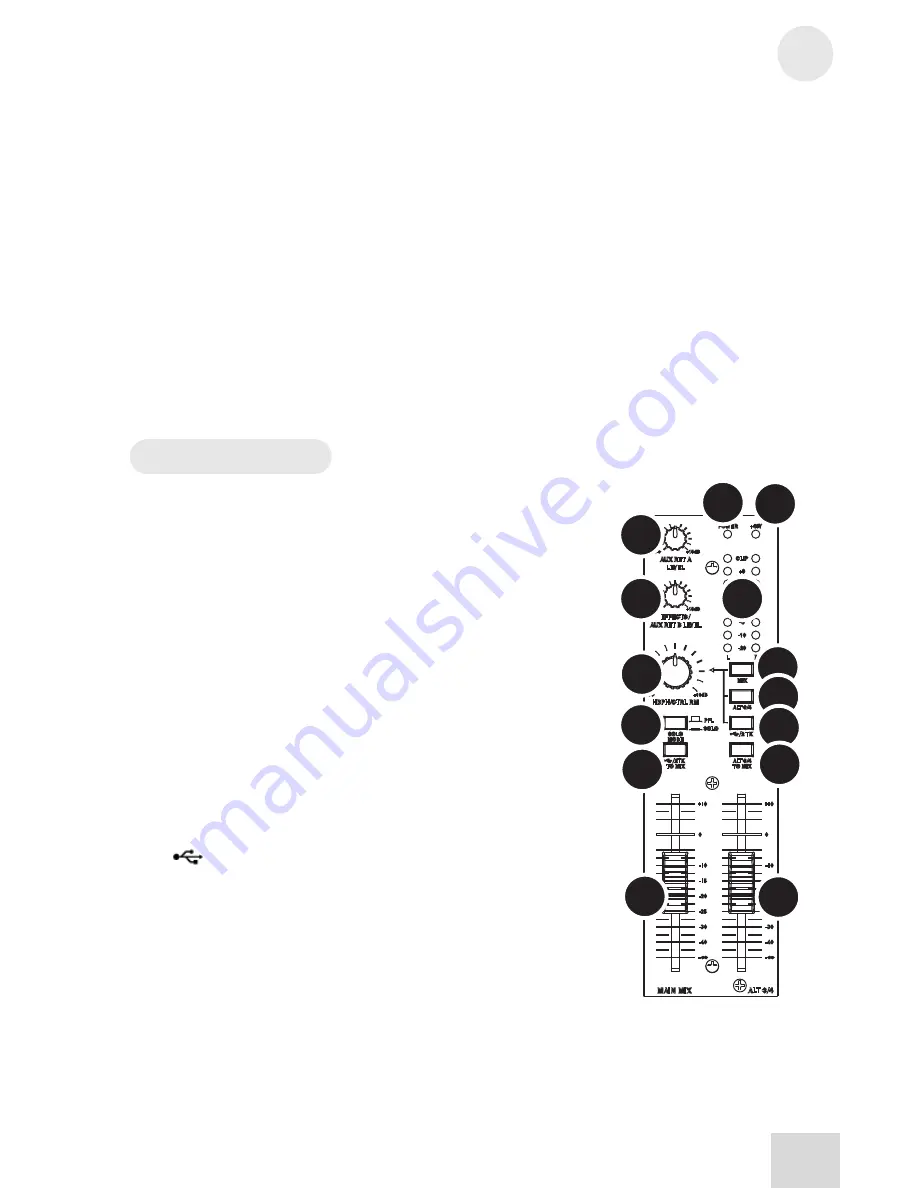
Master Section
The Master Section is the heart of the mixer, where the channel
inputs and aux returns all are mixed together and routed in various
ways.
1) MAIN MIX Fader
The signals from all channels and aux sends—excluding those that
are muted—are sent to the main mix. The MAIN MIX fader is the
one you’ll use to control the overall level of those combined
signals. This fader affects the levels of the signals sent to the
MAIN MIX OUT, the DIGITAL OUT (12FXD and16FXD
models only) and the 2-TRACK OUT. In its lowest position the
signal is cut off completely, and in the uppermost position you get
an additional 10dB of gain. In the 0 position the fader is at unity
gain.
2) ALT 3/4 Fader
This fader controls the output of the Alt 3/4 bus.
3)
/ 2TK TO MIX
When you press this switch, the signals coming in from your
computer through the USB connection and the RCA inputs
through the 2-TRACK IN get blended and routed to the MAIN
MIX, joining whichever other signals are already part of the main
mix. Used this way, this channel effectively becomes another stereo
channel (but without all the extras like pan, EQ, etc.).
4) ALT 3/4 TO Mix
This switch adds the signal from the Alt 3/4 bus to the main mix
bus.
1
2
3
5
10
13 14
11
6
7
12
8
9
4
Summary of Contents for iMultiMix 16 USB
Page 1: ...Reference Manual ...
Page 2: ...This page intentionally left blank 10 20 30 40 50 60 70 80 90 100 ...
Page 6: ...Table Of Contents 4 This page intentionally left blank ...
Page 12: ...Introduction 10 This page intentionally left blank ...
Page 34: ...5 Troubleshooting 32 This page intentionally left blank ...
Page 36: ...6 Specifications 34 This page intentionally left blank ...
Page 37: ...7 Block Diagram 35 ...
Page 38: ...7 Block Diagrams 36 This page intentionally left blank ...
Page 43: ......
Page 44: ......


