


English
- 18 -
When the pressing time is due for the second
numeric button, only the first digit programme
will be displayed. The limit of the delay time
is 3 seconds.
• Press directly the programme number to
reselect single digit programmes.
Everyday Operation
Pressing the
TV
DTV
button at any time
while watching television programmes will
switch the TV set between the digital terrestrial
television broadcasting and its normal
analogue broadcasting.
Information Banner
• Whenever you change channel, using the
P-
/
P+
button or the numeric buttons, the TV
displays the broadcast picture along with an
information banner at the bottom of the
screen. This will remain on the screen for
approximately three seconds.
• The information banner can also be
displayed at any time while watching TV by
pressing the
button on the remote
control:
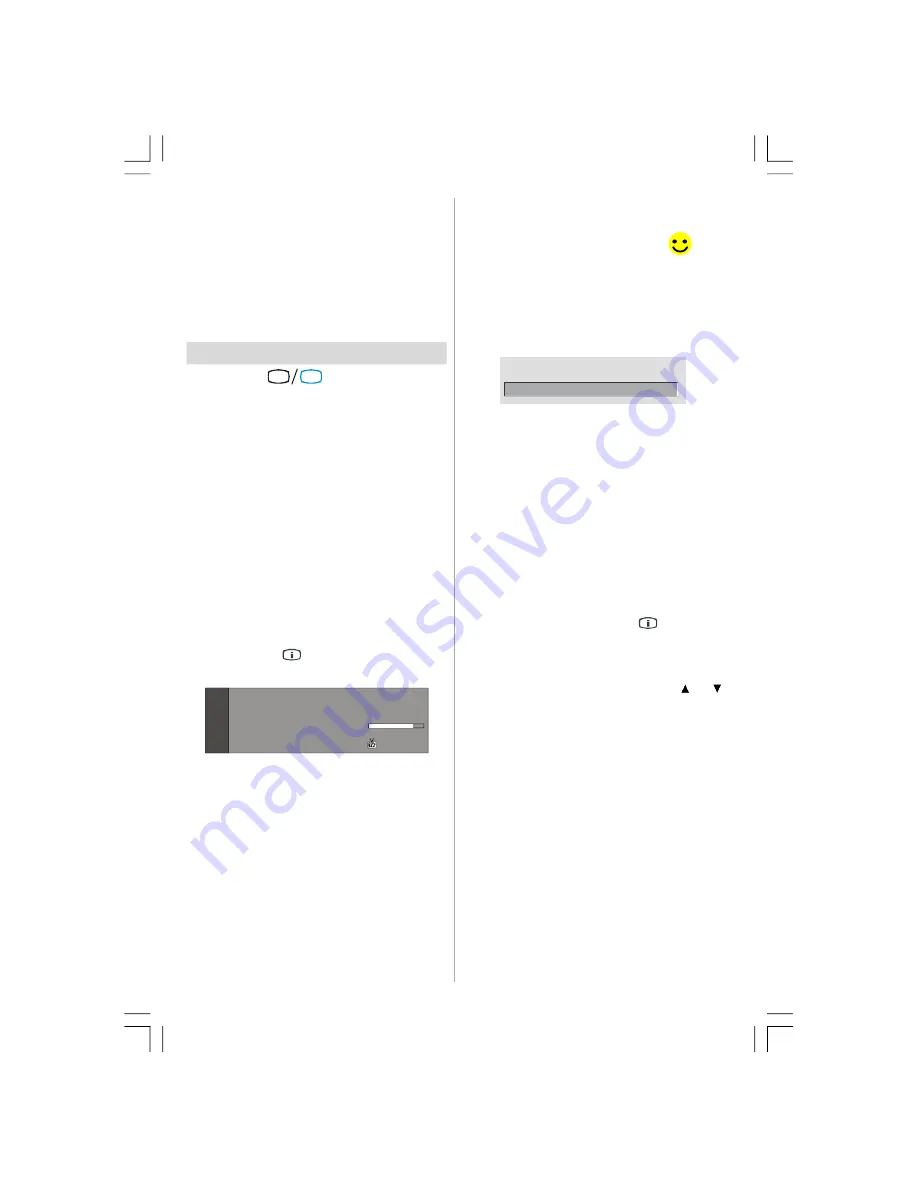
Now: 50/50
Next: Ace Lighting
1. BBC ONE
Signal Level:
13:15
09:25 - 11:00
11:00 - 11:25
• The information banner gives information
on the channel selected and the
programmes on it. The name of the channel
is displayed, along with its channel list
number and an indication of the strength of
the signal received.
Hint: Not all channels broadcast the
programme data. If the name and time
of the programme are not available,
then “No Information Available” will be
displayed in the information banner.
• Icons are also displayed in the information
banner and if this channel is a favourite
channel, favourite channel icon “
” will
also be displayed.
If the selected channel is locked, you must
enter the correct four numeric code to view
the channel. “
Enter Lock Key
” will be
displayed on the screen in such a case:
Enter Lock Key
Electronic Programme Guide (EPG)
• Some, but not all, channels send information
about the current and next events.
• Please note that event information is updated
automatically. If there is no event information
data available in channels, only channel
names with
“No Information Available”
banner is displayed.
• Press
GUIDE
button to view the
EPG
menu.
• In EPG menu, you can easily see the extended
help information by pressing
button.
• Press this button again to close this window.
• In the EPG menu, all channels are displayed.
Current channel is highlighted. Use
or
buttons to change channels. Also press
GREEN/RED
buttons to scroll up/down the
pages for the channels.
• If you highlight an event, short event
description, extended event description, start
and end times of the event will be displayed
on the screen.
• If you press the
OK
button when a next event
is highlighted, a reminder is set for the
highlighted programme and a clock appears
across the highlighted channel line.
Programme reminders can be set to signal that a
programme is about to start when you are
watching another channel. If you set reminder for
ENG-42761-1055UK-42 INCH 17MB26 UK IDTV-(WO SVHS-ECO PIP)-50116260.p65
16.10.2007, 09:19
18
Summary of Contents for AV42751-FHDID
Page 44: ......


