Akura AAMT15LCD, Instruction Manual
The Akura AAMT15LCD is a high-quality household product with an LCD display. To help you get the most out of your purchase, we offer a comprehensive Instruction Manual that you can easily download for free from our website. Discover the full potential of your device with our user-friendly manual.
Share
Download


Reviews:
No comments
Related manuals for AAMT15LCD

The Frame QE32LS03CB
Brand: Samsung Pages: 4

Google TV 98C735 Series
Brand: TCL Pages: 24

M170T
Brand: Pixstorm Pages: 13

L19D3260
Brand: TCL Pages: 26

DWM48F1G1
Brand: Westinghouse Pages: 35

TVH24R506STWEB
Brand: Gogen Pages: 150

32SOLO1
Brand: Vispera Pages: 43

43-4520
Brand: Olive Pages: 52

CAV191
Brand: Caratec Vision Pages: 80

Actios ATVUHD55-1216
Brand: Bauhn Pages: 2

32 GLX 3023
Brand: Grundig Pages: 26

LTDN40K221TWAM
Brand: Kalley Pages: 49

UE43BU8572UXXH
Brand: Samsung Pages: 134

UE70AU7101U
Brand: Samsung Pages: 267

CS20F10MJ0XBWT
Brand: Samsung Pages: 61

CTV 4910 DVB-T
Brand: AEG Pages: 51

CTV 4842
Brand: AEG Pages: 60
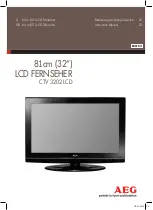
CTV 3202 LCD
Brand: AEG Pages: 40


