background image

 8

En

ENGLISH

 8

RADIO RECEPTION

BASIC OPERATIONS

s

a

f

,

g

 CD 

z

OPEN/CLOSE

CD

CD BLANK

SKIP

0-9, +10

DISPLAY

REPEAT

MODE

d

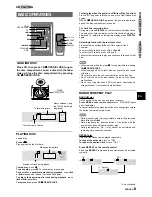
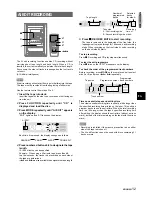
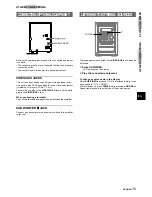
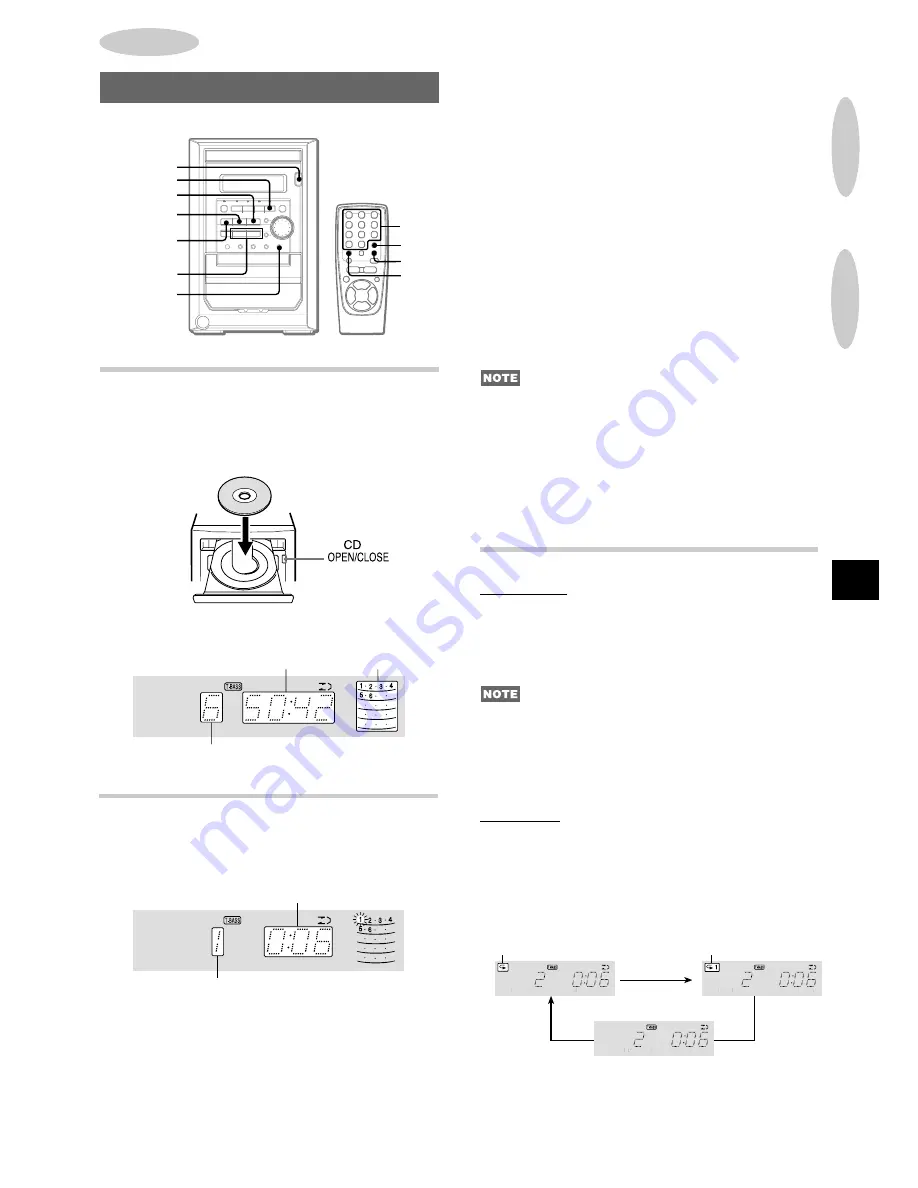
LOADING DISC

Press CD, then press CD 

z

z

z

z

z

 OPEN/CLOSE to open

the disc compartment. Load a disc with the label
side up. Close the disc compartment by pressing
CD 

z

z

z

z

z

 OPEN/CLOSE.

z

Music calender (only
the first 20 tracks are

Total playing time

displayed)

Total number of tracks

To start play when the power is off (Direct Play Function)

Press CD. The power is turned on and play of the loaded disc
begins.
When CD 

z

z

z

z

z

 OPEN/CLOSE is pressed, the power is also turned

on and the disc compartment is opened.

To check the remaining time

During play, press DISPLAY on the remote control three times.
The amount of time remaining until all tracks finish playing is
displayed. To restore the playing time display, press DISPLAY
again.

Selecting a track with the remote control

Press numbered buttons 0-9 and +10 to select a track.

Example:

To select the 25th track, press +10, +10 and 5.
To select the 10th track, press +10 and 0.
The selected track starts to play and continues to the end of that
disc.

• When removing the disc, press 

s

 to stop play before pressing

CD 

z

z

z

z

z

 OPEN/CLOSE.

• When loading an 8-cm (3-inch) disc, put it onto the inner circle

of the tray.

• Do not place more than one compact disc on the disc tray.
• Do not tilt the unit with disc loaded. Doing so may cause

malfunctions.

• Do not use irregular shape CDs (example: heart-shaped,

octagonal ones). It may result in malfunctions.

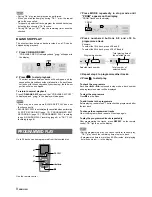
RANDOM/REPEAT PLAY

RANDOM play

All the tracks on the disc can be played randomly.
Press MODE on the remote control once, “RANDOM” lights
up on the display.
To cancel random play, press the button once during play or press
the button four times in stop mode.

• During random play, it is not possible to skip to the previously

played track with 

f

.

• During random play, direct selection of the tracks with the

numbered buttons will cancel random play.

• During random play, “

"

  1” play cannot be performed and

remaining time cannot be checked.

REPEAT play

One or all the tracks can be played repeatedly.
To repeat the entire disc, turn on 

"

”.

To repeat the desired track, turn on 

"

 1”.

Press REPEAT on the remote control.

Each time REPEAT is pressed, the operations can be selected
cyclically.

a

b

"

"

 1

c

To be continued

CD PLAYING

CD PLAYING

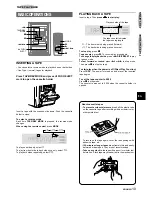
PLAYING DISC

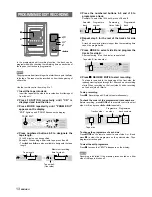
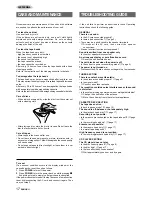
Load a disc.

Press 

d

d

d

d

d

.

Play begins with the first track.

Elapsed playing time

Number of track being played

To stop play, press 

s

.

To pause play, press 

a

. To resume play, press again.

To search for a particular point during playback, keep 

f

or 

g

 pressed and release it at the desired point.

To skip to the beginning of a track during playback, press

f

 or 

g

repeatedly.

To remove disc, press CD 

z

z

z

z

z

 OPEN/CLOSE.

 (Cancel)

Summary of Contents for XR-M100

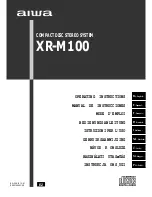
Page 1: ...DE INSTRUCCIONES MODE D EMPLOI BEDIENUNGSANLEITUNG ISTRUZIONI PER L USO GEBRUIKSAANWIJZING NÁVOD K OBSLUZE HASZNÁLATI UTASæTÁS INSTRUKCJA OBS UGI En English E Español 8A CLK 913 01 000314AWY X2 EZ F Français D Deutsch I Italiano NL Nederlands C C esky M Magyar Po Polski ...

Page 2: ...stoves or other appliances that generate heat It also should not be placed in temperatures less than 5 C 41 F or greater than 35 C 95 F 3 Mounting surface Place the unit on a flat even surface 4 Ventilation The unit should be situated with adequate space around it so that proper heat ventilation is assured Allow 10 cm 4 in clearance from the rear and the top of the unit and 5 cm 2 in from the each...

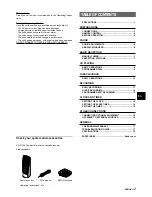
Page 3: ... M100 Compact disc stereo cassette receiver Front speakers Remote control FM antenna MW LW antenna Operating Instructions etc TABLE OF CONTENTS PRECAUTIONS 1 PREPARATIONS CONNECTIONS 3 REMOTE CONTROL 4 BEFORE OPERATION 5 SOUND AUDIO ADJUSTMENTS 6 GRAPHIC EQUALIZER 6 RADIO RECEPTION MANUAL TUNING 7 PRESETTING STATIONS 7 CD PLAYING BASIC OPERATIONS 8 PROGRAMMED PLAY 9 TAPE PLAYBACK BASIC OPERATIONS ...

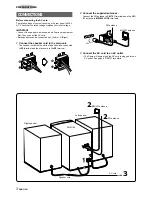
Page 4: ...ect the speaker cord to the main unit The speaker cord with the white stripe should be connected to 0 terminal and the black cord to the 9 terminal 2 Connect the supplied antennas Connect the FM antenna to FM 75 Ω terminals and the MW LW antenna to MW LW LOOP terminals ANTENNA MW LW LOOP FM 75Ω COAXIAL 3 Connect the AC cord to an AC outlet The Demo will begin when the AC cord is plugged into an AC...

Page 5: ... batteries Detach the battery cover on the rear of the remote control and insert two R6 size AA batteries R6 AA When to replace the batteries The maximum operational distance between the remote control and the sensor on the main unit should be approximately 5 meters 16 feet When this distance decreases replace the batteries with new ones Using the remote control The instructions in this manual ref...

Page 6: ...e AC cord is connected the display window demonstrates the functions of the unit When the power is turned on the DEMO display is overridden by the operation display To cancel DEMO mode Press DEMO ECO To re activate the DEMO mode press DEMO ECO repeatedly until the display window demonstrates the functions of the unit DIMMER mode Press DEMO ECO twice during power on The display is dimmer than usual...

Page 7: ...ed In this case cancel the T BASS system QSOUND This system provides a rich three dimensional sound area for stereo sources You can enjoy more enhanced sound Press QSOUND To cancel QSOUND Press QSOUND again OFF is displayed At higher volumes turning QSOUND on may cause sound distortion In this case turn the volume down GRAPHIC EQUALIZER EQ VOL MULTI JOG JOG MODE This unit provides the following th...

Page 8: ...et numbers of all other stations in the band with higher numbers are also decreased by one MANUAL TUNING BAND 2 1 POWER MODE 1 Press TUNER BAND repeatedly to select the desired band FM MW LW When TUNER BAND is pressed while the power is off the previously tuned station will be played Direct Play Function To select a band with the remote control Press BAND repeatedly 2 Press f f f f f or g g g g g ...

Page 9: ... tray Do not place more than one compact disc on the disc tray Do not tilt the unit with disc loaded Doing so may cause malfunctions Do not use irregular shape CDs example heart shaped octagonal ones It may result in malfunctions RANDOM REPEAT PLAY RANDOM play All the tracks on the disc can be played randomly Press MODE on the remote control once RANDOM lights up on the display To cancel random pl...

Page 10: ...rding page 8 or 1 PLAY recording page 8 PROGRAMMED PLAY Up to 30 tracks can be programmed from the inserted disc REPEAT 4 2 1 s f g Use the remote control 1 Press MODE repeatedly in stop mode until PRGM appears on the display PRGM flashes on the display PRGM 2 Press numbered buttons 0 9 and 10 to programme a track Example To select the 12th track press 10 and 2 To select the 20th track press 10 10...

Page 11: ...astic tabs on the cassette tape after recording with a screwdriver or other pointed tool To record on the tape again cover the tab openings with adhesive tape etc 120 minute or longer tapes are extremely thin and easily deformed or damaged They are not recommended Take up any slack in the tape with a pencil or similar tool before use Slack tape may break or jam in the mechanism BASIC OPERATIONS MO...

Page 12: ...re is to be started 3 Set the reverse mode by pressing TAPE REV MODE 4 Press AUX VIDEO and turn the connected equipment off 5 Press w REC REC MUTE to start the erasure RECORDING Sound adjustment during recording The output volume and tone of the speakers or headphones may be freely varied without affecting the recording INSERTING BLANK SPACE Insertion of 4 second blank spaces may help you to locat...

Page 13: ...f the time remaining on the tape with the minus mark Recording is inhibited if the erasure prevention tab on either side of the tape is broken off The AI edit function cannot be used with discs containing 31 tracks or more AI EDIT RECORDING 1 5 s 4 3 2 f g The AI edit recording function enables CD recording without worrying about tape length and track length When a CD is inserted the unit automati...

Page 14: ...rack press 10 and 0 Selected Programme Remaining Programmed track number time of side A track 6 Repeat step 5 for the rest of the tracks for side A A track whose playing time is longer than the remaining time cannot be programmed 7 Press MODE to select side B and program the tracks for side B After confirming B on the display repeat step 5 Tape side B reverse side 8 Press w w w w w REC REC MUTE to...

Page 15: ... press DISPLAY once on the remote control then press s within 4 seconds Repeat the same procedure to restore the 12 hour standard If the clock display flashes This is caused by a power interruption The current time needs to be reset If power is interrupted for more than approximately 24 hours all settings stored in memory after purchase need to be reset SETTING THE SLEEP TIMER VOL MULTI JOG 2 1 Th...

Page 16: ...e tape into deck To listen to the radio tune in to a station To listen to the equipment connected to AUX VIDEO jacks set the timer of the connected source with an external timer and prepare for the play 6 Press POWER to turn the unit off after adjusting the volume and tone When the timer on time is reached the unit turns on and begins play with the selected source The volume level is automatically...

Page 17: ...ENT SUB WOOFER Refer to the operating instructions of the connected equipment for details The connecting cords are not supplied Obtain the necessary connecting cords Consult your local Aiwa dealer for optional equipment VIDEO AUX JACKS This unit can input analog sound signals through these jacks Use a cable with RCA phono plugs to connect audio equipment turntables LD players VCRs TV etc Connect t...

Page 18: ...the power back on while pressing s Everything stored in memory after purchase is cancelled If the power cannot be turned off in step 1 because of a malfunction reset by disconnecting the AC cord and connect it again Then carry out step 2 TROUBLESHOOTING GUIDE If the unit fails to perform as described in these Operating Instructions check the following guide GENERAL There is no sound Is the AC cord...

Page 19: ...bit dual Signal to noise ratio 75 dB 1 kHz 0 dB Harmonic distortion 0 1 1 kHz 0 dB Wow and flutter Unmeasurable General Power requirements AC 230 V 50 Hz Power consumption 42 W Dimensions of main unit 168 256 255 mm W H D 65 8 101 8 101 8 in Weight of main unit 3 5 kg 7 Ibs 11 oz Standby power consumption If the power economizing mode is on 1 0 W If the power economizing mode is off 10 W Speaker s...

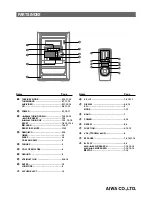
Page 20: ...Name Page 1 TAPE REV MODE 5 10 11 15 TUNER BAND 5 7 11 15 AUX VIDEO 5 11 15 16 CD 5 8 11 15 2 POWER 5 7 15 17 3 f r TUNING DOWN 7 10 12 15 d DIR PRESET 7 10 g t TUNING UP 7 10 12 15 a SET 7 8 10 11 14 s CLEAR 7 14 17 w REC REC MUTE 11 13 4 DEMO ECO 5 14 TIMER 15 SLEEP 14 CD BLANK SKIP 9 5 PHONES 5 6 CD z OPEN CLOSE 8 7 QSOUND 6 8 VOL MULTI JOG 6 14 15 9 ENTER 15 JOG MODE 6 0 z PUSH EJECT 10 1 2 3 ...

Reviews: