- 10 -
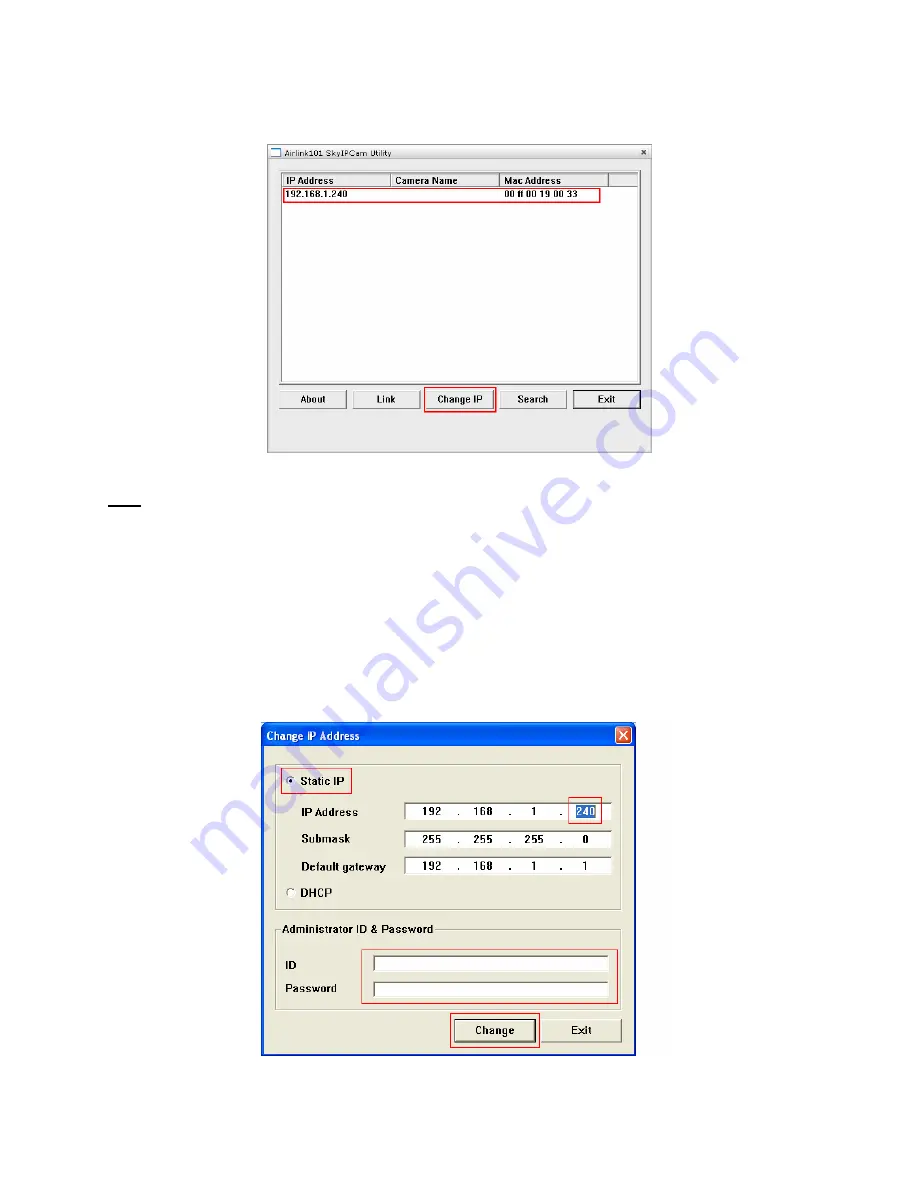
Step 2
Select the IP Camera you want to configure from the list and click on the
Change IP
button.
Note
: If the Camera’s IP address does not show up in the window, make sure the camera is properly
connected to the same network as your computer is, and then click on the
Search
button.
Step 3
You may simply accept the suggested
Static IP
, or you can manually change the last 3-digit
number of the IP Address, in case that the suggested one has already been used by another device in
the same network. Another option is that if your router’s DHCP server is enabled, you can select
DCHP
,
so the router will automatically assign a dynamic IP address to your camera.
Enter
“admin”
for both the
ID
and
password
, and click
Change
.


