Air-Pro 01A series Installation Instructions & Use & Care Manual Download Page 7

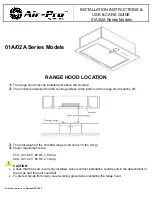
Installation Instructions, 

Revised 05/13/13


USE AND CARE 


   WARNING! 


Do NOT operate the blower/ventilator system without the filters in place, or with dirty, grease laden filters. 


OPERATING CONTROLS:  


Always activate the ventilator or when using appliances. For the best performance, turn on the blower a few minutes before 
starting to cook to establish an airflow pattern within the room. Adjust the fan speed as needed. The left control adjusts the 
halogen lights and the right control adjusts the blower.  
 

ENERGY SAVING TIPS: 


Eliminate air currents in the vicinity by shutting nearby windows and doors, turning off ceiling fans and adjusting the adjacent 
heating and air conditioning outlets if necessary. Place your largest pans on the rear burners whenever possible. Clean filters 
and grease laden surfaces often to improve efficiency. Always use lids on cookware to retain heat and moisture. Minimize the 
amount of liquid used to cook food. Select cookware of proper size, material and construction for the cooking task being 
performed.  
 

CARE & CLEANING:  


Proper cleaning is necessary to maintain performance and appearance, while also ensuring safe operation.   The frequency of 
cleaning should be according to the type and amount of cooking.  Best results will be achieved by cleaning soiled components 
as soon as possible.  Filters must be cleaned regularly.  Remove the filter(s) by grasping the D ring on the filter front and 
pulling gently.  Grasp the front of the filter to remove it.  To reinstall the filter, place the back edge of the filter into the back 
filter bracket.  Lightly push the filter toward the back of the liner while pressing the front side upwards into place.       


The filters may be cleaned by hand washing in hot water using a mild detergent solution or by placing in an automatic 
dishwasher.  Dry the filters before reusing.   


CAUTION:   Most common scrubber type pads will scratch the liner. 

If a commercially available stainless steel cleaner is 

used, it is important to read the labels for chlorine compounds. Chlorine is a corrosive substance. If these compounds are 
present, rinse thoroughly and dry with a soft lint-free cloth. Follow polish manufacturer’s instructions. Always wipe stainless 
steel surfaces with the grain. Never wipe across the grain. After cleaning, reinstall the filters carefully. 
 

HALOGEN LIGHT BULBS:  


Blowers are designed for MR16-GU10 50 watt halogen lamps. They can be purchased at most home or grocery stores, e.g., 
Lowe’s, Home Depot, McCoy’s, Menards or Ace True Value. 
 

ELECTRICAL CONNECTION 
 

IMPORTANT: Copy this page and the next for your electrical installer.  


WARNING!  

Ensure that the power supply is disconnected before proceeding. Verify that the power supply 

matches the ratings found on the appliance data label before proceeding. The complete appliance must be properly grounded 
at all times when electrical power is applied. Do not ground the appliance with the neutral (white) house supply wire. A 
separate ground wire must be utilized. Failure to complete electrical connections properly may result in damaged or non-
functional systems. Follow instructions carefully to ensure proper installation.    


It is the owner’s responsibility to ensure that a qualified person performs the electrical connection of this appliance. The 
electrical installation, including minimum supply wire size, must comply with the National Electric Code ANSI/NFPA 70-1990 
(or latest revision) and local codes and ordinances. A copy of this standard may be obtained from: National Fire Protection 
Association, 1 Batterymarch Park, Quincy, Massachusetts 02269-9101


INSTRUCTIONS: 

A 15 to 20 amp electrical service is recommended for proper electrical supply. Before determining, 

calculate amp ratings based on the product label found on the 01A/02A series module. Always observe local building codes.  
Always use a dedicated circuit. Line load is calculated by adding the amperage of the halogen lights to the rated amperage of 
the ventilator. If the ventilator is rated in watts rather than amps, divide the watts by 120 and this will give you the amperage 
rating.  


Summary of Contents for 01A series

Page 1: ... the cooking surface to the bottom of the range hood must be 24 3 The total weight of the 01A 02A range hood unit is 18 lbs 8 kg 4 Power requirements are 01A AC120 V 60 Hz 1 5 Amp 02A AC120 V 60 Hz 2 1 Amp CAUTION Check that the hood is correctly installed since incorrect installation could result in the detachment of the range and that unit could fall To protect hands from injury wear working glo...

Page 2: ...Installation Instructions Revised 05 13 13 ...

Page 3: ...t with any solid state speed control device 3 TO REDUCE THE RISK OF FIRE ELECTRIC SHOCK OR INJURY TO PERSONS OBSERVE THE FOLLOWING Installation work and electrical wiring must be done by a qualified person s in accordance with all applicable codes and standards including fire rated construction Sufficient air is needed for proper combustion and exhausting of gases through the flue chimney of fuel ...

Page 4: ...ightly If the liner installation is not correct the range hood unit may become detached and fall off WARNING TO REDUCE THE RISK OF A RANGE TOP GREASE FIRE a Never leave surface units unattended at high settings Boilovers cause smoking and greasy spillovers that may ignite Heat oils slowly on low or medium settings b Always turn hood ON when cooking at high heat or when flambéing food i e Crepes Su...

Page 5: ...Installation Instructions Revised 05 13 13 ...

Page 6: ...Installation Instructions Revised 05 13 13 ...

Page 7: ...ess steel cleaner is used it is important to read the labels for chlorine compounds Chlorine is a corrosive substance If these compounds are present rinse thoroughly and dry with a soft lint free cloth Follow polish manufacturer s instructions Always wipe stainless steel surfaces with the grain Never wipe across the grain After cleaning reinstall the filters carefully HALOGEN LIGHT BULBS Blowers a...

Page 8: ...t comes from the electrical panel to the liner Factory Installed Variable Speed Wiring Details Black 120 volt AC from electrical panel usually black White Neutral from electrical panel white Green Ground from electrical panel usually green Wiring Diagram 01A 02A Series Models Liner BLK WHT GRN House Electrical Panel Green White N 120V Black L ...

Page 9: ...ome use or products used outside of the United States and Canada Damage to the product caused by accident fire flood or other acts of God Service calls to educate the customer in the proper use and care of the product correct faulty installation change fuses or reset breakers VMI Inc disclaims and excludes any liability for implied warranties or for incidental or consequential damages wherever per...

Page 10: ...on et le bas de la gamme du capot doit être de 24 3 Le poids total du 01A 02A de la hotte est de 18 lbs 8 kg 4 Exigences d alimentation sont les suivantes 01A AC120 V 60 Hz 1 5 Amp 02A AC120 V 60 Hz 2 1 Amp ATTENTION Vérifier que le capot est correctement installé car une mauvaise installation pourrait entraîner le détachement de la gamme et cette unité pourrait tomber Pour protéger les mains cont...

Page 11: ...Installation Instructions Revised 05 13 13 ...

Page 12: ...ez pas ce produit avec tout état solide dispositif de contrôle de vitesse 3 POUR RÉDUIRE LE RISQUE D INCENDIE DE CHOC ÉLECTRIQUE OU DES BLESSURES AUX PERSONNES OBSERVER LES POINTS SUIVANTS Travaux d installation et le câblage électrique doit être effectué par une personne qualifiée s conformément à tous les codes et les normes applicables y compris au feu de la construction Suffisamment d air est ...

Page 13: ...a chemise n est pas correcte la gamme capot unité peut se détacher et tomber D Avertissement POUR RÉDUIRE LE RISQUE D UNE GAMME HAUT FEU DE GRAISSE a Ne jamais laisser unités de surface sans surveillance à paramètres élevés Boilovers cause fumeur et retombées grasse qui peuvent s enflammer Chauffer lentement les huiles de faible ou moyenne paramètres b mettez toujours le capot lors de la cuisson à...

Page 14: ...Installation Instructions Revised 05 13 13 ...

Page 15: ...Installation Instructions Revised 05 13 13 ...

Page 16: ...les étiquettes de composés du chlore Le chlore est une substance corrosive Si ces composés sont présents bien rincer et sécher avec un chiffon doux non pelucheux Suivez polonais les instructions du fabricant Essuyez toujours en acier inoxydable surfaces avec le grain Essuyez jamais en travers du grain Après nettoyage remettre en place les filtres avec précaution AMPOULES HALOGÈNES Ventilateurs son...

Page 17: ...panneau électrique de la chemise Installé en usine à régime variable détails de câblage Noir 120 Volts AC de panneau électrique généralement le noir Blanc Position neutre du panneau électrique blanc Vert La masse de panneau électrique généralement en vert SCHÉMA de CẤBLAGE 01A 02A Series Models Liner BLK WHT GRN House Electrical Panel Green White N 120V Black L ...

Page 18: ...inconsistent with the recommended installation instructions Product used other than for normal in home use or products used outside of the United States and Canada Damage to the product caused by accident fire flood or other acts of God Service calls to educate the customer in the proper use and care of the product correct faulty installation change fuses or reset breakers VMI Inc disclaims and ex...

Reviews: