Installation Instructions,
Revised 05/13/13
PREPARATION
WARNING:
If the range hood is not installed properly, it could become detached and fall.
Ensure that the metal duct does not touch other metal housing materials, otherwise fire or electric shock could
result.
1.
According to the conditions where the range
hood is installed, determine whether it will
discharge vertically or horizontally (7” Round
duct). For vertical or horizontal discharge, run
duct work between the hood location and a
roof cap or wall cap. For the best result in
either direction, use a minimum number of
transitions and elbows. Be sure to attach a
roof cap or wall cap to avoid water leakage.
2.
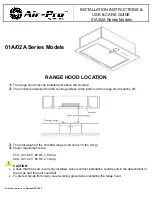
The range hood unit must be mounted to a liner which has the dimensions. Install the liner securely after checking
that the opening size of the liner is the same as the figure below.
CAUTION:
The liner should be installed tightly. If the liner installation is not correct, the range hood unit may become
detached and fall off.
WARNING – TO REDUCE THE RISK OF A RANGE TOP GREASE FIRE:
a)
Never leave surface units unattended at high settings. Boilovers cause smoking and greasy spillovers that may ignite. Heat
oils slowly on low or medium settings.
b)
Always turn hood ON when cooking at high heat or when flambéing food (i.e. Crepes Suzette, Cherries Jubilee, Peppercorn
Beef Flambé).
c) Clean ventilating fans frequently. Grease should not be allowed to accumulate on fan or filter.
d) Use proper pan size. Always use cookware appropriate for the size of the surface element.
CONNECTING TO THE VENT PIPE
The 01A/02A series ventilation modules come with a metal start collar. Attach the Start Collar to the duct with at least three
equally spaced screws. Also apply duct tape, preferably the metal type. Some installations, (where the outside of this position
of the duct is not accessible) will require the metal tape be applied on the
inside
of the duct.
7” Round Duct
(for Vertical Discharge)
7” Round Duct
(for Horizontal Discharge)
Summary of Contents for 01A series
Page 2: ...Installation Instructions Revised 05 13 13 ...
Page 5: ...Installation Instructions Revised 05 13 13 ...
Page 6: ...Installation Instructions Revised 05 13 13 ...
Page 11: ...Installation Instructions Revised 05 13 13 ...
Page 14: ...Installation Instructions Revised 05 13 13 ...


