


150mm+-2
105
mm+-2
105
mm+-2
25
24
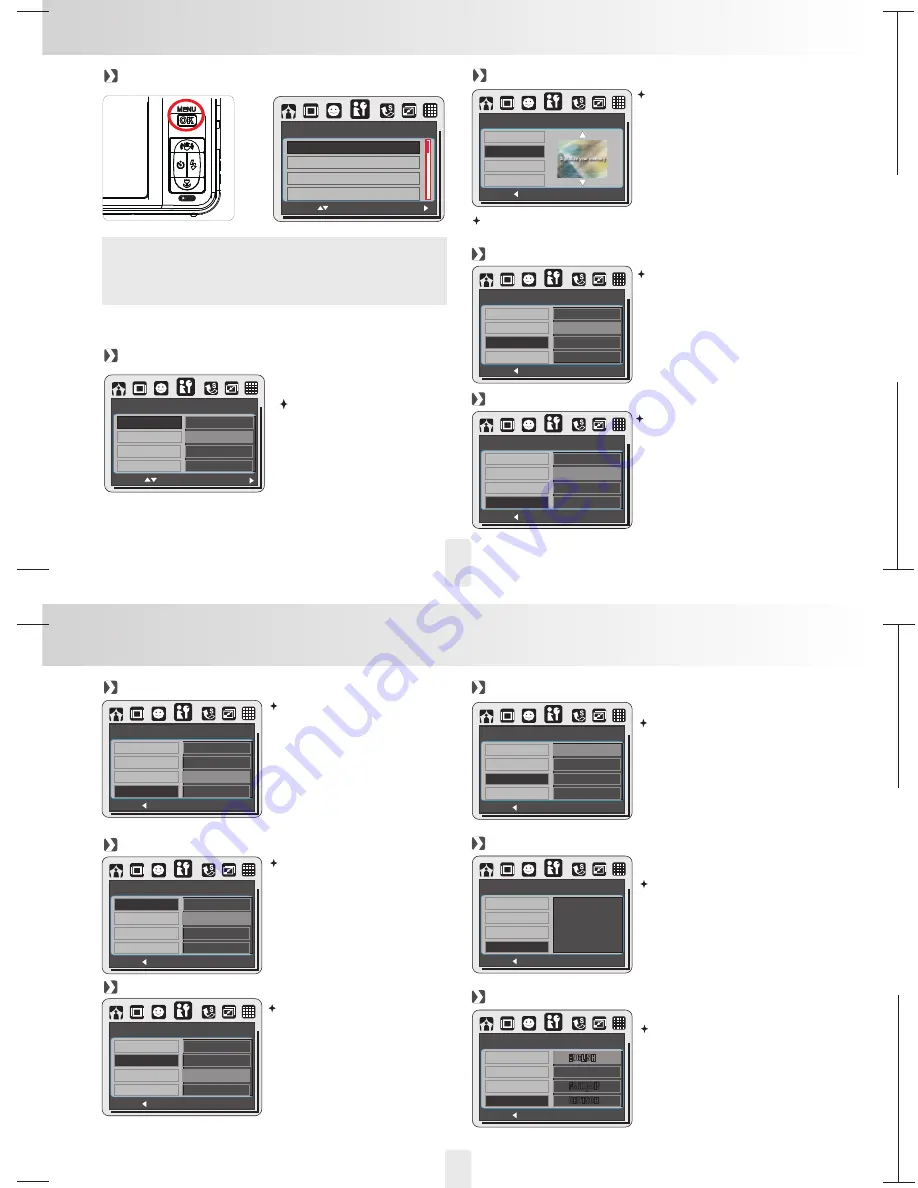
SETUP Setting
General Introduction
LCD (Default: NORMAL)
SETUP
LCD
NORMAL
S.IMAGE
LOGO
S.SOUND
SOUND1
SH.SOUND
SOUND1
MOVE :
CHANGE
There are 3 options of the LCD
brightness to select DARK ,
NORMAL and BRIGHT.
The camera has the space for default
start-up image or user start-up
images. To set up the start-up image,
please following the steps below.
1. Press OK/Menu Button and choose
"SETUP".
2. Choose "S. IMAGE".
3. Select the image you prefer and
press OK/Menu Button to confirm
the setting. Or you can select
"OFF" to not have a start-up image.
1.DARK
2.NORMAL
3.BRIGHT
SETUP
To set an image as a user start-up image option, please refer to
"Resize under Playback Mode".
START-UP IMAGE
SETUP
BACK:
SET:OK
LCD
S.IMAGE
S.SOUND
SH.SOUND
Note:
If it is set at "OFF", the camera will not turn off automatically.
The battery may get drained soon if the camera is being on for a long time.
QUICK VIEW (Default: 0.5 SEC.)
To set up the power saving time please
follow the steps below.
1. Press OK/Menu Button and choose
"SETUP".
2. Choose "PWR SAVE".
3. Select the time you prefer for the
power saving and press OK/Menu
Button to confirm the setting. Or you
can choose "OFF" to not have the
power saving function.
To set up the quick view time please
follow the steps below.
1. Press OK/Menu Button and choose
SET UP
2. Choose “Q. VIEW”
3. Select the time you prefer and press
OK/Menu Button to confirm the
setting or you can choose OFF
to have no Quick View Time.
“
”
“
”
This function allows you to
print the date or date & time on
the image.
START-UP SOUND (Default:SOUND1)
SHUTTER SOUND (Default:. SOUND1)
To set up the Start-up sound please
follow the steps below.
1. Press OK/Menu Button and
choose "SETUP".
2. Choose "S.SOUND".
3. Select the sound you prefer and
press OK/Menu Button to confirm
the setting. Or you can choose
"OFF" to turn off the a start-up
sound.
To set up the shooting sound please
follow the steps below.
1. Press OK/Menu Button and choose
"SETUP".
2. Choose "SH.SOUND".
3. Select the sound you prefer and
press OK/Menu Button to confirm
the
setting. Or you can choose "OFF"
to
shooting sound.
turn off the
To set up the System sound please
follow the steps below.
1. Press OK/Menu Button and
choose "SETUP".
2. Choose "SYS. VOLUME".
3. Select the sound volume you
prefer and press OK/Menu Button
to confirm
the setting. Or you can choose
"OFF" to
System sound.
turn off
Note :
The system sound includes the start-up sound and shooting sound.
SETUP Setting
SYSTEM VOLUME (Default: MEDIUM)
MOVE:
CHANGE:
LCD
DARK
S.IMAGE
NORMAL
S.SOUND
BRIGHT
SH.SOUND
SETUP
BACK:
SET:OK
LCD
S.IMAGE
S.SOUND
OFF
SOUND1
SOUND2
SOUND3
SH.SOUND
SETUP
BACK:
SET:OK
LCD
S.IMAGE
S.SOUND
OFF
SOUND1
SOUND2
SOUND3
SH.SOUND
SETUP
BACK:
SET:OK
S.IMAGE
S.SOUND
OFF
LOW
MEDIUM
SH.SOUND
SYS.VOLUME
HIGH
SETUP
BACK:
SET:OK
Q.VIEW
PWR SAVE
0.5 SEC
IMPRINT
1 SEC
OFF
DATE & TIME
3 SEC
POWER SAVE (Default: 3 MIN.)
SETUP
BACK:
SET:OK
Q.VIEW
PWR SAVE
1 MIN
IMPRINT
3 MIN
OFF
DATE & TIME
5 MIN
IMPRINT (Default: OFF)
SETUP
BACK:
SET:OK
Q.VIEW
PWR SAVE
DATE
IMPRINT
DATE & TIME
OFF
DATE & TIME
SETUP
BACK:
SET:OK
Q.VIEW
PWR SAVE
IMPRINT
DATE & TIME
DATE & TIME
LANGUAGE
This function allows you to choose
the type of the date & time.
99 / 01/021
01:26
YY/MM/DD
SETUP
BACK:
SET:OK
PWR SAVE
IMPRINT
DATE & TIME
LANGUAGE
ENGLISH
FRANCAIS
DEUTSCH
! " #
There are 12 languages availabe to
choose which are English,
Japanese, French, German,
Spanish, Italian, Turkish, Russian,
Thai, Portuguese, Simplified
Chinese and Traditional Chinese.
1. LCD
2. S. IMAGE
3. S. SOUND
4. SH. SOUND
5. SYS. VOLUME
11. FILE
12. RESET ALL
13. USB
14. VIDEO
15. FORMAT
6. Q.VIEW
7. PWR SAVE
8. IMPRINT
9. DATE &TIME
10. LANGUAGE


