14
4.
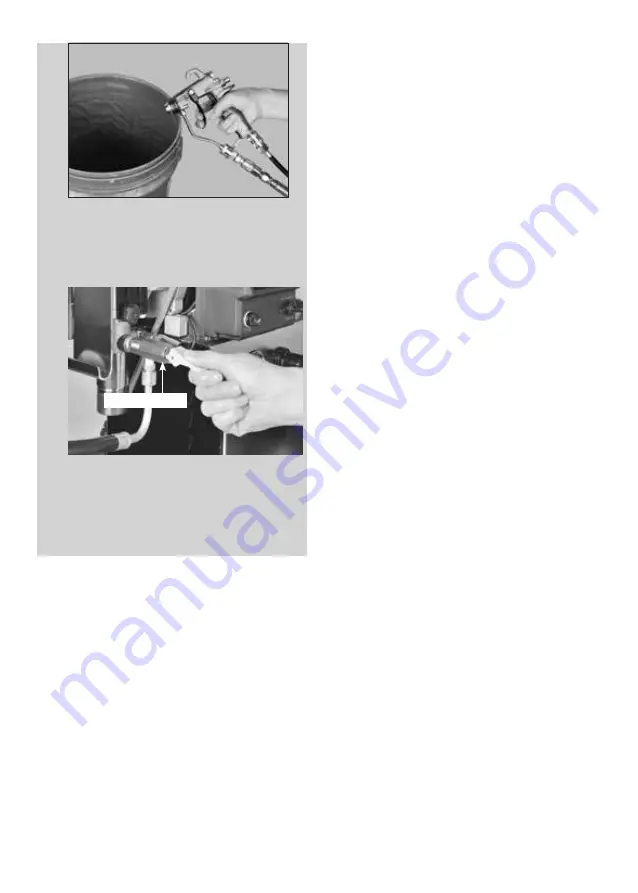
Slowly turn the Priming Valve to the open
(priming) position to relieve any residual fluid
pressure. Then close priming valve.(See page 2)
WARNING: If the SPR AY TIP OR HOSE IS
CLOGGED, Expect material splashing into the
bucket while opening the Priming Valve. So open
the valve very slowly and take precautions.
SPRAYING -ALL MODELS
Check the quality of the spray pattern on a piece of
scrap material, such as cardboard. Turn the Pressure
Control Knob Clockwise to increase pressure and
counterclockwise to decrease pressure.
Start with a low spray pressure and slowly increase
the pressure until a good spray pattern is achieved.
If the pressure is too low, the pattern will have “tails”,
which is a pattern with heavy, uneven edges. Keep
testing and increasing pressure until a smooth,
regular pattern is achieved. If the pressure is at
maximum and the pattern is still not ideal, either go
to a smaller orifice tip or thin the material.
Do not raise the pressure any higher than is
necessary. Operating the sprayer at a higher than
necessary pressure wastes material, causes early tip
wear, and shortens sprayer life. Excessive pressure
can also result in bounce-back of the material and
a rough finish. (Running with the pressure at the
absolute maximum setting will also make the pump
run on and off in an irregular way.)
NOTE: Use proper pressure settings. Do not rely
on the readout to set the pressure. The only
way to set the pressure is to test spray on scrap
materials and observe the spray pattern.
AIR-ASSISTED AIRLESS MODELS ONLY
The Air-Assisted Airless machine has two
different spraying modes:
The Airless mode is used for general spraying
with medium to high viscosity materials. The
instructions are the same as for other airless
models.
The Air-Assisted mode is used for fine finish
work with low to medium viscosity materials
(oil, stains, lacquers, etc...). The addition of air
pressure aids in atomization. To operate in Air-
Assisted mode, see the following instructions:
1.
With the machine function selector in the
“Airless” position, achieve a good spray
pattern as instructed above in “SPRAYING
-ALL MODELS”. Then decrease the pressure
by turning the Pressure Control Knob
anticlockwise slightly until “tails” start to
appear.
2.
Switch the machine Function Selector to the
“Air Assisted” position.
3.
Testing the quality of the spray pattern on a
piece of scrap material, first pull out, then turn
the Air Pressure Regulator Knob clockwise
to increase the air pressure until the “tails”
disappear again. Use the air pressure to fine
tune the pattern. When you achieve the
air pressure that you desire, push in the Air
Pressure Regulator Knob to lock in position.
You should now have a good pattern.
Priming Valve


