35
WARNING – SERVICING TO BE CARRIED OUT ONLY BY AN AUTHORISED PERSON
Disconnect from electricity and gas before servicing. Check appliance is safe when you have finished.
Bypass Screw Adjustment
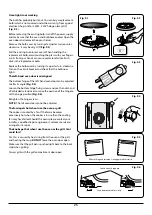
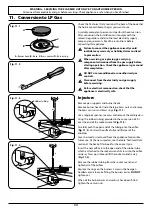
The valves in this cooker are fitted with adjustable bypass
screws. The cooker is supplied with the bypass screws set for
Natural gas. For LPG conversion the bypass screws must be
screwed all the way down.
It may be possible to adjust the bypass screw by simply
removing the control knobs (
Fig. 11.5
). If however you
are unable to access the bypass screw using a suitable
screwdriver, you will need to remove the control panel, please
refer to section ‘Removing the Control Panel’ below.
Removing the Control Panel
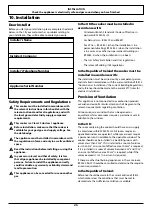
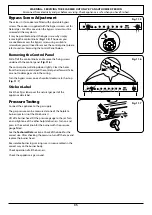
Pull off all the control knobs and remove the fixing screws
underneath the control panel (
Fig. 11.6
).
The control panel will drop down slightly. Clear the holes
from the inner panel and pull the control panel forward. Take
care not to damage or strain the wiring.
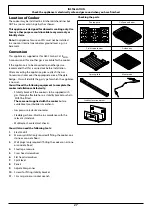
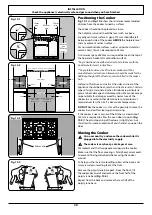
Turn the bypass screw on each control clockwise to the stop
(
Fig. 11.7
).
Stick on Label
Stick the LP gas label over the natural gas part of the
appliance data label.
Pressure Testing
Connect the appliance to the gas supply.
The gas pressure can be measured at one of the hotplate
burner injectors (not the Wok burner).
Lift off a burner head. Fit the pressure gauge to the jet. Turn
on and light one of the other hotplate burners. Turn on and
press in the control knob for the burner with the pressure
gauge fitted.
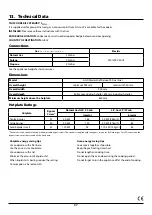
See the
Technical Data
section at back of the book for the
correct size. After checking the pressure, turn off the taps and
replace the burner head.
Reassemble burner top, making sure it is reassembled in the
correct way on the burner body.
Check operation of all the burners.
Check the appliance is gas sound.
S
S
1
1
2
2
3
3
4
4
5
5
6
6
7
7
8
8
9
9
0
S
S
1
1
2
2
3
3
4
4
5
5
6
6
7
7
8
8
9
9
0
M
H
G
S
S
1
1
2
2
3
3
4
4
5
5
6
6
7
7
8
8
9
9
0
S
S
1
1
2
2
3
3
4
4
5
5
6
6
7
7
8
8
9
9
0
M
H
G
ArtNo.0102-0011 - Screwing
the control valve bypass screw
Fig. 11.5
Fig. 11.6
Fig. 11.7
Summary of Contents for MASTERCHEF DELUXE 90 DUAL FUEL
Page 1: ...USER GUIDE INSTALLATION INSTRUCTIONS MASTERCHEF DELUXE 90 DUAL FUEL U111083 02...
Page 4: ...ii...
Page 44: ...40 NOTE...
Page 45: ...41 NOTE...
Page 46: ...42 NOTE...

