


42
4
5
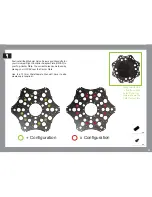
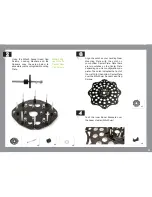
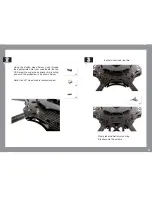
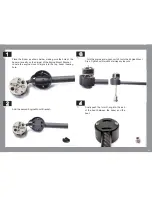
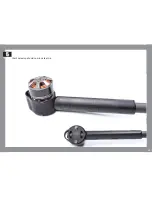
Flip the cam levers to a vertical position and make sure
that it is secure. If the bolts aren’t down against the center
plate then adjust the cam bolts. Unclip and pull out the
QR mechanism a few times to make sure that the action
and height of the bolts is correct.
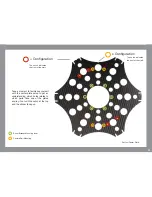
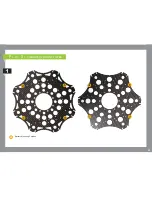
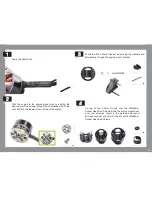
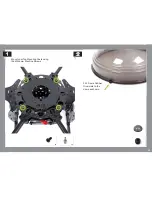
Slide the Quick Release Mechanism into the slots. You may need
to push down the bottom center plate to move the mechanism
into the spaces.
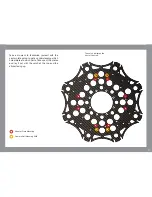
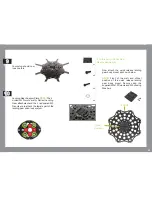
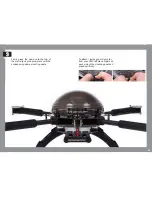
Make sure you
tighten the bolts
evenly in small
increments, testing
the folding cam with
each increment to
ensure a firm clamp.
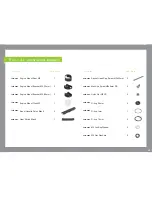
Summary of Contents for XM Titanium
Page 1: ...1 B u i l d M a n u a l...
Page 3: ...3 F l i g h t o p e r a t i o n a n d s a f e t y...
Page 8: ...8 P r e b u i l d C h e c k l i s t...
Page 10: ...10 A s s e mb l y I n s t r u c t i o n s...
Page 21: ...21 P a r t 2 G e a r R a i l a s s e mb l y...
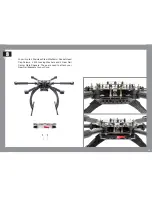
Page 37: ...37 15 Your setup should now look like this...
Page 38: ...38 P a r t 3 XM BATTERY MOUNT PLATES 1 Battery Mounting Position...
Page 52: ...52 Your final setup should now look like this 5...
Page 59: ...59 8 Your final setup should now look like this...


