AEQ
PHOENIX MERCURY
26
4.4. Audio.
Section 2.2 of this manual describes in detail the physical connections at the back panel of the
unit, but the procedure would be, in a nutshell, as follows:
•
Connect the audio line inputs in analog or digital format according to the description of
the connectors at the back panel of Phoenix MERCURY. XLR connectors for analog
inputs and optional DB15 connector for digital inputs.
•
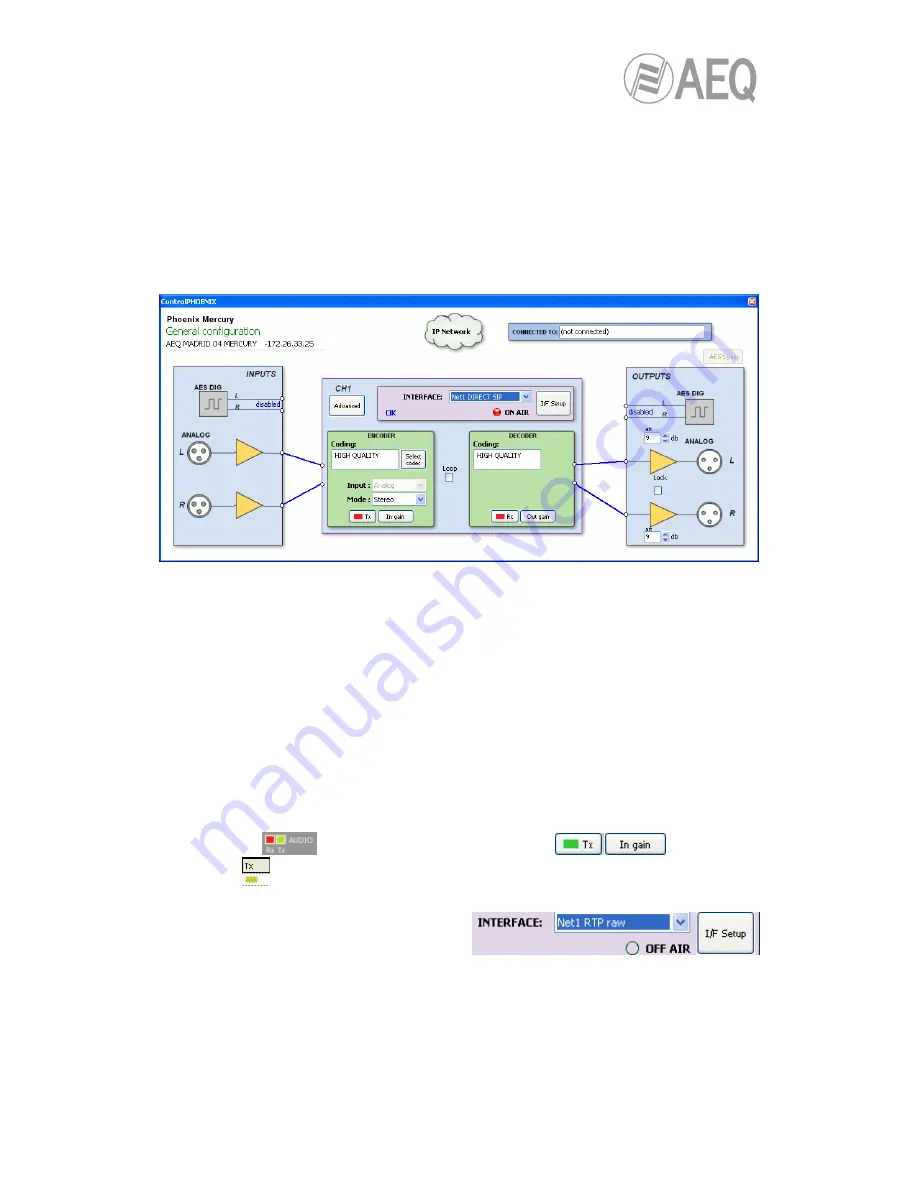
From General Configuration screen, select the input signal type to be used between
“Analog” or “Digital” (if this option is installed), and whether it is “Stereo”, you want only
“Mono L“,“Mono R“, or “Mono L+R“ mix.
•
Connect all the audio line outputs according to the description of the connectors at the
back panel of Phoenix MERCURY. XLR connectors for analog outputs and optional
DB15 connector for digital outputs.
•
It is not necessary to define the kind of output, as Phoenix MERCURY offers all the
outputs in both analog and digital (if option is installed) formats by default.
4.5. Establishing an IP communication.
4.5.1. Establishing an IP communication in RTP mode.
•
Ensure that the equipment is powered up and controlled by the software.
•
Establish the appropriate audio configuration (analog/digital input mode, gains, routing
of inputs to the codec, suitable encoding).
•
Check that there is incoming audio: the “Tx“ indicator in the individual codec control
window
, in the general configuration screen
and in the list
view
will change to green .
•
Go to general configuration screen and configure “INTERFACE” as “Net1 RTP raw”:
•
Enter “I/F Setup“ and select the “Local media port”: local IP port through which the RTP
audio is received. Ensure that the remote unit, when calling, sends audio to that port
(see section 3.2.3).


