26
With the frequency information entered, and the sweep rate
selected, it’s time to calibrate the
instrument.
To do this, requires three reference standards: An OPEN, a SHORT, and a reference LOAD. For
most applications, especially for frequencies of less than 200MHz or so, the OPEN is not too critical
and many users do not use anything for this. The SHORT is always required, should be as close to
0Ω as possible, using a high-quality connector. The 50Ω LOAD is critical, and inaccuracies originating
here become more apparent at higher frequencies. The
DC resistance should be as close to 50Ω as
possible, with good frequency characteristics (the Termination Standards AEA supplies are rated to
3GHz).
S11 Single-Port Operation
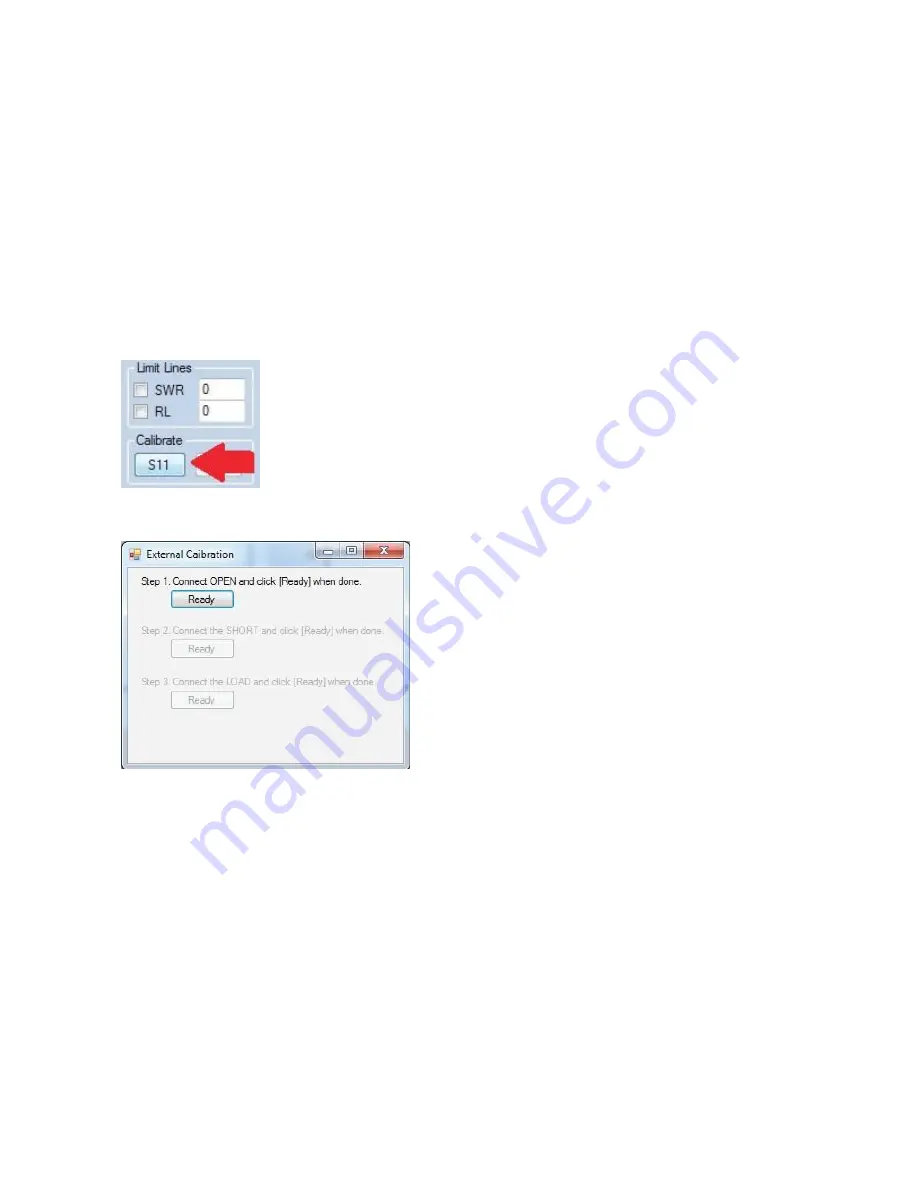
At this time, press the S11 button in the ‘Calibrate’ section of the PC Vision screen, shown here:
The Calibration process dialog box will appear as shown here:
Attach the (optional) OPEN standard to the Bravo EX2 (or attached cable)
, and press the ‘Ready’
button for step one. The PC Vision Program will assume control over the instrument, and begin the
calibration process. When t
he ‘OPEN’ part of the calibration is complete, the second ‘Ready’ button
will become active; prompting you to attach the SHORT standard to the instrument. When you’ve
done that, press the second ‘Ready’ button to continue the calibration process. When the ‘SHORT’
part o
f the procedure is completed, the third ‘Ready’ button will become active, prompting you to
atta
ch the 50Ω load. When attached, press the third ‘Ready’ button, and the calibration process will
complete.
Once the calibration process is complete, the PC Vision application, along with the Bravo EX2, is
ready to make measurements. Bear in mind that the calibration is only valid for as long as the
frequencies are NOT changed. If any of the frequencies (start, stop, center or span) are changed, you
must repeat the calibration process again before you can make measurements.
To begin the measurement process, press the PLOT button, shown here....


