background image


6


                                                                        B-5360 Hardware Manual 


Introduction 

Package Contents 

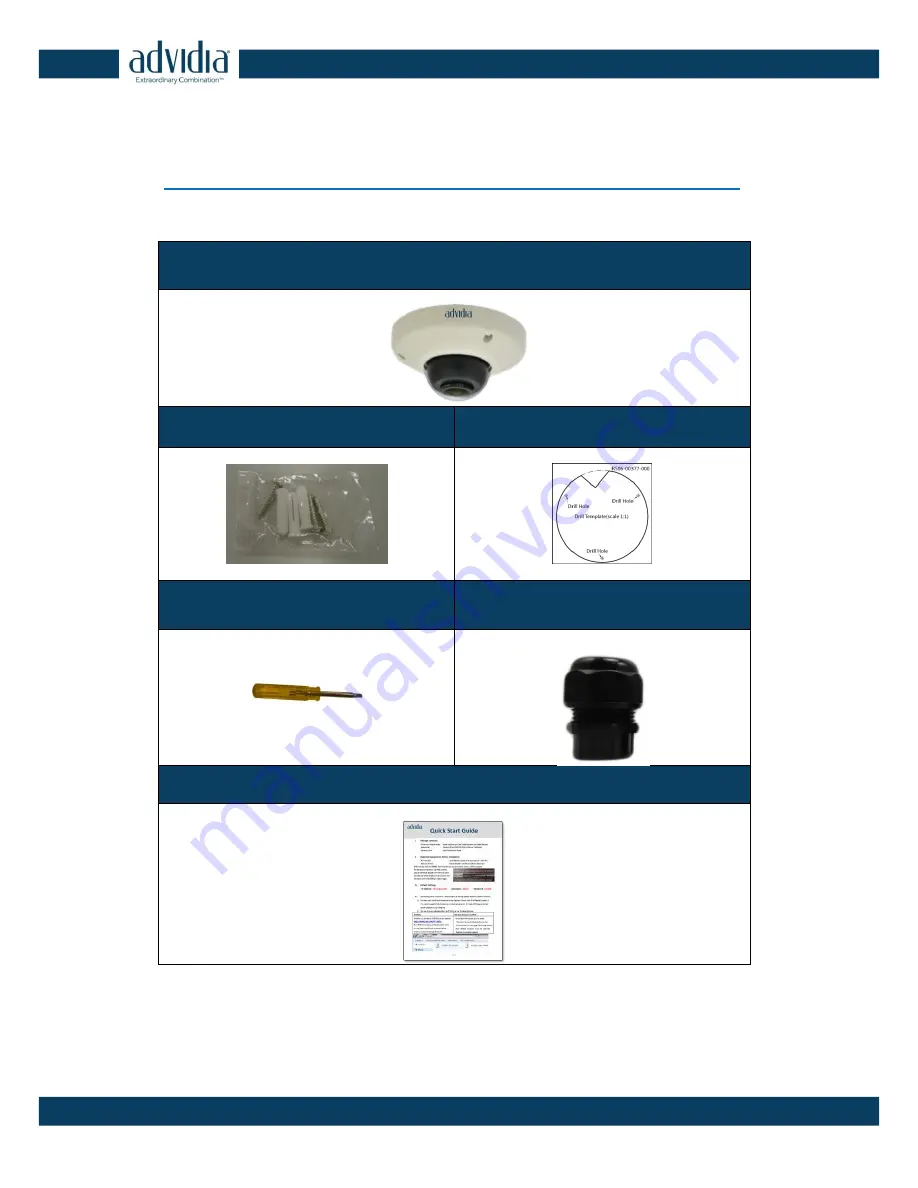
Check if the camera package comes with the following items: 

B-5360 Camera Body 


Screw Kit 


Drill Template 


Hexagon Screwdriver 


Cable Grommet 


Quick Start Guide 


IMPORTANT:

  When  the  camera  is  taken  out  from  the  box,  the  lens  cover  is  covered  by  a 

protective film. DO NOT remove this film. It is used to protect the lens cover from scratches or 

fingerprint marks which may happen during installation. Remove this film only after the camera 

is securely installed and all connections are complete. 

Summary of Contents for B-5360 5MP

Page 1: ...B 5360 5MP 360 Weather Proof Mini Dome Hardware Manual...

Page 2: ...aterproof the Cable Connection 14 Step 6 Connect to Network 17 Step 7 Access the Camera Live View 17 Step 8 Close the Dome Cover 18 Other Adjustments and Accessories 19 How to Install Remove the Memor...

Page 3: ...attempt to service this video device yourself as opening or removing covers may expose you to dangerous voltage or other hazards Refer all servicing to qualified service personnel Trademarks All name...

Page 4: ...ing the equipment off and on the user is encouraged to try to correct the interference by one or more of the following measures Reorient or relocate the receiving antenna Increase the separation betwe...

Page 5: ...personnel Damage Requiring service Disconnect this video product from the power supply immediately and refer servicing to qualified service personnel under the following conditions 1 When the power su...

Page 6: ...rewdriver Cable Grommet Quick Start Guide IMPORTANT When the camera is taken out from the box the lens cover is covered by a protective film DO NOT remove this film It is used to protect the lens cove...

Page 7: ...1 System LEDs Indicates the camera status Amber LED Blinks when network activity is in progress Blue LED Lights up when the camera is powered up and goes off again after the boot up process is complet...

Page 8: ...ecording 3 Ethernet Port RJ 45 Connects to a network using an Ethernet cable with RJ 45 connector 4 Reset Button Restores the factory default settings of the camera To reset the camera while the power...

Page 9: ...United States A Gangbox Converter purchased separately is required for this type of installation Wall Mount Suitable when mounting the camera on the wall with the camera facing down as if installed on...

Page 10: ...Before installing the camera prepare the additional accessories required for installation Required Accessories Exterior grade Ethernet Cable with RJ 45 connector not included in the package Cable Grom...

Page 11: ...al Step 2 Open the Dome Cover 1 Loosen the three 3 screws using the included hex screwdriver 2 Lift to remove the dome cover NOTE The dome cover is attached to the camera body by a cable do not lift t...

Page 12: ...nect it to the Ethernet port of the camera NOTE If the camera will be installed outdoors or in places where the environmental factors change drastically make sure to waterproof the cable connection se...

Page 13: ...necessary insert a memory card into the memory card slot of the camera See How to Insert the Memory Card on page 19 for more information 2 Mount the camera to the surface using the three 3 supplied sc...

Page 14: ...e follow the procedures below to waterproof the cable connection 1 Detach the cable grommet as shown below 2 On the network side cable insert the clamping nut through the Ethernet cable 3 Insert the s...

Page 15: ...gap on the grommet body 5 Attach the grommet body to the Ethernet port of the camera IMPORTANT Make sure the rubber ring is completely aligned and flat on the grommet body to avoid possible water lea...

Page 16: ...ble grommet body 8 Attach the clamping nut to the cable gland body Make sure the clamping nut is tightly secured and the rubber is squeezed in to avoid water leakage DISCLAIMER Advidia will not be res...

Page 17: ...network or PC and a power source See Power over Ethernet PoE example connection diagram below Network AC Power Source PoE Injector PoE Switch Power Cable Ethernet Cable Ethernet Cable Data Power Ether...

Page 18: ...Align cable tab side of the dome cover to the direction of the network cable 2 Tighten the three 3 screws using the supplied hex screwdriver to attach the dome cover 3 Remove the thin film Final inst...

Page 19: ...s facing the bottom side of the camera 3 Push the card completely until it clicks into place 4 Attach the dome cover to the camera and tighten the three 3 screws How to Remove the Memory Card In case...

Page 20: ...connect an audio input device do the following 1 Pull to remove the protective cover 2 Connect the audio input device NOTE The microphone must have a built in amplifier Connecting an ordinary microph...

Page 21: ...1 Open the dome cover 2 Loosen the three 3 screws securing the lens 3 Turn the lens to adjust the viewing orientation The arrow on the lens indicates the top side orientation 4 Once done tighten the...

Page 22: ...ess from the PC The user however might not know the IP address of the camera yet It is necessary to know the IP address of the camera in other to be able to access it by using a Web browser By double...

Page 23: ...nual You can quickly see the camera model in the list Click on the IP address to automatically launch the default browser of the PC with the IP address of the target camera filled in the address bar o...

Page 24: ...k and it does not detect any DHCP services it will automatically assign itself a default IP 192 168 0 100 Whereas the default port number would be 80 In order to access that camera the IP address of t...

Page 25: ...tility With the procedure shown above all the cameras will have unique IP addresses starting from 192 168 0 101 In case there are 20 cameras selected the last one of the cameras would have the IP 192...

Page 26: ...ternet Explorer browsers free third party software plug ins must be installed to the PC first to be able to get the live video feed from the camera Browser Required Plug In Safari QuickTime http www a...

Page 27: ...owing address into Web browser s address bar http 192 168 0 100 Upon successful connection to the camera the user interface called Web Configurator would appear together with the login page The HTTP p...

Reviews: