Chapter 1 Hardware Configuration
19
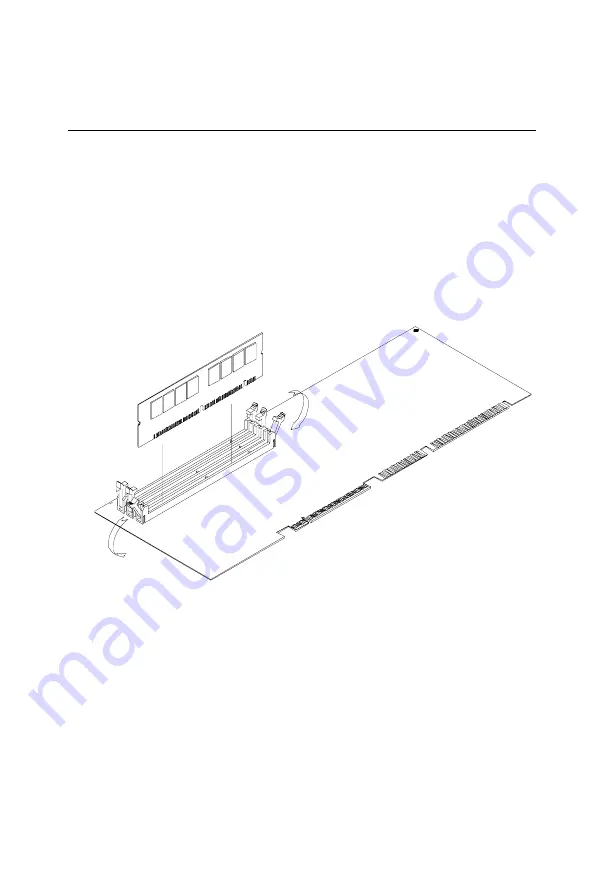
1.10 Memory Installation Procedures
To install DIMMs, first make sure the two handles of the DIMM
socket are in the "open" position. i.e. The handles lean outward.
Slowly slide the DIMM module along the plastic guides on both ends
of the socket. Then press the DIMM module right down into the
socket, until you hear a click. This is when the two handles have
automatically locked the memory module into the correct position of
the DIMM socket (see Figure 1-3, DIMM installation). To remove the
memory module, just push both handles outward, and the memory
module will be ejected by the mechanism in the socket.
Figure 1-3: DIMM installation
Important: You must install SDRAM progressively from BANK0
through BANK2 on DIMM socket, otherwise the
system will not work.
Summary of Contents for PCA-6166
Page 1: ...PCA 6166 Full size Super 7 Pentium MMX processor based PCI ISA bus CPU card...
Page 44: ...32 PCA 6166 User s Manual...
Page 69: ...Chapter 4 PCI SVGA Setup 57 7 When the Setup Complete screen appears click Finish...
Page 71: ...Chapter 4 PCI SVGA Setup 59 4 Click Browse to look for the driver program 3 Click Have Disk...
Page 79: ...Chapter 5 LAN Configuration 67 3 Click Next 4 Click Next...
Page 81: ...Chapter 5 LAN Configuration 69 7 Select net82557 inf and click OK 8 Click OK...
Page 82: ...70 PCA 6166 User s Manual 10 Click Next 9 Click OK...
Page 83: ...Chapter 5 LAN Configuration 71 12 Click Yes 11 Click Finish...
Page 87: ...Chapter 5 LAN Configuration 75 6 Select Intel R PRO Adapter and click OK 5 Click OK...
Page 97: ...SiS IDE Driver Installation This chapter explains how to install the SiS IDE driver CHAPTER 7...
Page 100: ...88 PCA 6166 User s Manual...
Page 110: ...98 PCA 6166 User s Manual...
Page 114: ...102 PCA 6166 User s Manual...
Page 132: ...120 PCA 6166 User s Manual...


