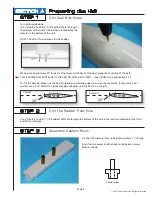
Correct
Incorrect
Incorrect
Fillet
Fillet
Correct
87
°
SECTION D
STEP 1
Finishing the keel
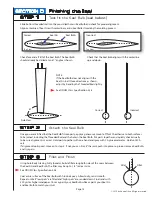
Test fit the Keel Bulb (lead ballast)
STEP 2
Attach the Keel Bulb
STEP 3
Fillet and Finish
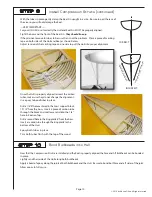
Slide bottom threaded rod into the pre-drilled hole in Keel Bulb and check for proper alignment.
Align centerline of Keel Fin with centerline mark in Keel Ballast made by the molding process.
Check fore and aft tilt of the Keel Bulb. The Keel Bulb
should already be drilled at an 87
°
angle as shown.
Once you are satisfied that the Keel Bulb fits properly, apply a generous amount of Thick CA adhesive to both surfaces
to be joined, including the Threaded Rod and the hole in the Keel Bulb. Put parts together and quickly check visually
to be sure alignment is correct. Hold parts together with one hand and spray with CA glue accelerator. Hold until CA
sets.
If alignment looks good, move on to step 3. If not, you can "crack" the joint, push into place, re-glue or remove Keel Bulb,
and try again.
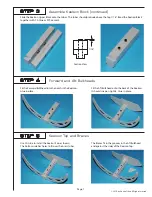
Using Auto Body Glazing Putty (bondo), build a fillet along both sides of the seam between
the Keel Fin and Keel Bulb. The fillet may be up to 1/2" radius in size.
See ODOM Class Specification 3.3.8
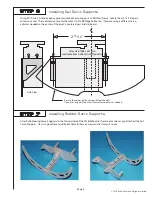
Coat entire surface of the Keel Bulb with Aluzine Epoxy. Allow to dry, sand smooth.
Repeat until all "low spots" are filled and "high spots" are sanded down. Final sand with
320 grit or higher sandpaper. You may paint your Keel Bulb white or paint your Keel Fin
and Keel Bulb to match your Hull.
Page 14
Keel Fin
Keel Bulb
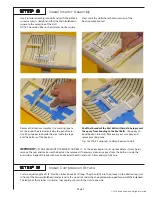
Check that the Keel Bulb aligns with the centerline
up and down.
NOTE:
If the Keel Bulb does not align with the
Keel Fin in all three directions as shown,
adjust by bending the Threaded Rod slightly.
See ODOM Class Specification 3.3.6
Side View
Top View
Top View
© 2010 by Adrian Olson. All rights reserved.


