– 16 –
6. To add additional folders or drives as described in the previous step, click
Add
in the
Sources
window. After you finish adding folders and drives, click
OK
.
7. In the
Backup: Retrospect Button Backup
window, click
Destinations
. To create a new
location, in the
Backup Set Selection
window, click
Create New
to launch the
Create
New Backup Set
wizard.
8. In the
Create New Backup Set
wizard, click
Next
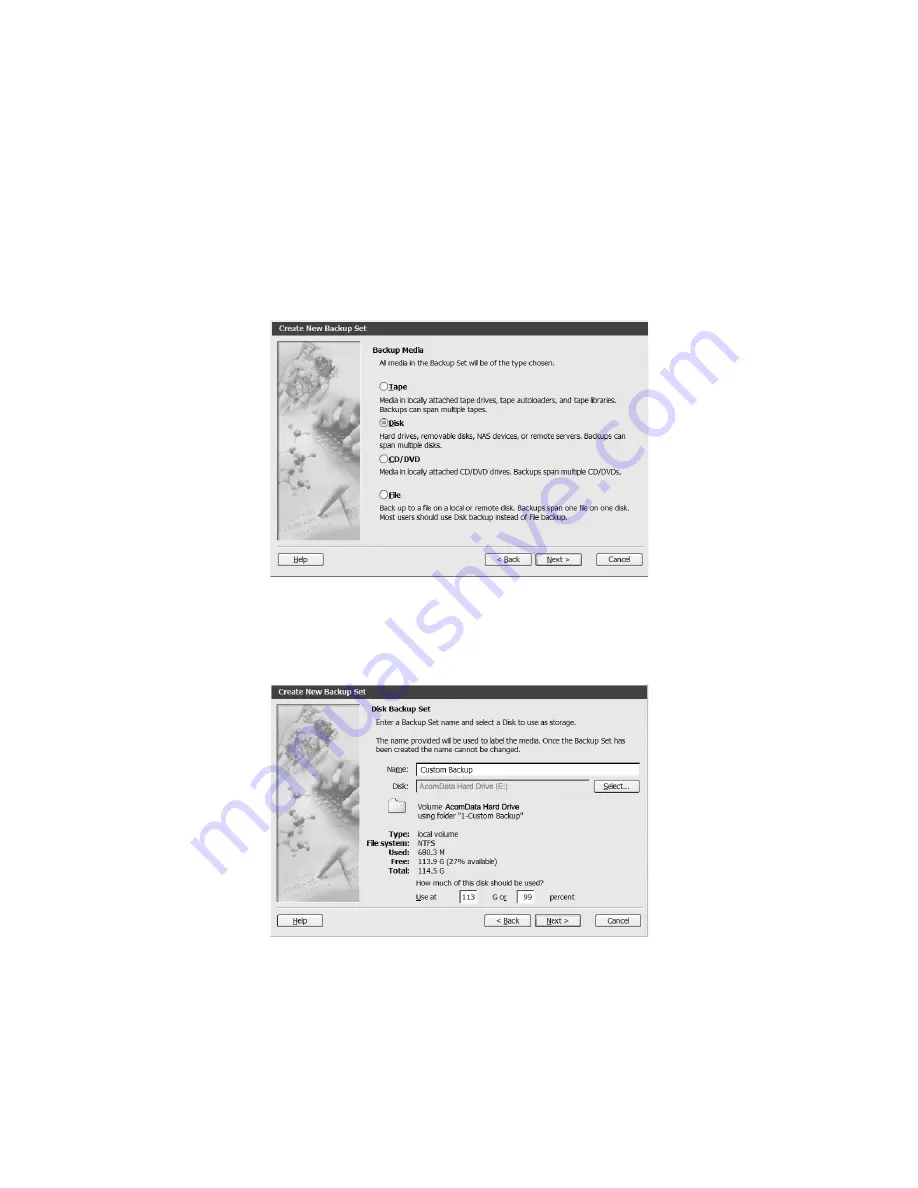
. Select
Disk
(Figure 16) as the
Backup
Media
and click
Next
.
9. Enter a name for the Backup Set or use the default name (Figure 17). In this exam-
ple, the Backup Set is named Custom Backup. Click
Select
.
FIGURE 16
FIGURE 17


