background image


5


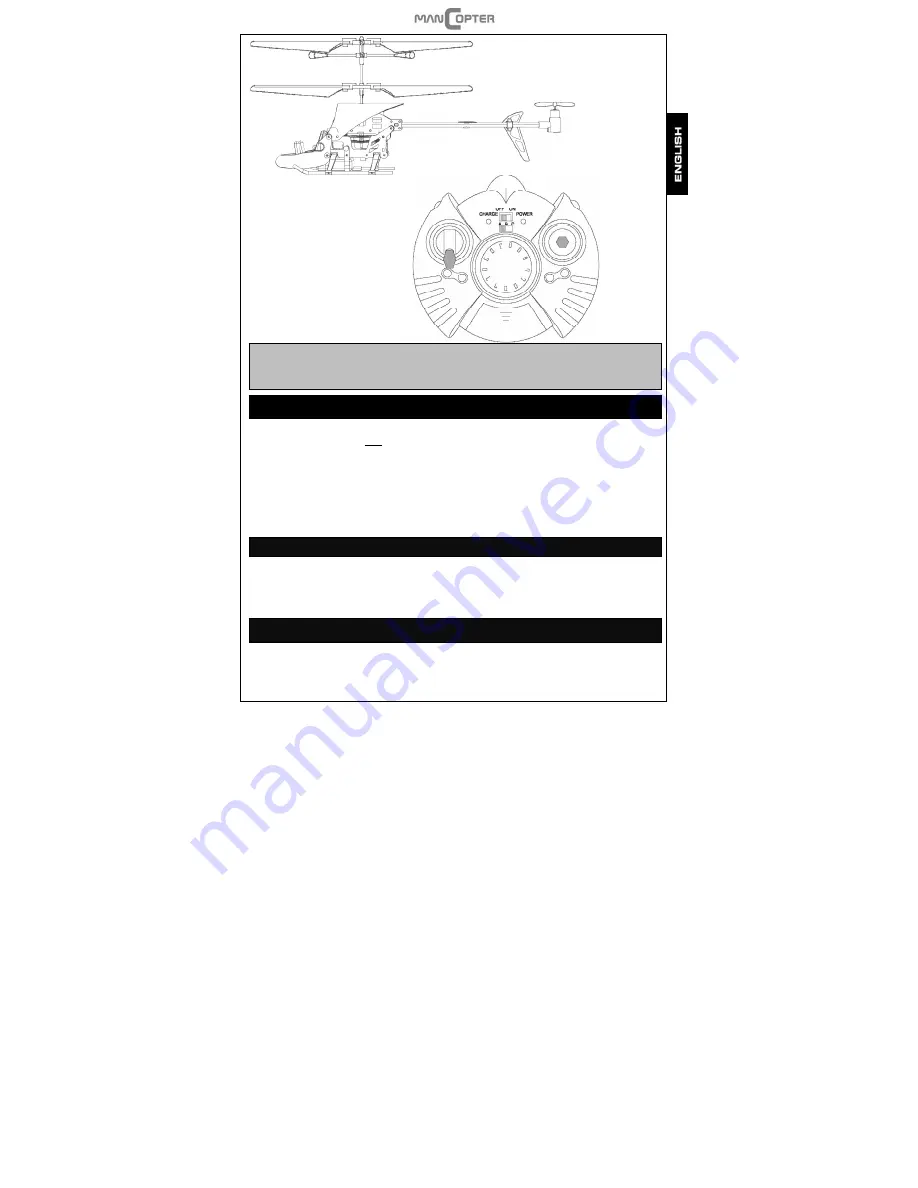
Main rotor A

                                                                Stabilizer 


Main rotor B


            Charging Socket / On/Off- Switch 
                                          
                                Landing Gear                                               IR-sender


                                      On/Off Switch        Power LED


           Charging LED 


                Gas Stick     Channel Switch


                                                                                                       Cover 
                                                                                                Charging Lead


Please note! 
Never fly close to other people! Danger of injury! 
Don´t fly if obstacles complicate flying! 
Don´t fly if it´s too windy. Close windows and doors! 


Charging of the helicopter 


The helicopter gets charged by the charging lead of the controller. 
Switch OFF the helicopter and the controller! 
Connect the charging lead under the coverage of the controller with the 
at  the helicopter. Now switch on the controller.  
The procedure is displayed by the green LED and is finished when the light turns off. 
Charging takes about 30-40 minutes. Please note that only full batteries can charge the 
helicopter.  


If charging is finished earlier, the batteries in the controller a
replaced! The controller LEDs starts blinking when to low to charge!


Preparation


Place the helicopter on a plain surface, so that the tail rotor points in
on the helicopter. Check if any obstacles could affect fly. Step back for 
then switch on the controller.  
First pull the gas stick down, then up and again down – now the helicopter is ready for take 
off! 


Flying 


The range of the controller is about 10m, but can be interfered by sun
Avoid flying directly under the ceiling or crashing against walls 
damage the helicopter. Optimal flying at about 1m. 


rotor A 

rotor B 

               Tail Rotor 

ender 

                    Trimming wheel 

Power LED 

Channel Switch  Control Stick 

Charging Lead 

The helicopter gets charged by the charging lead of the controller.  

Connect the charging lead under the coverage of the controller with the socket marked “CHA” 

The procedure is displayed by the green LED and is finished when the light turns off. 

40 minutes. Please note that only full batteries can charge the 

If charging is finished earlier, the batteries in the controller are weak and have to be 

The controller LEDs starts blinking when to low to charge! 

so that the tail rotor points into your direction. Switch 

Step back for at least one meter and 

now the helicopter is ready for take 

but can be interfered by sun- or strip lights. 

– this causes crashes and can 

Summary of Contents for MAN COPTER

Page 1: ...Ab 14 Jahren For ages 14 and up Pour les plus de 14 ans Anleitung Manual Manuel d utilisation copyright 2010 by ACME the game company GmbH ...

Page 2: ...ng einschalten Die Ladefunktion wird durch die grüne LED angezeigt und ist abgeschlossen wenn die grüne LED erlischt Die Ladedauer beträgt ca 30 40 Minuten Beachte den Helikopter komplett laden können Sollte der Ladevorgang frühzeitig beendet sein sind die Batterien der Fernbedienung erschöpft und müssen ausgetauscht werden Hauptrotor A Hauptrotor B Heckrotor Landegestell IR Sender Trimmrad Ein Au...

Page 3: ...en Hebel nach rechts so dreht sich der Helikopter herum Beachte das die Richtungsangaben aus Pilotensicht gelten wenn der Helikopter von dir wegfliegt sich aber umkehren fliegt der Helikopter auf dich zu Trimmen Justieren Dreht sich der Helikopter nach dem Start um die eigene Achse Trimmrad rechts oben an der Fernbedienung justiert und die Fluglage stabilisiert Das linke Trimmrad ist ohne Funktion...

Page 4: ...dienung zu schwach Sonnen oder Neonlicht beeinträchtigen das IR Signal Tausche defekte Rotorblätter umgehend aus achte bei dem Hauptrotor auf die Kennung A Hauptrotor oben und B Hauptrotor unten niemals vertauscht Lösung Batterien überprüfen Batterien ersetzen Den Gashebel zunächst ganz zurück dann nach vorn und wieder zurück bewegen Helikopter laden Batterien der Fern bedienung austauschen Batter...

Page 5: ...e tail rotor points in on the helicopter Check if any obstacles could affect fly Step back for then switch on the controller First pull the gas stick down then up and again down now the helicopter is ready for take off Flying The range of the controller is about 10m but can be interfered by sun Avoid flying directly under the ceiling or crashing against walls damage the helicopter Optimal flying a...

Page 6: ...light disturb the IR Signal Please replace defective rotors immediately Pay attention on the main rotors label main rotor above and B main rotor below never place them wrong side out With the gas stick the altitude of the helicopter handle the stick very gentle As soon as the helicopter has reached an optimal for example 1m smooth moving of the is sufficient for gaining height If you pull the stic...

Page 7: ...ter l environnement peuvent être rencontrées Il est indispensable de ne pas voler sous la lumière de néons Par ailleurs éviter de coquer le modèle dans les murs ce qui pourrait causer des dommages irréparables à votre modèle Nous vous conseillons de voler à une distance de 1 mètre Rotor arrière Emetteur IR Trime Interrupteur On Off LED de mise sous tension Accélérateur Interrupteur fréquence Direc...

Page 8: ...ption Vous devez immédiatement remplacer les pales de votre rotor en cas de dommage Veillez à respecter le positionnement des pales lorsque vous procédez au remplacement Un autocollant est présent sur les pales de chaque rotor remplacer les pales A par les pales B et inversement L accélérateur permet de contrôler l altitude du modèle Pour cela il est indispensable de manipuler se manche progressiv...

Page 9: ...halten Bringen Sie verbrauchte Akkus zu einer dafür vorgesehenen Sammelstelle The product contains LiPo batteries Carry wasted batteries to a scheduled collecting point Ce produit contient des batteries LiPo Ramener les batteries utilisées dans un centre de valorisation des déchets Wenn Sie Fragen oder Probleme haben können Sie sich Mo 49 700 70 777700 0 12 Euro pro Mi deutschen Festnetz Center in...

Page 10: ...ande si celle permettent pas Pour empêcher les courts circuits évitez tout contact avec de l eau En cas de contact de liquide provenant des piles avec votre peau ou vos vêtements lavez abondamment à l eau De même en cas de contact avec vos yeux rincez abondamment à l eau et consultez immédiatement un médecin Lorsque la pile ne fonctionne plus enlevez la et emmenez la dans un centre de recyclage zu...

Page 11: ...Täma tuote on direktiiven 1999 5 EC vaatimusten mukainen Alkuperäset vaatimustenmukaisuus asiakirjat ovat saatavilla Hermed erklaerer vi at denne bil overensstemmelse med de pakraevet regelementer og i henhold til andre relevante regulativer ifolge direktiv 1999 5 EC En kopi af den originale erklaering med de angivne regler kan rekvireres pa folgende adresse ACME the game company GmbH Industriestr...

Page 12: ...nentes que pueden ser reciclados Como resulto no puede tirar este producto con sus desechos domésticos Tiene que colectar este producto en un centro especializado en el tratamiento y la valorización de los desechos Händlerstempel Stamp of retailer Tampon revendeur Sello del vendedor _____ _____ 201___ Kaufdatum Date of purchase Date d achat Fecha de compra Benutzerinformation zur Entsorgung von el...

Reviews: