41
1.1.3 Flash the code
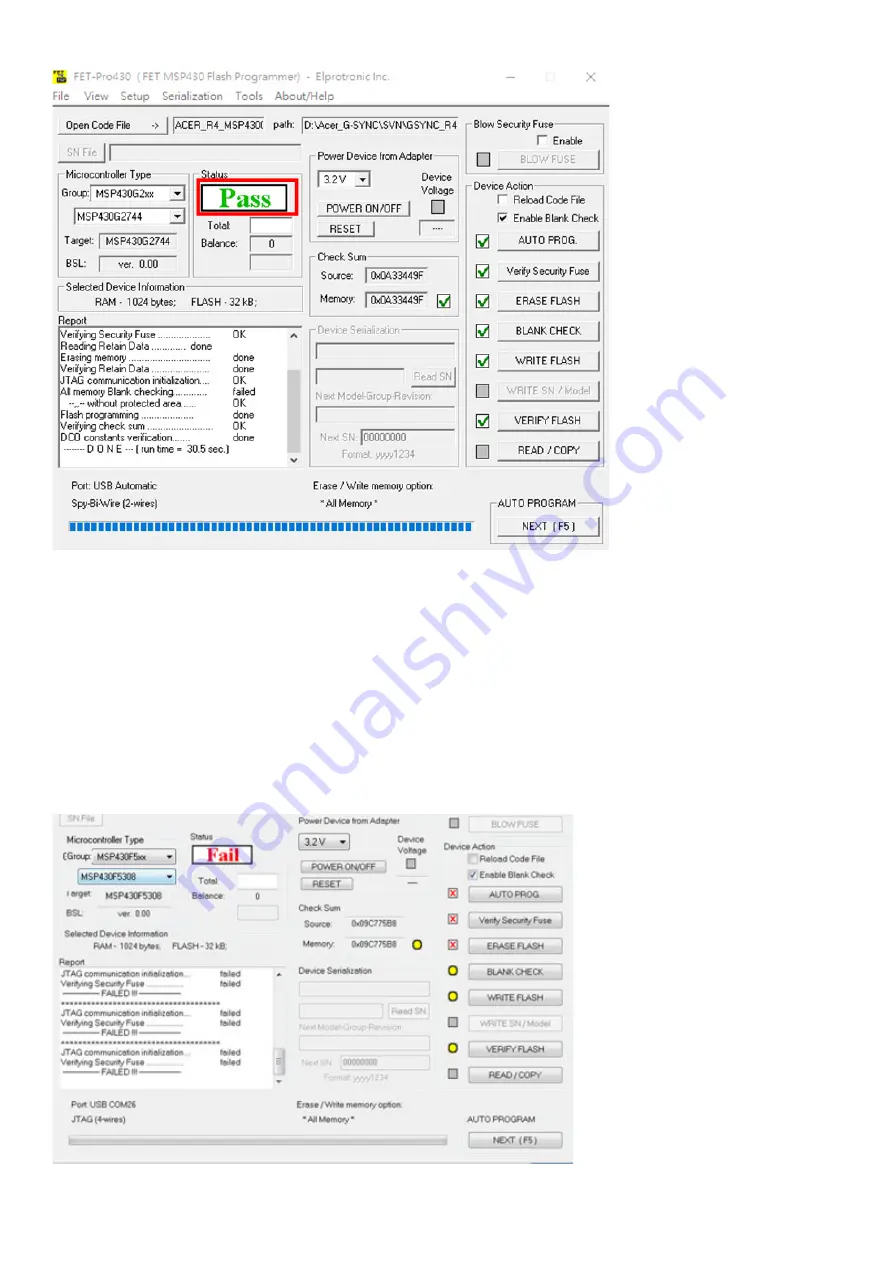
Now click the “AUTO PROG” Button. After finished, the screen should look like this:
In the process of burning LED lamp will flashing red and green across
When you need writing other machine, only need connect ok and press “space key” it will automatic update the FW
don’t need close the software.
When you update the FW appear this error, please check:
1. If have power on
2. The tool connection if is OK,
3. The tool connecting cable red pin need connect together with 14 pin needle
4. If still can’t solve I, please replace a PC or replace a tool and try again.
5. Use windows 10 system 64 bit.
Summary of Contents for X25
Page 9: ...9 ...
Page 11: ...11 ...
Page 12: ...12 S8 Remove the screws to remove the boards Disconnect all of the cables ...
Page 13: ...13 S9 Remove the screws to remove the main board and the G sync board ...
Page 16: ...16 S4 Prepare the panel assemble as below picture ...
Page 18: ...18 ...
Page 19: ...19 S8 Connect the pins and assemble it ...
Page 20: ...20 S9 Prepare a STAND BASE ASSY to assemble it ...
Page 23: ...23 The software must install it to C disk the path C altera 16 0 older ...
Page 24: ...24 1 4 Flash Bitstream if necessary 1 4 1 Install USB Blaster driver ...
Page 25: ...25 ...
Page 27: ...27 ...
Page 28: ...28 1 4 4 Click on the following figure to open the file to be burned ...
Page 29: ...29 ...
Page 30: ...30 1 4 5 According to the figure below the digital sequence began to burn FPGA ...
Page 31: ...31 ...
Page 42: ...42 If appear this error please to update the version of software Tool software update steps ...
Page 43: ...43 After tool software update success will appear this message Note How to remove the tool ...
Page 46: ...46 ...
Page 50: ...50 OSD FW Version ...


