background image

77

Important safety instructions

Read these instructions carefully. Save these instructions for future reference.

1

Follow all warnings and instructions marked on the product.

2

Unplug this product from the wall outlet before cleaning. Do not use 
liquid cleaners or aerosol cleaners. Use a damp cloth for cleaning.

3

Do not use this product near water.

4

Do not place this product on an unstable cart, stand, or table. The product 
may fall, causing serious damage to the product.

5

Slots and openings in the cabinet and the back or bottom are provided for 
ventilation; to ensure reliable operation of the product and to protect it 
from overheating, these openings must not be blocked or covered. The 
openings should never be blocked by placing the product on a bed, sofa, 
rug, or other similar surface. This product should never be placed near or 
over a radiator or heat register, or in a built-in installation unless proper 
ventilation is provided.

6

This product should be operated from the type of power indicated on the 
marking label. If you are not sure of the type of power available, consult 
your dealer or local power company.

7

Do not allow anything to rest on the power cord. Do not locate this 
product where persons will walk on the cord.

8

If an extension cord is used with this product, make sure that the total 
ampere rating of the equipment plugged into the extension cord does not 
exceed the extension cord ampere rating. Also, make sure that the total 
rating of all products plugged into the wall outlet does not exceed the fuse 
rating.

9

Never push objects of any kind into this product through cabinet slots as 
they may touch dangerous voltage points or short out parts that could 
result in a fire or electric shock. Never spill liquid of any kind on the 
product.

10

Do not attempt to service this product yourself, as opening or removing 
covers may expose you to dangerous voltage points or other risks. Refer all 
servicing to qualified service personnel.

11

Unplug this product from the wall outlet and refer servicing to qualified 
service personnel under the following conditions:

a

When the power cord or plug is damaged or frayed

b

If liquid has been spilled into the product

c

If the product has been exposed to rain or water

d

If the product does not operate normally when the operating 
instructions are followed. Adjust only those controls that are covered 
by the operating instructions since improper adjustment of other 

UN761.f/cppl!!Qbhf!88!!Gsjebz-!Kbovbsz!28-!3114!!7;47!QN

Summary of Contents for TravelMate 650 Series

Page 1: ...TravelMate 650 series User s guide...

Page 2: ...nce concerning your unit should include the serial number model number and purchase information No part of this publication may be reproduced stored in a retrieval system or transmitted in any form or...

Page 3: ...omputer simply press the power button the button left of the launch keys found above your TravelMate s standard First off the Just for Starters poster helps you get started with setting up your comput...

Page 4: ...ee the online guide for details Note If you cannot power off the computer normally press and hold the power switch for more than four seconds to shut down the computer If you turn off the computer and...

Page 5: ...f the cord if you are using an extension cord Also the total current rating of all equipment plugged into a single wall outlet should not exceed the fuse rating Taking care of your battery pack Here a...

Page 6: ...vi The computer has been dropped or the body has been damaged Liquid has been spilled into the product The computer does not operate normally Please refer to Troubleshooting my computer on page 57...

Page 7: ...24 Storage 26 Hard disk 26 AcerMedia bay 26 Using software 27 Audio 29 Adjusting the volume 29 Power management 30 Moving around with your TravelMate 31 Disconnecting from the desktop 31 Moving aroun...

Page 8: ...3 Troubleshooting my computer 57 Frequently asked questions 59 Troubleshooting tips 62 Error messages 63 Requesting service 64 International Traveler s Warranty ITW 64 Before you call 64 Appendix A Sp...

Page 9: ...1 Getting to know your TravelMate...

Page 10: ...er combines high performance versatility power management features and multimedia capabilities with a unique style and ergonomic design Work with unmatched productivity and reliability with your new p...

Page 11: ...escription 1 Display screen Also called LCD liquid crystal display displays computer output 2 Power button Turns on the computer 3 Touchpad Touch sensitive pointing device which functions like a compu...

Page 12: ...icrophone Internal microphone for sound recording 9 Launch keys Special keys for launching internet browser email program and frequently used programs See on page 21 for more details Item Description...

Page 13: ...and indicator work on models with wireless LAN only 5 Bluetooth button2 Enables or disables Bluetooth functionality 6 Bluetooth indicator2 Indicates that Bluetooth is enabled 7 InviLink button3 Enabl...

Page 14: ...devices 3 Smart Card slot Slot for Smart Card interface with pre boot authentication system 4 Line in jack Accepts audio line in devices e g audio CD player stereo walkman 5 Microphone jack Accepts in...

Page 15: ...t Accepts one Type II PC Card Item Description 1 AcerMedia drive Houses a removable media drive module 2 AcerMedia indicator Lights up when the AcerMedia drive is active 3 Eject button Ejects the driv...

Page 16: ...or or EasyPort expansion devices 4 Parallel port Connects to a parallel device e g parallel printer 5 External display port Connects to a display device e g external monitor LCD projector and displays...

Page 17: ...the computer s battery pack 4 Battery release latch Unlatches the battery to remove the battery pack 5 Battery lock Locks the battery in place 6 Mini PCI slot Slot for adding mini PCI cards 7 Hard dis...

Page 18: ...0 10 Cooling fan Helps keep the computer cool Note Don t cover or obstruct the opening of the fan 11 Personal identification slot Insert a business card or similar sized identification card to persona...

Page 19: ...isplay Thin Film Transistor TFT liquid crystal display LCD displaying 32 bit high color up to 1024 x 768 eXtended Graphics Array XGA resolution for 14 1 15 and 1400 x 1050 Super eXtended Graphics Arra...

Page 20: ...InviLink 802 11b or 802 11a b wireless LAN manufacturing optional Bluetooth ready manufacturing optional SD MMC SM MS memory slot manufacturing optional Human centric design and ergonomics Internet 4...

Page 21: ...and Battery status indicators are visible even when the display is closed Icon Function Description Caps lock Lights when Caps Lock is activated Num lock Lights when Num Lock is activated Media Activ...

Page 22: ...1 Getting to know your TravelMate 14 Battery Lights orange when the battery is charging Icon Function Description...

Page 23: ...abetic characters typed are in uppercase Num Lock Fn F11 When Num Lock is on the embedded keypad is in numeric mode The keys function as a calculator complete with the arithmetic operators and Use thi...

Page 24: ...Note If an external keyboard or keypad is connected to the computer the Num Lock feature automatically shifts from the internal keyboard to the external keyboard or keypad Desired access Num lock on...

Page 25: ...e screen brightness volume output and the BIOS Utility Key Description Windows logo key Start button Combinations with this key perform shortcut functions Below are a few examples Tab Activates next t...

Page 26: ...Launch Notebook Manager Fn F3 Power management scheme toggle Switches the power management scheme used by the computer function available if supported by operating system See Power management on page...

Page 27: ...k Turns the display screen backlight off to save power Press any key to return Fn F7 Touchpad toggle Turns the internal touchpad on and off Fn F8 Speaker toggle Turns the speakers on and off Fn Volume...

Page 28: ...en select United States International and click on OK 5 Click on OK To verify the keyboard type in Windows XP follow the steps below 1 Click on Start Control Panel 2 Double click on Regional and Langu...

Page 29: ...21...

Page 30: ...n Click right button at the Launch Manager icon on the taskbar and click on E Mail Detection In this dialog box you have the option to enable disable mail checking set the time interval for mail check...

Page 31: ...23 Aside from the email checking function there is a mail button that is used to launch the email application It is located above the keyboard right below the LCD...

Page 32: ...palmrest provides optimum comfort and support Note When using an external USB mouse you can press Fn F7 to disable the touchpad Touchpad basics The following items teach you how to use the touchpad M...

Page 33: ...Hence the lighter the touch the better the response Tapping harder will not increase the touchpad s responsiveness Function Left button Right button Center buttons Tap Execute Click twice quickly Tap...

Page 34: ...k is the answer to your storage needs This is where your programs and data are stored AcerMedia bay The AcerMedia bay accepts a wide variety of optional media drive modules for use with your computer...

Page 35: ...DVD tray and insert a DVD movie disc then close the DVD tray Important When you launch the DVD player for the first time the program asks you to input the region code DVD discs are divided into 6 reg...

Page 36: ...DVD movie of a different region into the DVD ROM drive Please refer to the online help for more information Region code Country or region 1 U S A Canada 2 Europe Middle East South Africa Japan 3 Sout...

Page 37: ...ual stereo speakers There are audio ports on the rear of the computer See Rear view on page 8 for more information on connecting external audio devices Adjusting the volume Adjusting the volume on the...

Page 38: ...ls connected to the serial and parallel ports and video memory If no activity is detected for a period of time called an inactivity timeout the computer stops some or all of these devices in order to...

Page 39: ...ces 7 Disconnect the Kensington lock if you are using one to secure the computer Moving around when you are just moving within short distances for example from your office desk to a meeting room Prepa...

Page 40: ...ircumstances If your meeting is shorter than that you probably do not need to bring anything with you other than the computer What to bring to long meetings If your meeting will last longer than 3 hou...

Page 41: ...by keeping the computer with you If you need to stop for an extended period of time and cannot bring the computer with you leave the computer in the trunk of the car to avoid exposing the computer to...

Page 42: ...bring with you Bring the following items with you AC adapter Spare fully charged battery pack s AcerMedia drive module s Additional printer driver files if you plan to use another printer Special con...

Page 43: ...ort Special considerations Follow the same special considerations as when traveling with the computer In addition these tips are useful when traveling internationally When traveling in another country...

Page 44: ...andle Insert the lock into the notch and turn the key to secure the lock Some keyless models are also available Using the Smart Card This software includes the following components PlatinumPAS Platinu...

Page 45: ...Card is located on the left panel of the computer This new security feature helps you boot up your computer with all your settings built right into your Smart Card You don t have to remember your pass...

Page 46: ...ecurity feature please refer to your Smart Card user manual Running PlatinumSecure PlatinumSecure enhances the secure logon procedure for Windows 2000 or XP at the operating system level It provides u...

Page 47: ...ion and Password Option will be disabled too The Smart Card password is required for this selection System Lock Option When Lock system when the Smart Card is not in use default is selected if the Sma...

Page 48: ...clicking the OK button to change the Smart Card password Encrypt Decrypt PlatinumSecure can also be used to encrypt decrypt files except for system files or files that are already encrypted with othe...

Page 49: ...can be transferred to other applications using the drag and drop method simply point the cursor to the field containing the information press and hold the left mouse button then drag the cursor to th...

Page 50: ...to any site on the list either double click it or select it and click the Go button Also you can click the View button to view the selected website information including Web Name User Name Password a...

Page 51: ...essage appears Try again and press Enter When the User Password is set and the Password on boot parameter is enabled a prompt appears at boot up Type the User Password and press Enter to use the compu...

Page 52: ...1 Getting to know your TravelMate 44...

Page 53: ...2 Customizing my computer...

Page 54: ...basics of your TravelMate computer let s get acquainted with the advanced features of your computer In this chapter you will learn how to add options upgrade components for better performance and cust...

Page 55: ...uide for more details Fax data modem Your computer has a built in V 92 56Kbps AC 97 Link fax data modem Warning This modem port is not compatible with digital phone lines Plugging this modem into a di...

Page 56: ...hub on your network Fast infrared The computer s fast infrared FIR port allows you to do wireless data transfer with other IR aware computers and peripherals such as PDAs personal digital assistants m...

Page 57: ...ial Bus The Universal Serial Bus USB 2 0 port is a high speed serial bus which allows you to connect and daisy chain USB peripherals without taking up precious system resources Your computer has four...

Page 58: ...redit card sized cards that enhance the usability and expandability of the computer These cards should have a PC Card logo on them PC Cards formerly PCMCIA are add on cards for portable computers givi...

Page 59: ...f necessary See your card manual for details Ejecting a PC Card Before ejecting a PC Card 1 Exit the application using the card 2 Left click on the PC Card icon on the taskbar and stop the card operat...

Page 60: ...ey components when you need increased performance Note Contact your authorized dealer if you decide to perform a key component upgrade Memory upgrade Memory is expandable to 1 GB employing 256 512 MB...

Page 61: ...mory module diagonally into the slot a then gently press it down b until it clicks into place 4 Replace the memory cover and secure it with the screw 5 Reinstall the battery pack and reconnect the AC...

Page 62: ...your computer before you can swap the module You can swap the AcerMedia drive with any optional AcerMedia modules First slide the AcerMedia release latch as shown in the illustration a Then remove th...

Page 63: ...r allows you to set passwords the startup sequence of the drives and power management settings It also shows current hardware configurations To start the Notebook Manager press Fn F2 or follow these s...

Page 64: ...h Manager to start the application BIOS Utility The BIOS Utility is a hardware configuration program built into your computer s BIOS basic input output system Your computer is already properly configu...

Page 65: ...3 Troubleshooting my computer...

Page 66: ...s Read it before calling a technician if a problem occurs Solutions to more serious problems require opening up the computer Do not attempt to open the computer by yourself Contact your dealer or an a...

Page 67: ...or replace it with a system diskette and press Ctrl Alt Del to restart the system The operating system files may be damaged or missing Insert the startup disk you created during Windows setup into th...

Page 68: ...e may be muted In Windows look at the volume control speaker icon on the taskbar If it is crossed out click on the icon and deselect the Mute option The speakers may be turned off Press Fn F8 to turn...

Page 69: ...ing to an infrared printer During the POST press F2 to access the BIOS Utility and verify that the infrared port is enabled Make sure both devices are IrDA compliant The printer does not work Check th...

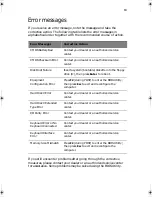
Page 70: ...porates an advanced design that delivers onscreen error message reports to help you solve problems If the system reports an error message or an error symptom occurs see Error messages on page 63 If th...

Page 71: ...orized service center Disk Boot Failure Insert a system bootable diskette into the floppy drive A then press Enter to reboot Equipment Configuration Error Press F2 during POST to enter the BIOS Utilit...

Page 72: ...sport If the country you are traveling in does not have an Acer authorized ITW service site you can still get in contact with our offices worldwide There are two ways to access Acer for technical supp...

Page 73: ..._________ Address ______________________________________ ______________________________________________ Telephone number ____________________________ Machine and model type _______________________ Ser...

Page 74: ...3 Troubleshooting my computer 66...

Page 75: ...Appendix A Specifications...

Page 76: ...This appendix lists the general specifications of your computer...

Page 77: ...d crystal display LCD displaying 32 bit true color up to 1024 x 768 eXtended Graphics Array XGA resolution for 14 1 15 and 1400 x 1050 Super eXtended Graphics Array SXGA resolution for 15 4X AGP bus w...

Page 78: ...e out jack 3 5mm mini jack One audio line in jack 3 5mm mini jack One microphone in jack One IEEE 1394 port One S video TV out port 100 pin port replicator Four USB ports One FIR port IrDA One Smart C...

Page 79: ...ttery pack 1 5 hour rapid charge 3 5 hour charge in use AC adapter 75 Watt Auto sensing 100 240Vac 47 63Hz Options 256 512 MB memory upgrade modules Additional Li Ion battery pack Additional AC adapte...

Page 80: ...Appendix A Specifications 72...

Page 81: ...Appendix B Notices...

Page 82: ...This appendix lists the general notices of your computer...

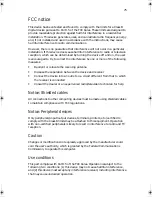
Page 83: ...eceiver Connect the device into an outlet on a circuit different from that to which the receiver is connected Consult the dealer or an experienced radio television technician for help Notice Shielded...

Page 84: ...l be notified as soon as possible You will also be informed of your right to file a complaint with the FCC Your telephone company may make changes in its facilities equipment operations or procedures...

Page 85: ...pany 7 Do not allow anything to rest on the power cord Do not locate this product where persons will walk on the cord 8 If an extension cord is used with this product make sure that the total ampere r...

Page 86: ...approved or its equivalent Maximum length is 15 feet 4 6 meters Laser compliance statement The CD or DVD drive used with this computer is a laser product The CD or DVD drive s classification label sh...

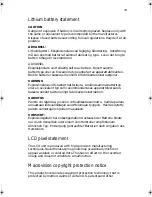
Page 87: ...vivalent typ som rekommenderas av apparattillverkaren Kassera anv nt batteri enligt fabrikantens instruktion VAROITUS P risto voi r j ht jos se on virheellisesti asennettu Vaihda paristo ainoastaan la...

Page 88: ...ing or disassembly is prohibited Apparatus Claims of U S Patent Nos 4 631 603 4 577 216 4 819 098 and 4 907 093 licensed for limited viewing uses only A Tick notice For safety reasons only connect hea...

Page 89: ...nce 11 security 36 setting up a home office 33 taking home 32 traveling internationally 34 traveling on local trips 34 troubleshooting 58 turning off iv connections network 47 connectivity options por...

Page 90: ...58 Q questions setting location for modem use 61 S safety CD ROM 78 FCC notice 75 general instructions 77 modem notices 76 scroll lock 15 security keylock 36 passwords 42 smart card 36 service when to...

Page 91: ...83 W warranty International Traveler s Warran ty 64 Windows keys 17...

Page 92: ...84...

Reviews: