Chapter 1
11
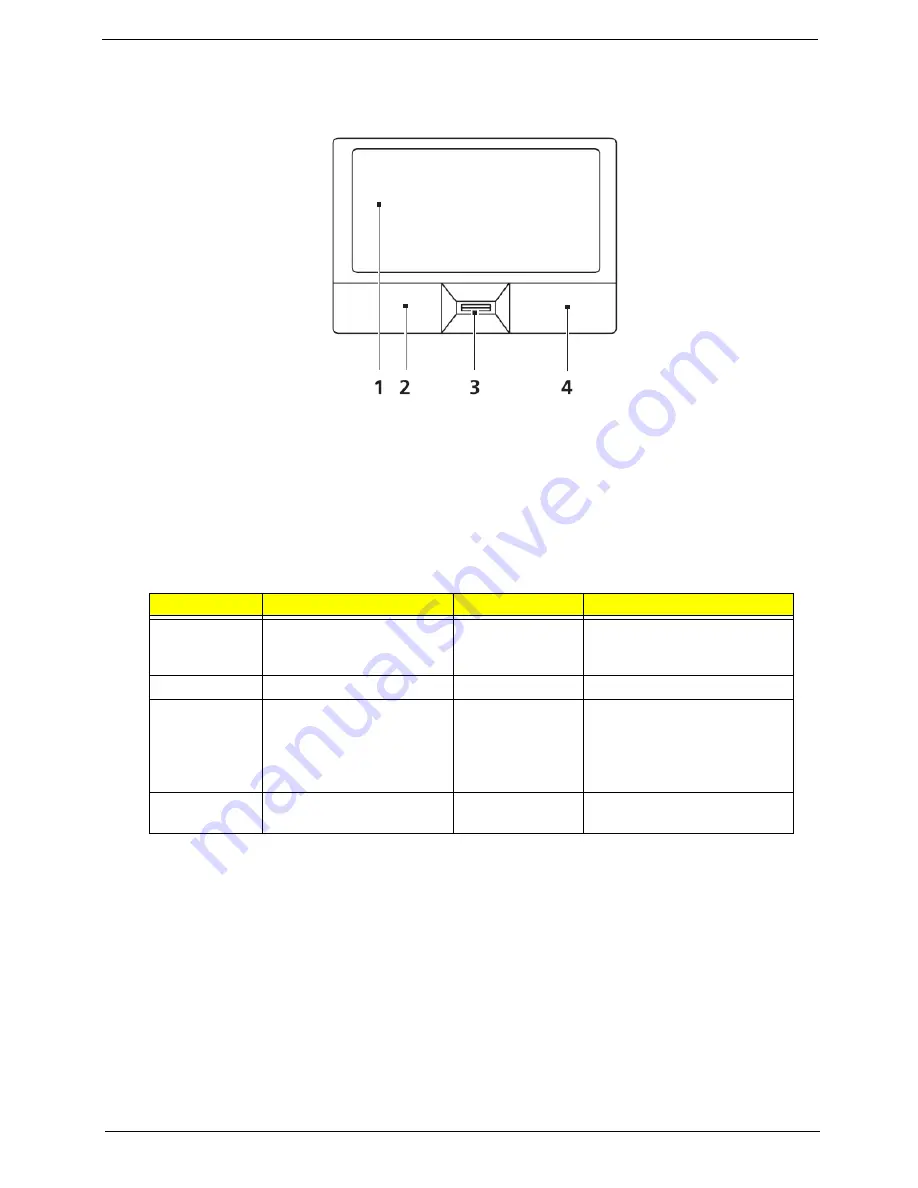
Touchpad Basics (with fingerprint reader)
The following items show you how to use the touchpad with Acer Bio-Protection fingerprint reader:
•
Move your finger across the touchpad (1) to move the cursor.
•
Press the left (2) and right (4) buttons located beneath the touchpad to perform selection and
execution functions. These two buttons are similar to the left and right buttons on a mouse.
Tapping on the touchpad is the same as clicking the left button.
•
Use Acer Bio-Protection fingerprint reader (3) supporting Acer FingerNav 4-way control function
(only for certain models) or the 4-way scroll (3) button (only for certain models) to scroll up or down
and move left or right a page. This fingerprint reader or button mimics your cursor pressing on the
right scroll bar of Windows applications.
NOTE:
When using the touchpad, keep it - and your fingers - dry and clean. The touchpad is sensitive to finger
movement; hence, the lighter the touch, the better the response. Tapping too hard will not increase the
touchpad’s responsiveness.
Function
Left Button (2)
Right Button (4)
Main touchpad (1)
Execute
Quickly click twice.
Tap twice (at the same speed
as double-clicking a mouse
button).
Select
Click once.
Tap once.
Drag
Click and hold, then use
finger on the touchpad to
drag the cursor.
Tap twice (at the same speed
as double-clicking a mouse
button); rest your finger on
the touchpad on the second
tap and drag the cursor.
Access
context menu
Click once.
Summary of Contents for TravelMate 4330 Series
Page 6: ...VI ...
Page 10: ...X Table of Contents ...
Page 14: ...4 Chapter 1 System Block Diagram ...
Page 38: ...28 Chapter 1 ...
Page 56: ...46 Chapter 2 ...
Page 64: ...54 Chapter 3 5 Remove the WLAN cover as shown ...
Page 86: ...76 Chapter 3 8 The Upper Cover can now be removed from the lower base ...
Page 101: ...Chapter 3 91 4 Lift the Thermal Module clear of the Mainboard ...
Page 120: ...110 Chapter 3 3 Connect the RJ 11 cable to the modem module as shown ...
Page 134: ...124 Chapter 3 3 Turn the computer over and replace the five securing screws ...
Page 181: ...Chapter 6 171 ...
Page 203: ...193 Appendix A ...
Page 204: ...Appendix A 194 ...
Page 212: ...202 Appendix B ...
Page 214: ...204 Appendix C ...
Page 217: ...207 Wireless Function Failure 142 WLAN Board 56 ...
Page 218: ...208 ...