


1 G e t t i n g s t a r t e d
Command interface
16
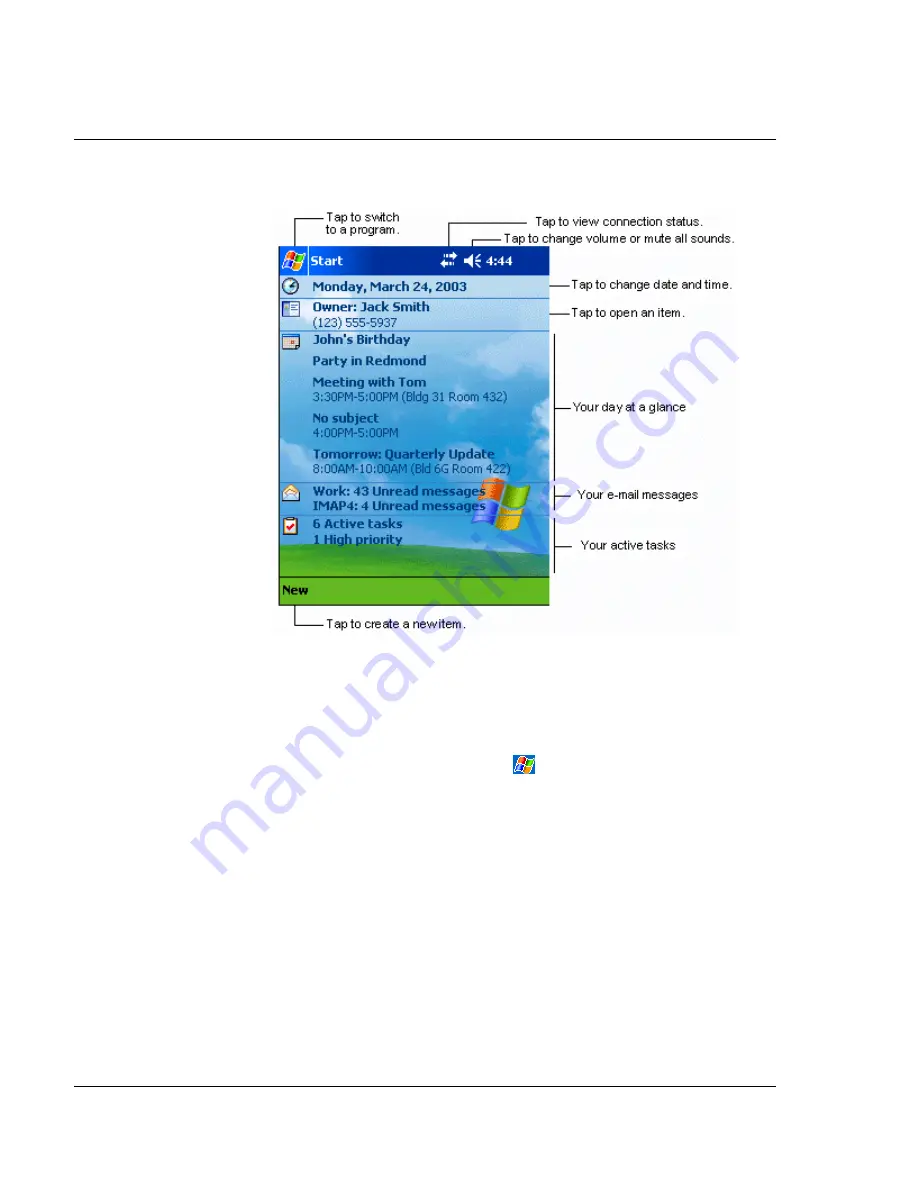
Start menu
From the Start menu, you can select programs, settings and Help topics. To display the
Start menu, from the top of any screen tap
.
Command bar
At the bottom of the screen is the command bar. You can use its menus and buttons to
perform tasks in programs. Depending upon which program you are using, the
buttons may vary from those depicted below.
• To create a new item in the current program, tap New.
Summary of Contents for n50
Page 1: ...Manual for Acer n50 Handheld ...
Page 4: ...About this Manual iv ...
Page 10: ...First things first Installing Software on Your Acer n50 x ...
Page 32: ...1 Getting started Command interface 18 ...
Page 42: ...2 Entering data in your Acer n50 Using My Text 28 ...
Page 72: ...5 Managing Microsoft Pocket PC 2003 companion programs Microsoft Reader for Pocket PC 58 ...
Page 77: ...6 Backup and restore data 63 4 Tap Delete to remove the file ...
Page 78: ...6 Backup and restore data 64 ...
Page 82: ...7 Using expansion features Using an USB thumb drive 68 ...
Page 94: ...10 Using Microsoft Pocket Internet Explorer Using Pocket Internet Explorer 80 ...
Page 98: ...11 Customising your handheld Adding and removing programs 84 ...
Page 120: ...Appendix C Wireless communication Main configuration of utility 106 ...


