16
Chapter 1
OSD Navigation
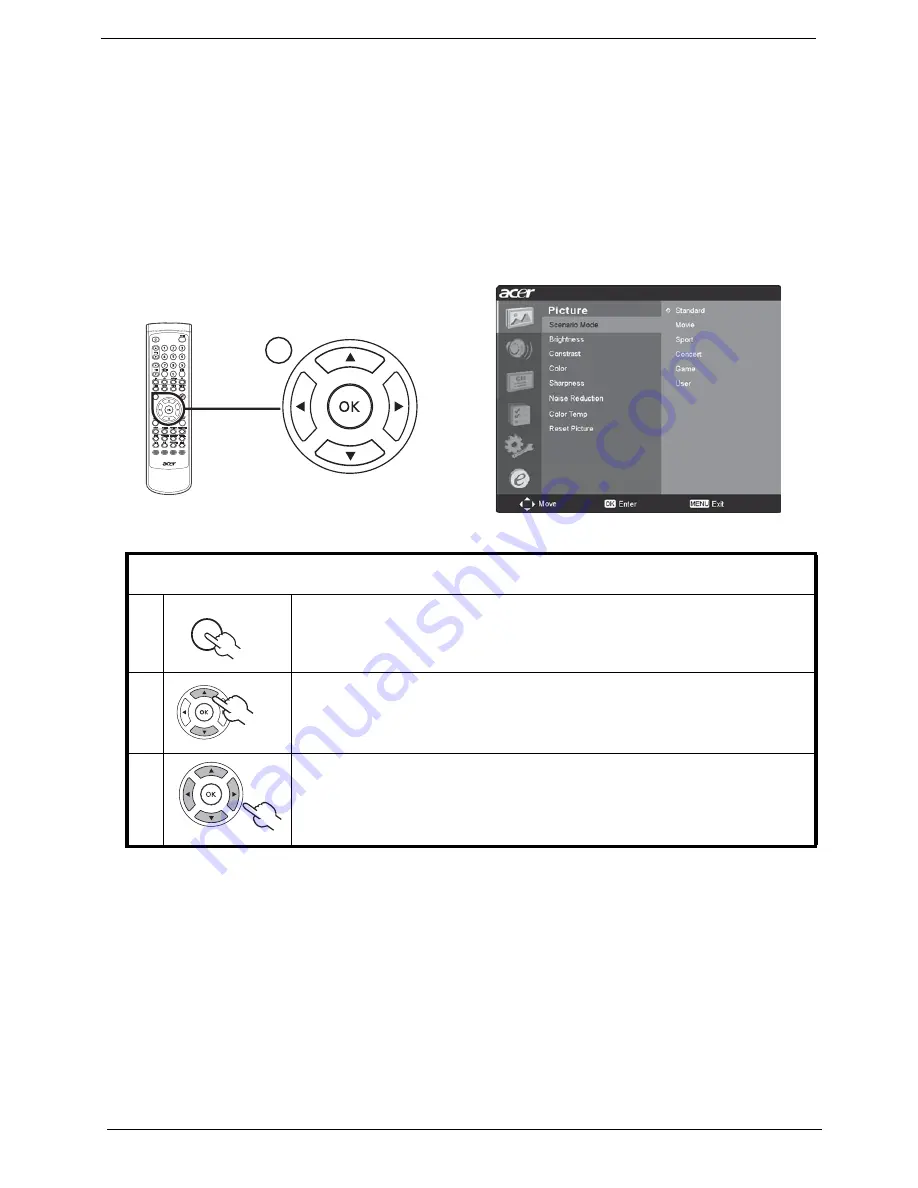
Many of the advanced settings and adjustments are available through using the OSD (On Screen
Display) menus, as shown in the example screenshot below.
Basic operations required to navigate these menus (Picture, Audio, Channel management,
Settings, Empowering) are described in this section. The first time you access the OSD, you will be
asked to choose your language settings.
Navigating the OSD with the Remote Control
NOTE:
You can also interact with these menus using the front panel controls. Please refer to “Front panel
view” for details.
There are six main OSD menus. These are Picture, Audio, Channel management, Options, Settings and
Empowering. Use the following method to navigate these menus.
1
Press the
MENU
button on the remote control or the
MENU
button on the control
panel.
2
Select your desired menu by using the up and down
directional keys
to switch
between the six menus.
3
Use the
directional keys
to interact with the menu. The up / down directions will
scroll through the menu options, while left / right will adjust the different settings
(for example, in the Picture menu, settings such as brightness, contrast, etc.). If
there are no further adjustments, hold down
Enter
on the remote control for
more than two seconds to save the settings.
0(18
Summary of Contents for AT2703
Page 35: ...Chapter 1 29 Dimensions NOTE Unit mm 3 86 3 2 5 ...
Page 42: ...36 Chapter 2 ...
Page 54: ...48 Chapter 3 8 Power Board Main Board END Replacement Replacement N G N G ...
Page 58: ...52 Chapter 4 Exploded Diagram ...
Page 60: ...54 Chapter 4 Parts The latest parts information will be updated shortly ...


