6 Upgrading your computer
98
En
gl
ish
5
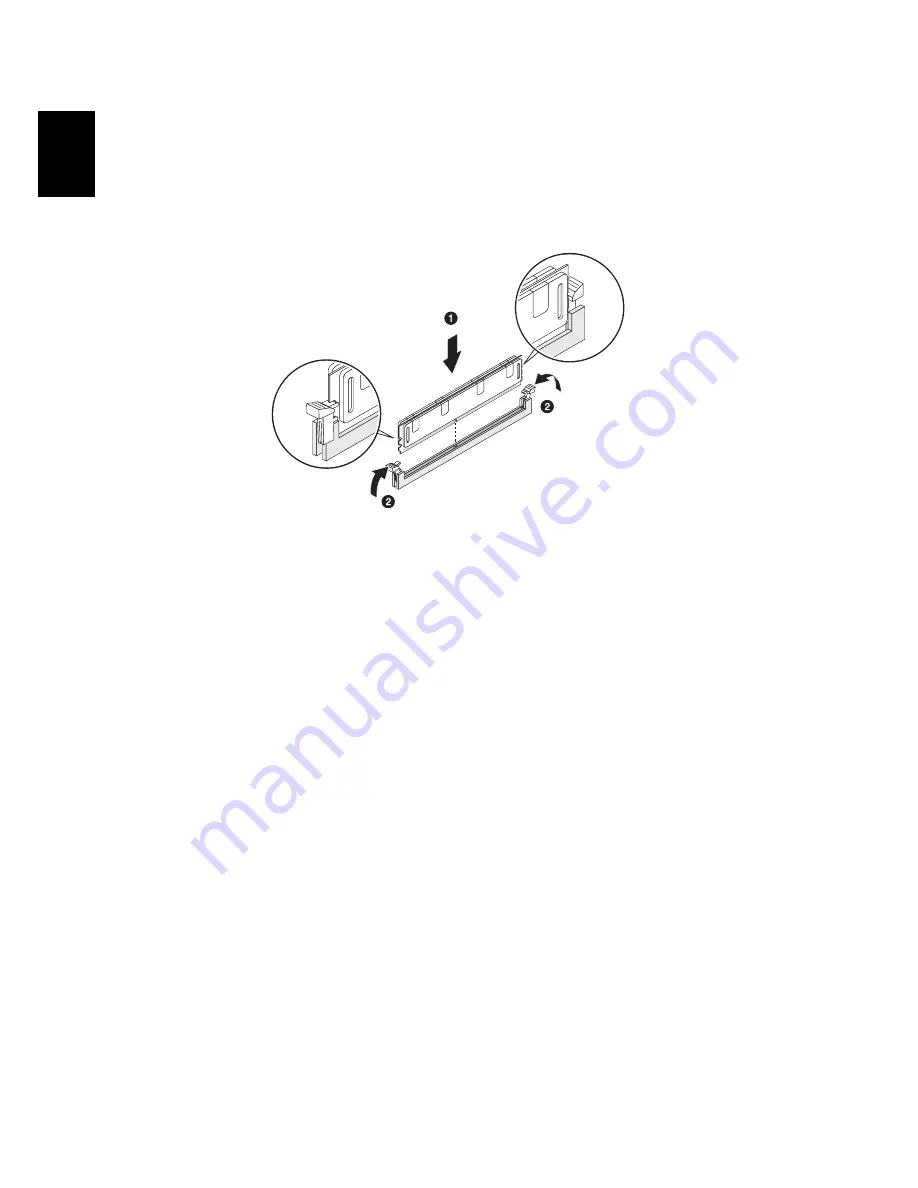
Align the DIMM so that the notch on the slot fits the keyed edge of the
module, then press the module at both ends to seat it fully into the slot (1).
If you insert a DIMM but it does not fit easily into the slot, you have
inserted it incorrectly. Reverse the orientation of the module and insert it
again.
6
Firmly press the holding clips inward to lock the DIMM in place (2).
If the holding clips do not close, the DIMM is not properly inserted.
7
Observe the post-installation instructions described on page 85.
The system automatically detects the amount of memory installed. Run the
BIOS setup to view the new value for total system memory and make a
note of it.
Summary of Contents for Aspire Predator G7700 Series
Page 1: ...User s Guide...
Page 8: ...viii...
Page 13: ...1 First things first...
Page 18: ...1 First things first 6 English...
Page 19: ...2 System tour...
Page 20: ...2 System tour 8 English External and internal structure Closed front panel...
Page 21: ...9 English No Component 1 Hinge screws x 4 2 Door hinges x 4 3 Bezel door...
Page 22: ...2 System tour 10 English Front panel...
Page 26: ...2 System tour 14 English Rear panel...
Page 28: ...2 System tour 16 English Internal components...
Page 30: ...2 System tour 18 English System board Mainboard...
Page 41: ...3 Setting up your computer...
Page 51: ...4 Using your desktop...
Page 59: ...47 English jack green jack located on the front and rear of the computer...
Page 69: ...5 Advanced hardware setup...
Page 94: ...5 Advanced hardware setup 82 English...
Page 95: ...6 Upgrading your computer...
Page 115: ...7 Frequently asked questions...
Page 122: ...7 Frequently asked questions 110 English...
Page 123: ...8 Regulations and safety notices...
Page 134: ...8 Regulations and safety notices 122 English...


