


91
English
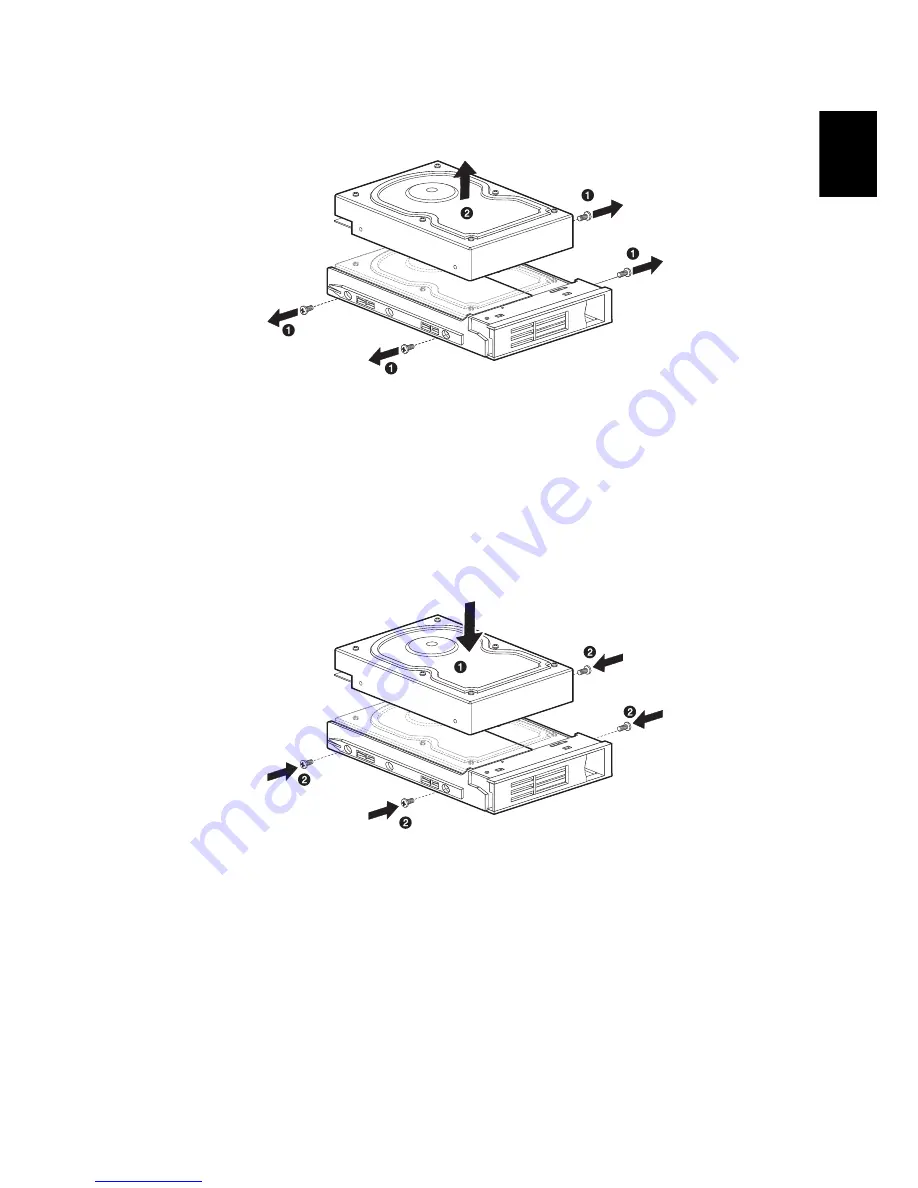
5
If you are replacing a hard disk, remove the four screws that secure the
hard disk to the carrier (1), then remove the disk from the carrier (2).
6
Keep the screws for later installation.
To install a new hard drive to an empty carrier:
1
Perform steps 1 through 5 of the previous section.
2
Remove the four screws. Save the screws for later use.
3
Remove the new HDD from its protective packaging.
4
Install the new hard disk into the HDD carrier. Secure it with the four
screws you removed.
5
Install the new hard drive into the drive bay.
(1) Slide the drive into the bay with the carrier handle still extended.
Summary of Contents for Aspire Predator G Series
Page 1: ...User s Guide ...
Page 8: ...viii ...
Page 13: ...1 First things first ...
Page 18: ...1 First things first 6 English ...
Page 19: ...2 System tour ...
Page 20: ...2 System tour 8 English External and internal structure Closed front panel ...
Page 21: ...9 English No Component 1 Hinge screws x 4 2 Door hinges x 4 3 Bezel door ...
Page 22: ...2 System tour 10 English Front panel ...
Page 26: ...2 System tour 14 English Rear panel ...
Page 28: ...2 System tour 16 English Internal components ...
Page 30: ...2 System tour 18 English System board Mainboard ...
Page 41: ...3 Setting up your computer ...
Page 51: ...4 Using your desktop ...
Page 59: ...47 English jack green jack located on the front and rear of the computer ...
Page 69: ...5 Advanced hardware setup ...
Page 94: ...5 Advanced hardware setup 82 English ...
Page 95: ...6 Upgrading your computer ...
Page 115: ...7 Frequently asked questions ...
Page 122: ...7 Frequently asked questions 110 English ...
Page 123: ...8 Regulations and safety notices ...
Page 134: ...8 Regulations and safety notices 122 English ...


