background image

41

Eng

lis

h

Using software

Playing DVD movies

When the DVD drive module is installed in the optical drive bay, you 
can play DVD movies on your computer.

1

Eject the DVD tray and insert a DVD movie disc; then close the DVD 
tray.

Important! When you launch the DVD player for the first time, the 
program asks you to enter the region code. DVD discs are divided 
into 6 regions. Once your DVD drive is set to a region code, it will 
play DVD discs of that region only. You can set the region code a 
maximum of five times (including the first time), after which the 
last region code set will remain permanent. Recovering your hard 
disc does not reset the number of times the region code has been 
set. Refer to the table below for DVD movie region code 
information.

2

The DVD movie will automatically play after a few seconds. 

Note: To change the region code, insert a DVD movie of a 
different region into the DVD drive. Please refer to the online 
help for more information.

Region code

Country or region

1

U.S.A., Canada

2

Europe, Middle East, South Africa, Japan

3

Southeast Asia, Taiwan, Korea (South)

4

Latin America, Australia, New Zealand

5

Former U.S.S.R., parts of Africa, India

6

People's Republic of China

Summary of Contents for Aspire 9100 Series

Page 1: ...Aspire 9100 Series User s Guide ...

Page 2: ...nce concerning your unit should include the serial number model number and purchase information No part of this publication may be reproduced stored in a retrieval system or transmitted in any form or by any means electronically mechanically by photocopy recording or otherwise without the prior written permission of Acer Incorporated Model Number __________________________________ Serial Number __...

Page 3: ...d information on such subjects as system utilities data recovery expansion options and troubleshooting In addition it contains warranty information and the general regulations and safety notices for your notebook It is available in Portable Document Format PDF and comes preloaded on your notebook Follow these steps to access it 1 Click on Start All Programs AcerSystem 2 Click on AcerSystem User s ...

Page 4: ...ressing the sleep hot key Fn F4 See Preparing the computer on page 28 of the AcerSystem User s Guide for details Note If you cannot power off the computer normally press and hold the power button for more than four seconds to shut down the computer If you turn off the computer and want to turn it on again wait at least two seconds before powering up Taking care of your computer Your computer will ...

Page 5: ...d do not pull on the cord itself but pull on the plug The total ampere ratings of the equipment plugged in should not exceed the ampere rating of the cord if you are using an extension cord Also the total current rating of all equipment plugged into a single wall outlet should not exceed the fuse rating Taking care of your battery pack Here are some ways to take care of your battery pack Use only ...

Page 6: ...s This device complies with Part 15 of the FCC Rules Operation is subject to the following two conditions 1 this device may not cause harmful interference and 2 this device must accept any interference received including interference that may cause undesired operation Users are requested to follow the RF safety instructions on wireless option devices that are included in the user s manual of each ...

Page 7: ...edded numeric keypad 13 Windows keys 14 Hot keys 15 The Euro Symbol 17 Launch keys 18 Touchpad 19 Touchpad basics 19 Ejecting the optical drive tray 21 Using a computer security lock 21 Audio 22 Adjusting the volume 22 Using system utilities 23 Acer eManager 23 Launch Manager 24 Enabling dual displays 24 Acer GridVista dual display compatible 25 Moving around with your notebook PC 27 Disconnecting...

Page 8: ...passwords 33 Setting passwords 33 Expanding through options 35 Connectivity options 35 Fax Data modem 35 Built in network feature 36 Universal Serial Bus 37 IEEE 1394 port 37 PC Card slot 38 BIOS Utility 40 Boot sequence 40 Password 40 Using software 41 Playing DVD movies 41 Power management 42 Arcade 43 Arcade Hot keys 44 The Arcade remote control 45 Finding and playing content 46 Advanced Settin...

Page 9: ... store files simply and easily 54 Video your world in pictures 54 TV Optional 54 Troubleshooting 57 Frequently asked questions 57 Troubleshooting tips 60 Error messages 60 Requesting service 61 International Travelers Warranty ITW 61 Before you call 62 Regulations and safety notices 63 ...

Page 10: ......

Page 11: ... setting up your computer as illustrated in the Just for Starters poster let us show you around your new Aspire computer Front view Item Description 1 Display screen Also called Liquid Crystal Display LCD displaying computer output ...

Page 12: ...almrest Comfortable support area for your hands when you use the computer 6 Status indicators Light Emitting Diodes LEDs that turn on and off to show the status of the computer s functions and components 7 Touchpad Touch sensitive pointing device which functions like a computer mouse 8 Click buttons Left and right The left and right buttons function like the left and right mouse buttons Item Descr...

Page 13: ... from external microphone 4 CIR Receiver Receives remote control infrared signals 5 Arcade Media Volume buttons For use with Acer Arcade and other media playing programs 6 Indicators power Hard disc and battery Light to indicate the computer s status 7 Wireless communication button indicator Press to enable disable Wireless function Lights to indicate the status of wireless LAN communications 8 La...

Page 14: ...y lock 2 Power jack Connects to an AC adaptor 3 Two USB 2 0 ports Connect to Universal Serial Bus USB 2 0 devices e g USB mouse USB camera 4 Optical drive Internal optical drive accepts CDs or DVDs depending on the optical drive type 5 LED indicator Lights up when the optical drive is active 6 Optical drive eject button Ejects the optical drive tray from the drive 7 Emergency eject hole Ejects the...

Page 15: ...S SM and SD card Note Only one card can operate at any given time 2 PC Card slot Connects to one Type II CardBus PC Card 3 PC Card slot eject button Ejects the PC Card from the slot 4 USB 2 0 port Connects to Universal Serial Bus USB 2 0 devices e g USB mouse USB camera ...

Page 16: ...Connects to a phone line 4 Audio video in port Supports both audio and video input 5 Antenna port Connects to a PAL NTSC TV antenna cable 6 External display port Connects to a display device e g external monitor LCD projector 7 S video out port Connects to a television or display device with S video input 8 Ventilation slots Enable the computer to stay cool even after prolonged use ...

Page 17: ...e battery pack 2 Battery bay Houses the computer s battery pack 3 Hard disc bay Houses the computer s hard disc secured by a screw 4 Memory compartment Houses the computer s main memory and Mini PCI Card 5 Cooling fan Helps keep the computer cool Note Do not cover or obstruct the opening of the fan ...

Page 18: ...er Display and video Thin Film Transistor TFT displaying at 15 4 WXGA 1280 x 800 Acer CrystalBrite ATI MOBILITY RADEON X600 with 128 MB of video memory Simultaneous LCD and CRT display support Dual independent display Connectivity Integrated gigabit Fast Ethernet connection for selected models Built in 56Kbps fax data modem Three Universal Serial Bus USB 2 0 ports InviLink 802 11b g dual band Wire...

Page 19: ... modem One RJ 45 network jack One DC in jack AC adaptor One external monitor port One speaker headphone out jack One audio line in microphone in jack One infrared CIR port One IEEE 1394 port One S video TV out port One Audio Video in port One PAL NTSC TV in port Three USB 2 0 ports 3 in 1 MS SM SD card reader Weight with battery 6 5 lbs 2 9 kg Dimensions 360 W x 265 D x 32 2 35 H mm ...

Page 20: ...ting 20 80 RH System Microsoft Windows XP Professional Home Media Center Edition ACPI 1 0b support DMI 2 0 compliant Wi Fi compliant Power 8 cell 65 W Li ion battery pack 65 W AC adaptor 19 V 3 42 A Options 256 MB 512 MB 1 GB memory upgrade module Additional 65 W AC adaptor Addition Li ion battery pack Media player remote control ...

Page 21: ...rged light shows green when in AC mode Icon Function Description Caps Lock Lights when Caps Lock is activated Num Lock Lights when Num Lock is activated Scroll Lock Lights when Scroll Lock is activated Power Lights when the computer is on Battery indicator Lights when the battery is being charged Media activity Lights when the hard disc or optical drive is active Wireless communication Lights to i...

Page 22: ...ic characters typed are in uppercase Num Lock Fn F11 When Num Lock is on the embedded keypad is in numeric mode The keys function as a calculator complete with the arithmetic operators and Use this mode when you need to do a lot of numeric data entry A better solution would be to connect an external keypad Scroll Lock Fn F12 When Scroll Lock is on the screen moves one line up or down when you pres...

Page 23: ... indicated by small characters located on the upper right corner of the keycaps Desired Access Num Lock On Num Lock Off Type numbers Use embedded keypad in the same way as the numeric keypad on a standard keyboard Type letters Hold Fn while typing letters on embedded keypad Type the letters in a normal manner ...

Page 24: ...rt menu It can also be used with other keys to provide a variety of functions Tab Activates the next Taskbar button E Opens the My Computer window F1 Opens Help and Support F Opens the Find All Files dialog box M Minimizes all windows Shift M Undoes the minimize all windows R Opens the Run dialog box Application key This key has the same effect as clicking the right mouse button it opens the appli...

Page 25: ...he other key in the hot key combination Hot Key Icon Function Description Fn F1 Hot key help Displays help on hot keys Fn F2 Acer eSetting Launches the Acer eSetting in the Acer eManager set by the Acer Empowering Key See Acer eManager on page 23 Fn F3 Acer ePowerMana gement Launches the Acer ePower Management in the Acer eManager set by the Acer Empowering Key See Acer eManager on page 23 Fn F4 S...

Page 26: ...6 Screen blank Turns the display screen backlight off to save power Press any key to return Fn F7 Touchpad toggle Turns the internal touchpad on and off Fn Volume up Increases the sound volume Fn Volume down Decreases the sound volume Fn Brightness up Increases the screen brightness Fn Brightness down Decreases the screen brightness Hot Key Icon Function Description ...

Page 27: ...d with a European layout you can type the Euro symbol on your keyboard 1 Open a text editor or word processor 2 Hold Alt Gr and then press the Euro symbol at the upper center of the keyboard Note Some fonts and software do not support the Euro symbol Please refer to www microsoft com typography faq faq12 htm for more information ...

Page 28: ...Empowering Key Press the Empowering Key to run the Acer eManager Please see Acer eManager on page 23 for details The Web browser will open an Internet browser as default but it can be reset by users To set the Web browser key run the Acer Launch Manager See Acer eManager on page 23 Launch key Default application Internet browser application User programmable eManager User programmable ...

Page 29: ...mrest provides optimum comfort and support Touchpad basics The following items teach you how to use the touchpad Move your finger across the touchpad 2 to move the cursor Press the left 1 and right 3 buttons located on the edge of the touchpad to do selection and execution functions These two buttons are similar to the left and right buttons on a mouse Tapping on the touchpad is the same as clicki...

Page 30: ...t increase the touchpad s responsiveness Function Left button Right button Touchpad Execute Click twice quickly Tap twice at the same speed as double clicking a mouse button Select Click once Tap once Drag Click and hold then use finger to drag the cursor on the touchpad Tap twice at the same speed as double clicking a mouse button hold finger to the touchpad on the second tap and drag the cursor ...

Page 31: ...e emergency eject hole Using a computer security lock A security keylock notch located on the chassis of the computer lets you connect a Kensington compatible computer security lock Wrap a computer security lock cable around an immovable object such as a table or handle of a locked drawer Insert the lock into the notch and turn the key to secure the lock Some keyless models are also available ...

Page 32: ...ers Adjusting the volume Adjusting the volume on the computer is as easy as pressing some buttons The volume can be controlled by using either the dedicated volume media keys located on the front of the notebook or the hot keys See Hot keys on page 15 for more information on adjusting the speaker volume ...

Page 33: ... the press of the Acer Empowering Key the Acer eManager user interface appears featuring two main settings Acer eSetting and Acer ePresentation To set the Acer Empowering Key see Launch keys on page 18 Acer eSetting makes managing system settings and security easy Acer ePresentation simplifies resolution settings when connecting to a projector ...

Page 34: ...ays To enable the dual monitor feature of your notebook First ensure the secondary monitor is connected Then select Start Control Panel Display and click on Settings Select the secondary monitor 2 icon in the display box and then click the check box Extend my windows desktop onto this monitor highlighted in red below Finally Apply the new settings and then click OK to complete the process Note Ple...

Page 35: ...ista You may choose any one of the four display settings indicated below Double Vertical Triple Major at left Triple Major at right or Quad GridVista is dual display compatible allowing two displays to be partitioned independently GridVista is simple to set up 1 Run GridVista and select your preferred screen configuration for each display from the taskbar 2 Drag and drop each window into the appro...

Page 36: ...26 English ...

Page 37: ...xternal monitor and other external devices 7 Disconnect the Kensington lock if you are using one to secure the computer Moving around When you are just moving within short distances for example from your office desk to a meeting room Preparing the computer Before moving the computer close and latch the display cover to place it in Sleep mode You can now safely take the computer anywhere you go wit...

Page 38: ...obably do not need to take anything with you other than the computer What to bring to long meetings If your meeting lasts longer than 3 hours or if your battery is not fully charged you may want to take the AC adaptor with you to plug in your computer while in the meeting room If the meeting room does not have an electrical outlet reduce the drain on the battery by putting the computer in Sleep mo...

Page 39: ...eling to and from work Minimize the effects of temperature changes by keeping the computer with you If you need to stop for an extended period of time and cannot carry the computer with you leave the computer in the trunk of the car to avoid exposing the computer to excessive heat Changes in temperature and humidity can cause condensation Allow the computer to return to room temperature and inspec...

Page 40: ... the computer as if you were taking it home Make sure that the battery in the computer is charged Airport security may require you to turn on your computer when carrying it into the gate area What to take with you Take the following items with you AC adaptor Spare fully charged battery pack s Additional printer driver files if you plan to use another printer Special considerations In addition to t...

Page 41: ...se you need to show it to customs officials International Travelers Warranty passport Special considerations Follow the same special considerations as when traveling with the computer In addition these tips are useful when traveling internationally When traveling in another country check that the local AC voltage and the AC adaptor power cord specifications are compatible If not purchase a power c...

Page 42: ...words protect your computer from unauthorized access Setting these passwords creates several different levels of protection for your computer and data Supervisor Password prevents unauthorized entry into the BIOS Utility Once set you must enter this password to gain access to the BIOS Utility See See BIOS Utility on page 40 User Password secures your computer against unauthorized use Combine the u...

Page 43: ...ss Enter When the User Password is set and the password on boot parameter is enabled a prompt appears at boot up Type the User Password and press Enter to use the computer If you enter the password incorrectly a warning message appears Try again and press Enter Important You have three chances to enter a password If you fail to enter the password correctly after three tries the system halts Press ...

Page 44: ...34 English ...

Page 45: ...rnal devices to the computer read the following section Fax Data modem Your computer has a built in V 92 56Kbps AC 97 link fax data modem Warning This modem port is not compatible with digital phone lines Plugging this modem into a digital phone line will damage the modem To use the fax data modem port connect a phone cable from the modem port to a telephone jack Warning Please make sure that the ...

Page 46: ...ature The built in network feature allows you to connect your computer to an Ethernet based network To use the network feature connect an Ethernet cable from the network jack on the computer to a network jack or hub on your network ...

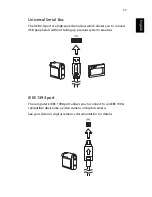
Page 47: ... allows you to connect USB peripherals without taking up precious system resources IEEE 1394 port The computer s IEEE 1394 port allows you to connect to an IEEE 1394 compatible device like a video camera or digital camera See your video or digital camera s documentation for details ...

Page 48: ...cards CardBus improves on the 16 bit PC card technology by expanding the bandwidth to 32 bits Note Refer to your card s manual for details on how to install and use the card and its functions Inserting a PC Card Insert the card into the slot and make the proper connections e g network cable if necessary See your card manual for details Ejecting a PC Card Before ejecting a PC Card 1 Exit the applic...

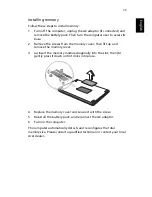
Page 49: ...cover then lift up and remove the memory cover 3 a Insert the memory module diagonally into the slot then b gently press it down until it clicks into place 4 Replace the memory cover and secure it with the screw 5 Reinstall the battery pack and reconnect the AC adaptor 6 Turn on the computer The computer automatically detects and reconfigures the total memory size Please consult a qualified techni...

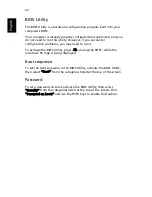
Page 50: ...ed to run it To activate the BIOS Utility press F2 during the POST while the notebook PC logo is being displayed Boot sequence To set the boot sequence in the BIOS Utility activate the BIOS Utility then select Boot from the categories listed at the top of the screen Password To set a password on boot activate the BIOS Utility then select Security from the categories listed at the top of the screen...

Page 51: ...ximum of five times including the first time after which the last region code set will remain permanent Recovering your hard disc does not reset the number of times the region code has been set Refer to the table below for DVD movie region code information 2 The DVD movie will automatically play after a few seconds Note To change the region code insert a DVD movie of a different region into the DV...

Page 52: ... the serial and parallel ports and video memory If no activity is detected for a period of time called an inactivity timeout the computer stops some or all of these devices in order to conserve energy This computer employs a power management scheme that supports the advanced configuration and power interface ACPI which allows for maximum power conservation and maximum performance at the same time ...

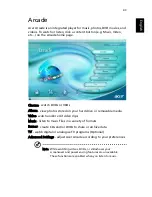
Page 53: ... drive or removable media Video watch and or edit video clips Music listen to music files in a variety of formats Burner create CDs and or DVDs to share or archive data TV watch digital or analogue TV programs Optional Advanced Settings adjust Acer Arcade according to your preferences Note While watching videos DVDs or slideshows your screensaver and power saving features are unavailable These fun...

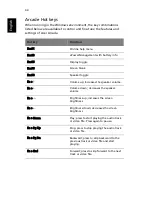
Page 54: ...aker toggle Fn Volume up increases the speaker volume Fn Volume down decreases the speaker volume Fn Brightness up increases the screen brightness Fn Brightness down decreases the screen brightness Fn Home Play press to start playing the audio track or video file Press again to pause Fn Pg Up Stop press to stop playing the audio track or video file Fn Pg Dn Backward press to skip backward to the p...

Page 55: ...o provides a remote control for a convenient way to control the features of Arcade mode The images below show which buttons on the remote contol function in the different Arcade modes Arcade Main Page Cinema Mode Album Mode Video Mode Music Mode TV Mode ...

Page 56: ...ontent than will fit on a page use the buttons at the lower right to scroll through the pages Advanced Settings There are settings in Acer Arcade that allow you to fine tune its perfor mance to your machine and your personal preferences The Settings page is reached by the Advanced Settings button on the Home page Use the Screen ratio setting to choose between standard 4 3 or widescreen 16 9 displa...

Page 57: ...for content click Up one level To return to a previous screen click Return The buttons in the upper right Minimize Maxi mize and Close have standard PC behaviours To quit Arcade click the Close button in the upper right corner of the window You can also click To PC Player controls At the bottom of the window the player controls used for video slideshows movies and music are shown The group on the ...

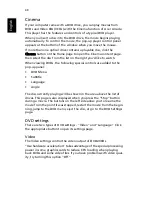
Page 58: ...cial controls are added to the pop up panel DVD Menu Subtitle Language Angle The disc currently playing will be shown in the area above the list of drives This page is also displayed when you press the Stop button during a movie The buttons on the left side allow you to resume the movie from the point it was stopped restart the movie from the begin ning jump to the DVD menu eject the disc or go to...

Page 59: ... the disc you are watch ing while Vivid Bright and Theatre add enhanced color to the video display Clear vision is a video enhancement technology that detects video content and dynamically adjusts the brightness contrast saturation lev els so that you do not need to change the color settings if the movie you are watching contains scenes that are overly dark or too bright Click Restore to factory s...

Page 60: ...photos individually or as a slideshow from any available drive on your computer Click Album button on the Arcade Home page to show the Album main page The content area on the right shows both individual pictures and fold ers Click on a folder to open it ...

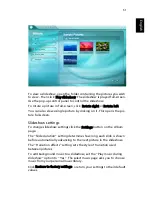
Page 61: ...n Slideshow settings To change slideshow settings click the Settings button on the Album page The Slide duration setting determines how long each slide is shown before automatically advancing to the next picture in the slideshow The Transition effects setting sets the style of transition used between pictures To add background music to a slideshow set the Play music during slideshow option to Yes ...

Page 62: ...ideo page click Stop Video Authoring Click the Video Authoring button to open the PowerProducer program PowerProducer allows you to finalize your digital video productions and burn them to disc Before you produce your movie using PowerProducer first gather or create its component parts video clips photos and background music You may collect raw footage yourself with a camcorder or other recording ...

Page 63: ...tion allows you to watch computer generated visualizations while you listen to music When playing music the control panel at the bot tom of the page makes it easy to adjust the volume and control play back To rip music from a CD click Rip CD In the page that opens select the songs you would like to rip or click Select Clear all then click Rip now Burner NTI CD DVD Maker simplifies today s digital ...

Page 64: ... data on CD DVD eliminates the need for extra hard drives Video your world in pictures Turn digital photos into a Slideshow VCD with background music that can be played by most DVD players Bring new life to your video clips and share any event with your friends and family for playback on most DVD players You can even add customized menus to Video CDs and Super Video CDs For Specific details about ...

Page 65: ...w files that you have recorded from the TV See Recorded TV The Schedule option allows you to set TV recording schedules for later viewing See Scheduling Recordings The Settings button opens a page containing TV settings See TV Set tings The TV preview option allows you to preview available TV channels See TV Preview The TeleText option opens the TeleText function See Using TeleText Functions Insta...

Page 66: ...ptions on this page see Videos Scheduling Recordings To set a TV recording schedule click Schedule then New schedule In the page that opens select the Channel you want to record and the Scheduling frequency Set the Starting date Starting time and Ending time of the program you want to record Click Confirm schedule to activate the recording schedule or Cancel to quit without accepting the schedule ...

Page 67: ...TV Settings To change picture settings click the TV button on the Settings page or the Settings button on the main TV page There are two types of TV settings TV Signal and Channels TV Signal In the TV Source option select if your TV receives signals from an antenna or a cable The Country option allows you to select the country or region where your cable provider is located The Recording quality op...

Page 68: ...ck the new location or use the up down arrow keys and press Enter The channel is moved to the new location in the list To rename a channel in the list click on it then enter the new name If no channel list exists click Scan channels Your computer will scan and list the available TV channels File type compatibility Note Auto media detection will only function under main menu Mode Supported Not Supp...

Page 69: ...eing supplied to the computer Check the following If you are running on battery power it may be low and unable to power the computer Connect the AC adaptor to recharge the battery pack Make sure that the AC adaptor is properly plugged into the computer and to the power outlet If it is lit check the following Is a non bootable non system disc in the external USB floppy drive Remove or replace it wi...

Page 70: ...make sure that the resolution is set to the appropriate resolution Resolutions lower than the specified resolution are not full screen on the computer or on an external monitor No audio is heard from the computer Check the following The volume may be muted In Windows look at the volume control speaker icon on the taskbar If it is crossed out click on the icon and deselect the Mute option The volum...

Page 71: ...e internal keyboard cable may be loose The printer does not work Check the following Make sure that the printer is connected to a power outlet and that it is turned on Make sure that the printer cable is connected securely to the computer s parallel or a USB port and the corresponding port on the printer I want to set up my location to use the internal modem To properly use your communication soft...

Page 72: ...g service on page 61 Error messages If you receive an error message note the message and take the corrective action The following table lists the error messages in alphabetical order together with the recommended course of action Error messages Corrective action CMOS battery bad Contact your dealer or an authorized service center CMOS checksum error Contact your dealer or an authorized service cen...

Page 73: ... is in this handy booklet Read this passport thoroughly Always have your ITW passport on hand especially when you travel to receive the benefits from our support centers Place your proof of purchase in the flap located inside the front cover of the ITW passport If the country you are traveling in does not have an Acer authorized ITW service site you can still get in contact with our offices worldw...

Page 74: ...reported by your computer write them down as they appear on the screen or the number and sequence in the case of beeps You are required to provide the following information Name ________________________________________ Address ______________________________________ _______________________________________________ Telephone number ____________________________ Machine and model type _________________...

Page 75: ...nstallation If this device does cause harmful interference to radio or television reception which can be determined by turning the device off and on the user is encouraged to try to correct the interference by one or more of the following measures Reorient or relocate the receiving antenna Increase the separation between the device and receiver Connect the device into an outlet on a circuit differ...

Page 76: ...ation of Conformity for EU countries Hereby Acer declares that this Notebook PC series is in compliance with the essential requirements and other relevant provisions of Directive 1999 5 EC Please visit http global acer com products notebook reg nb index htm for complete documents Modem notices Notice for USA This equipment complies with Part 68 of the FCC rules Located on the modem is a label that...

Page 77: ... individual PSTNs provided in different countries the approval does not of itself give an unconditional assurance of successful operation on every PSTN termination point In the event of problems you should contact your equipment supplier in the first instance List of Applicable Countries EU member states as of May 2004 are Belgium Denmark Germany Greece Spain France Ireland Italy Luxembourg the Ne...

Page 78: ...he associated equipment shall be set to operate within the following limits for compliance with Telecom s Specifications a There shall be no more than 10 call attempts to the same number within any 30 minute period for any single manual call initiation and b The equipment shall go on hook for a period of not less than 30 seconds between the end of one attempt and the beginning of the next call att...

Page 79: ... occur the user should NOT contact the telecom Fault Service 5 This equipment may not provide for the effective hand over of a call to another device connected to the same line 6 Under power failure conditions this appliance may not operate Please ensure that a separate telephone not dependent on local power is available for emergency use 7 Some parameters required for compliance with Telecom s Te...

Page 80: ...cord ampere rating Also make sure that the total rating of all products plugged into the wall outlet does not exceed the fuse rating 9 Never push objects of any kind into this product through cabinet slots as they may touch dangerous voltage points or short out parts that could result in a fire or electric shock Never spill liquid of any kind on the product 10 Do not attempt to service this produc...

Page 81: ...T 2 rated 7 A 125 V minimum VDE approved or its equivalent Maximum length is 15 feet 4 6 metres 16 Always disconnect all telephone lines from the wall outlet before serving or disassembling this equipment 17 Avoid using a telephone other than a cordless type during an electrical storm There may be a remote risk of electric shock from lightning Laser compliance statement The CD or DVD drive used wi...

Page 82: ...opyright protection technology that is protected by U S patents and other intellectual property rights Use of this copyright protection technology must be authorized by Macrovision and is intended for home and other limited viewing uses only unless otherwise authorized by Macrovision Reverse engineering or disassembly is prohibited U S Patent Nos 4 631 603 4 577 216 4 819 098 4 907 093 and 6 516 1...

Page 83: ...Luxembourg the Netherlands Austria Portugal Finland Sweden United Kingdom Estonia Latvia Lithuania Poland Hungary Czech Republic Slovak Republic Slovenia Cyprus and Malta Usage allowed in the countries of European Union as well as Norway Switzerland Iceland and Liechtenstein This device must be used in strict accordance with the regulations and constraints in the country of use For further informa...

Page 84: ...nnas One of the antennas is selected automatically or manually by users to ensure good quality radiocommunication 2 This device is restricted to indoor use due to its operation in the 5 15 to 5 25 GHz frequency range FCC requires this product to be used indoors for the frequency range 5 15 to 5 25 GHz to reduce the potential for harmful interference to co channel Mobile Satellite systems 3 High po...

Page 85: ...ubject to licensing c Operation in 5 GHz band The device for the band 5150 5250 MHz is only for indoor usage to reduce potential for harmful interference to co channel Mobile Satellite systems High power radars are allocated as primary users meaning they have priority of 5250 5350 MHz and 5650 5850 MHz and these radars could cause interference and or damage to LELAN Licence Exempt Local Area Netwo...

Page 86: ...mber Aspire 910xxx x 0 9 a z or A Z Is in compliance with the essential requirements and other relevant provisions of the following EC directives Reference No Title 89 336 EEC Electromagnetic Compatibility EMC directive 73 23 EEC Low Voltage Directive LVD 1999 5 EC Radio Telecommunications Terminal Equipment Directive R TTE The product specified above was tested conforming to the applicable Rules ...

Page 87: ...armful interference and 2 this device must accept any interference received including interference that may cause undesired operation The following local Manufacturer Importer is responsible for this declaration Product Personal Computer Model Number DL71 Machine Type Aspire 910xxx SKU Number Aspire 910xxx x 0 9 a z or A Z Name of Responsible Party Acer America Corporation Address of Responsible P...

Page 88: ...76 English ...

Page 89: ...tting up a home office 30 taking home 28 traveling internationally 31 traveling on local trips 30 troubleshooting 57 turning off iv connections network 36 D display hotkeys 16 troubleshooting 57 58 DVD 41 DVD movies playing 41 E error messages 60 Euro 17 F FAQ See frequently asked questions frequently asked questions 57 front view 3 H hotkeys 15 I IEEE 1394 port 37 indicator lights 11 ITW See warr...

Page 90: ...ety CD or DVD 69 FCC notice 63 general instructions 67 modem notices 64 scroll lock 12 security keylock 21 32 passwords 32 service when to call vi speakers hotkey 15 troubleshooting 58 status indicators 11 support information 61 T touchpad 19 hotkey 16 using 19 20 travel international flights 31 local trips 30 troubleshooting 57 tips 60 U universal serial bus 37 V view front 4 left 4 rear 6 right ...

Reviews: