


60
Chapter 3
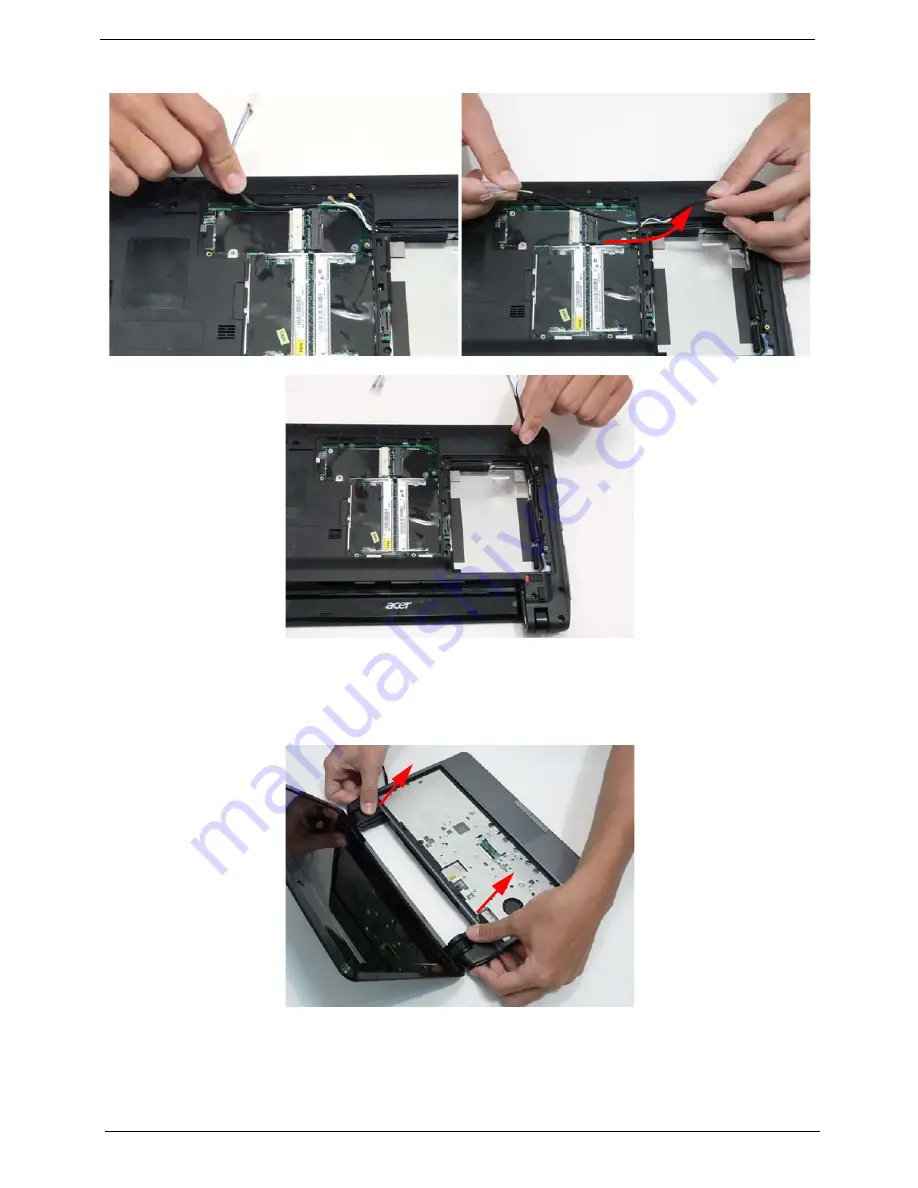
6.
Pull the 3M module and WLAN cables away from the computer.
NOTE: Replace the plastic caps over the 3M module cable connectors immediately if they get dislodged
during the process.
7.
Turn the computer over and grasp the upper cover by the hinges. Then pull the upper cover up and away
from the computer.
Summary of Contents for AO752
Page 6: ...VI ...
Page 10: ...X Table of Contents ...
Page 34: ...24 Chapter 1 ...
Page 50: ...40 Chapter 2 ...
Page 59: ...Chapter 3 49 9 Detach the HDD board ...
Page 61: ...Chapter 3 51 5 Pull the memory module out 6 Repeat steps 4 and 5 for the second memory module ...
Page 73: ...Chapter 3 63 7 Unlock the touch pad FCC and pull the cable away ...
Page 87: ...Chapter 3 77 4 Pull the cables away from the two adhesive locations 5 Lift the modules away ...
Page 91: ...Chapter 3 81 5 Roll the bezel up and away from the hinges ...
Page 94: ...84 Chapter 3 4 Lift the LCD panel out lifting the bottom of the panel first ...
Page 106: ...96 Chapter 3 3 Apply adhesive and stick the microphone down ...
Page 117: ...Chapter 3 107 3 Connect the speaker connector ...
Page 135: ...Chapter 3 125 4 Tighten the four captive screws ...
Page 137: ...Chapter 3 127 4 Place the HDD cover in from one corner 5 Tighten the two captive screws ...
Page 140: ...130 Chapter 3 ...
Page 240: ...230 Appendix A ...
Page 250: ...240 Appendix B ...
Page 252: ...242 ...
Page 255: ...245 ...
Page 256: ...246 ...