4 Configuring the system
34
Installing and removing storage
devices
The system supports 3.5-inch and 5.25-inch internal storage devices.
The system comes pre-installed with a floppy drive and a CD-ROM
drive. The empty 5.25-inch half-height bays allow you to install
additional drives such as another CD-ROM drive or a tape drive.
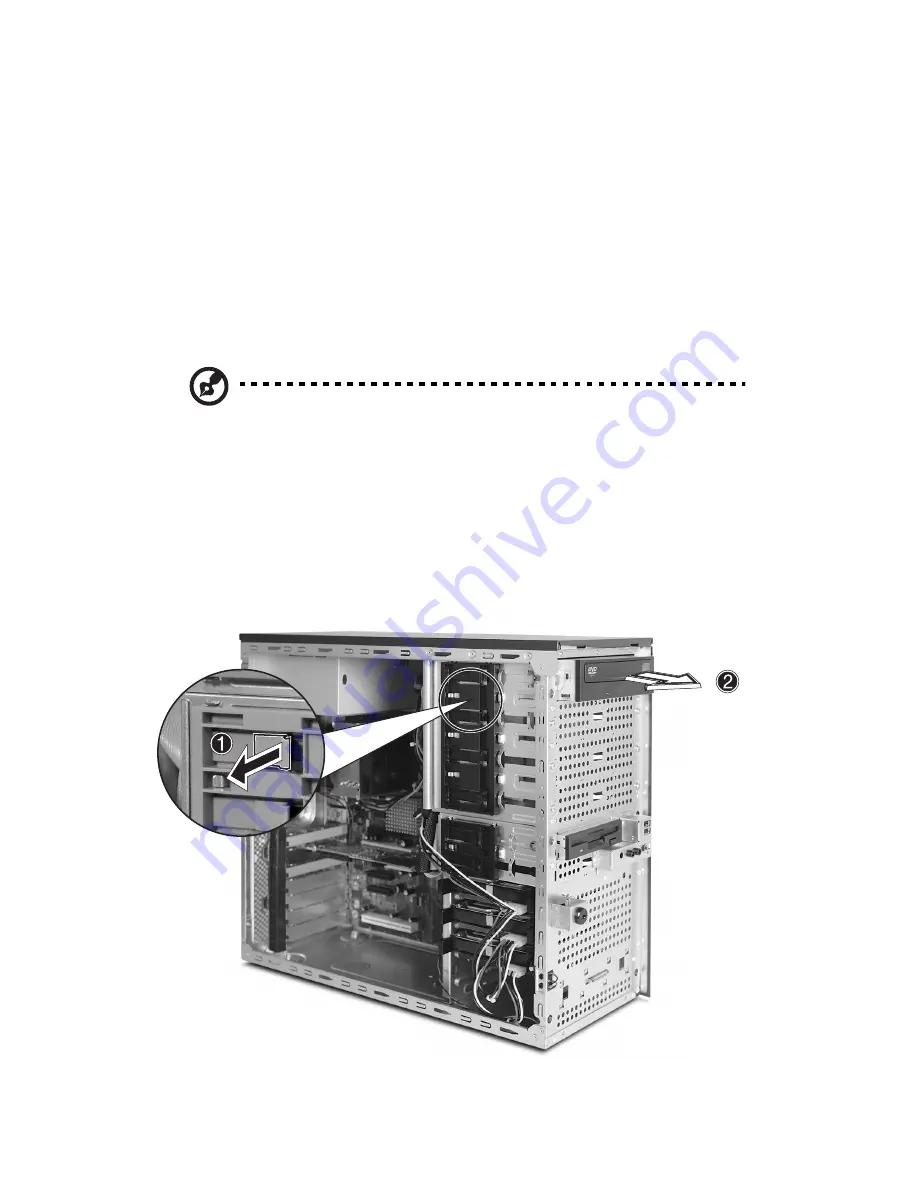
To install a 5.25-inch storage device
Note:
If you are installing a new drive in an empty drive bay, skip
steps 2 to 4.
1
Observe the ESD precautions and pre-installation procedures
described on page 30.
2
Disconnect the power and IDE cables from the old drive.
3
Lift the plastic tab that secures the drive in the bay
(1)
and gently
pull it from the chassis
(2)
.
Summary of Contents for Altos G310 MK2 Series
Page 1: ...Acer Altos G310 Mk2 series ...
Page 12: ...Contents ...
Page 13: ...1 System information ...
Page 18: ...1 System information 6 ...
Page 21: ...2 System tour ...
Page 33: ...3 Getting Started ...
Page 34: ...This chapter gives information on setting up and starting to use your system ...
Page 38: ...3 Getting Started 26 ...
Page 39: ...4 Configuring the system ...
Page 61: ...5 BIOS setup ...
Page 90: ...5 BIOS setup 78 ...
Page 91: ...6 Troubleshooting ...
Page 110: ...6 Troubleshooting 98 ...
Page 111: ...Appendix A Embedded SATA RAID Technology for the Altos G310 Mk2 ...


