16
©2005 Johnson Level & Tool
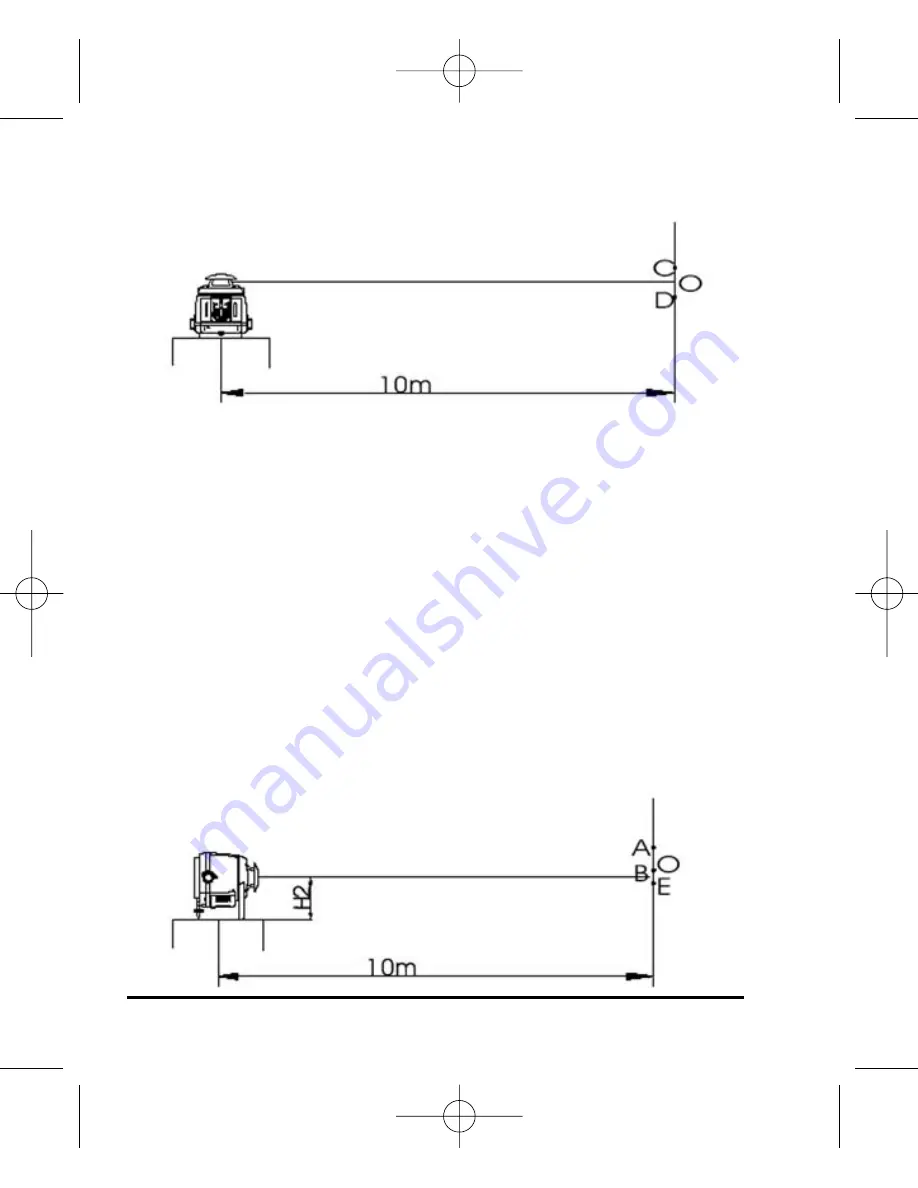
5. Measure the vertical distance h between point A and point B.
6. As shown, turn the instrument by 90° and place it on the
platform, with the operating panel facing you. Perform
Y-direction self-check with the same method as X-direction
self-check, and mark point C and point D by turns.
7. If h<0.236" (6mm), the accuracy is within tolerance.
Otherwise reference section 12 of this document.
Accuracy Self-Check for Vertical Output Status
1. Follow the operations as above, and measure the distance H1
between the laser rotating plane and the platform surface.
2. Set the locking knob to locking position, and place the instrument
horizontally.
Wall
Wall
40-6520_6530 4/20/05 4:12 PM Page 16


