Installation
2-2
2
To connect the Mini AP Router in Router Mode for use as an Internet gateway, follow
these steps:
1.
Connect an Ethernet cable from the Mini AP Router’s WAN port to your Internet
connected cable or ADSL modem.
2.
Connect an Ethernet cable from the Mini AP Router’s LAN port to your PC.
Alternatively, you can connect to a workgroup switch to support multiple users.
The Mini AP Router can support up to 253 wired or wireless users.
3.
Power on the Mini AP Router by connecting the AC power adapter and
plugging it into a power source.
When you power on the Mini AP Router, verify that the Power LED turns on and
that the other LED indicators start functioning as described under “LED
Indicators” on page 1-3.
4.
Set up wireless devices by pressing the WPS Set button on the Mini AP Router
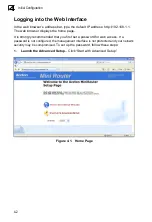
or by using the web interface. See “Initial Configuration” on page 4-1 for more
information on accessing the web interface.
Caution:
Use ONLY the power adapter supplied with the Mini AP Router. Otherwise, the
product may be damaged.
Bridge Mode
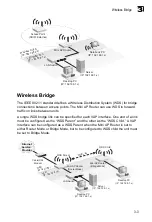
In Bridge Mode, the Mini AP Router operates as a wireless access point, extending
a local wired network to associated wireless clients (PCs or notebooks with wireless
capability). From any nearby location, you can then make a wireless connection to
the Mini AP Router and access the wired network resources, including local servers
and the Internet.
In Bridge Mode, the Mini AP Router does not support gateway functions on its WAN
port. Both the LAN port and the WAN ports can be connected to a local Ethernet
LAN.
Note:
Bridge Mode is not the factory default mode and must be manually set using the
web management interface.
Summary of Contents for MR3202A
Page 1: ...WA6102 ZZ MR3202A IEEE 802 11b g Mini AP Router User Guide ...
Page 2: ......
Page 3: ...User Guide Guide 802 11b g Mini AP Router IEEE 802 11b g Wireless Router ...
Page 4: ...MR3202A E062007 EK R01 149100038500E ...
Page 14: ...Installation 2 4 2 ...
Page 18: ...Network Planning 3 4 3 ...
Page 73: ......


