background image

Next, follow the instructions in Getting Started to begin using your scale. To take full advantage 

of the Pyxis’s many features, carefully read through the manual, which contains step-by-step 

procedures, examples, and other information.

Warning: Incorrect handling of this product could result in personal injury or physical damage.

The instructions in this user manual apply to the Acaia Pyxis. You have purchased a quality 

precision weighing scale that requires handling with care. Make sure to read through this user 

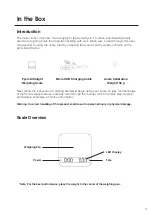
manual prior to using the scale. Start by checking that your Acaia Pyxis box contains all the 

parts listed below:

In the Box

Introduction

Scale Overview

Pyxis Ultralight 

Weighing Scale 

Micro USB Charging Cable

Acaia Calibration 

Weight 100 g

3

*Note: For the best performance, place the weight in the center of the weighing pan.

Weighing Pan

LED Display

Power

Tare

Summary of Contents for AC002

Page 1: ...Acaia Pyxis User Manual FW 1 0 019 AC002...

Page 2: ...Units Product Care Information Battery Charge Calibration Care and Cleaning Mode Introduction Mode 1 Weighing Mode Mode 2 Dual Display Mode Mode 3 Auto Start Mode Configuration Appendix Button Functi...

Page 3: ...uctions in this user manual apply to the Acaia Pyxis You have purchased a quality precision weighing scale that requires handling with care Make sure to read through this user manual prior to using th...

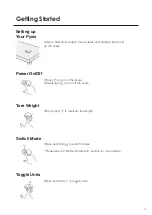
Page 4: ...ct a horizontal surface that is stable and vibration free to set up the scale Press to turn on the scale Double tap to turn off the scale Short press to tare zero the weight Press and hold to switch m...

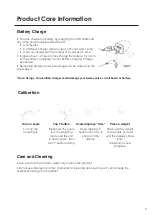
Page 5: ...e the scale is in the weighing mode and the unit is set to gram then tap T button rapidly Keep tapping T button until CAL is shown on the display Place a 100 g weight on the scale and wait until the d...

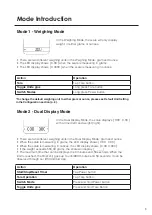
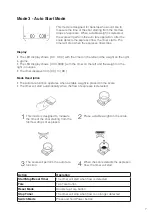
Page 6: ...display shows 0 00 0 000 If the weight exceeds 500 00 grams the scale will display _ _ _ _ The maximum time that can be displayed is 9 minutes and 59 seconds When the limit is reached the timer still...

Page 7: ...right in ounces The timer displays from 00 to 99 Display Mode Description This mode is designed to measure the time of the shot starting from the first few drops of espresso The scale will perform th...

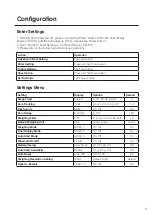
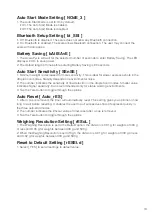
Page 8: ...d Tare button Exit Settings Tap Power button Setting Display Options Default Sleep Timer SLEEP 5 10 20 30 60 Off 5 Zero Tracking trAcE 0 5 d 1 d 2 d 3 d Off 1 d Key Sound bEEP On Off On Zero Range O r...

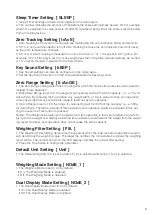
Page 9: ...is By pressing the Tare button any weight within 10 g is zeroed out by zero operation while any weight that lies outside the range is tared out by tare operation 3 If Zero Range is set to 100 the rang...

Page 10: ...the sensitivity of ow detection in the droplet icon modes Smaller value indicates higher sensitivity but is recommended only for stable working environments 3 Tap the Tare button to toggle through the...

Page 11: ...ettings Menu tap to go back to Modes Tare Button Tare Tap to perform tare operation Toggle units Long press to switch between gram and ounce in Weighing Mode Switch option While in Settings tap to adv...

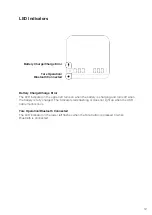
Page 12: ...tery is fully charged The indicator starts flashing or does not light up when the USB cable malfunctions Tare Operation Bluetooth Connected The LED indicator on the lower left flashes when the Tare bu...

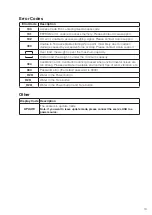
Page 13: ...Over load the weight is over the maximum capacity Under load the weight is under the minimum capacity 304 Calibration error Calibration cannot proceed when environmental noises are too strong Please...

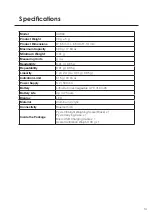
Page 14: ...05 g Linearity 1 d 2 d d 0 01 g 0 05 g Indication Limit 515 g 18 16 oz Power Supply 5 V 500 mA Battery Lithium ion rechargeable 3 7 V 310 mAh Battery Life Up to 7 hours Display LED Material Aluminum...

Page 15: ...l rights reserved No part of this manual may be reproduced processed duplicated or published in any form by photocopying microfilming reprinting or any other method in particular electronic means with...

Reviews: