Recording
104
Record
Setting up
Open the main menu and click on record:
Schedule
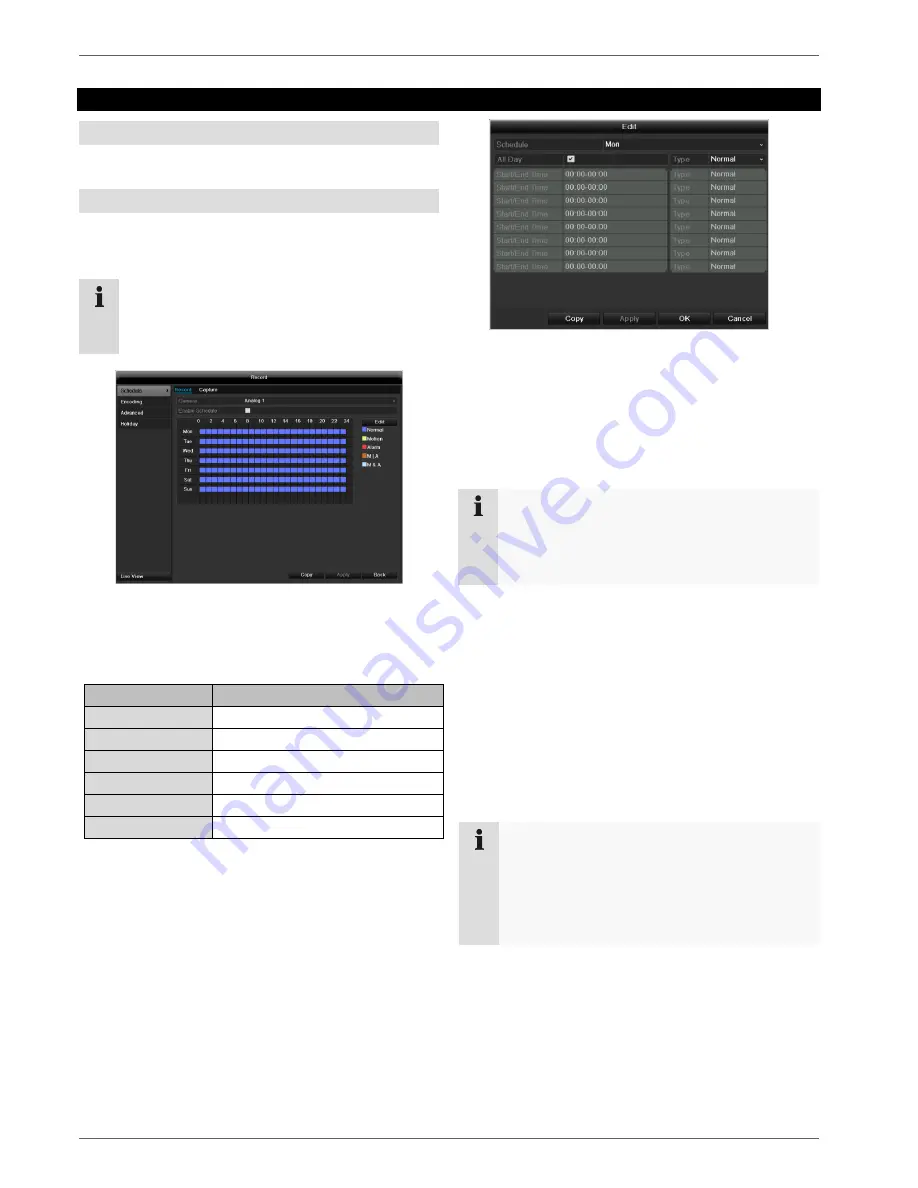
The schedule is used to specify the recording times and
triggers (recording type) for the cameras. Click on the
“Schedule” tab:
Note
Because there is no difference between the set-
tings for the TABs record and instant image, these
are only listed once.
In the OSD, the hours of the respective days are listed
from left to right (the days are listed from top to bottom).
A colour key is shown underneath the days (i.e. the re-
cording periods in the schedule are shown in colour ac-
cording to the trigger (recording types)).
Colour symbol
Key
Blue
Normal recording: Period in hours
Yellow
Motion detection
Light blue
Motion detection and alarm
Red
Alarm
Grey
No selection
Brown
Motion or alarm
Select the camera and click on the check box
Ena-
ble Schedule.
Click on
Edit
to specify the type and duration of the
time plan
1. Define the day to be set in the pull-down menu at
‘Schedule’.
2.
Activate/deactivate ‘All day’. If the full day is active, no
definite times can be entered as the setting is now
valid for the whole day.
3.
To make specific time settings, deactivate the “All
Day” box.
4. Specify the recording type in the drop-down menu:
Time
Motion detection
Alarm
Motion detection or alarm
Motion detection and alarm
5. When making a specific time setting, you can define
up to 8 time periods (each from 00:00 to 24:00). The
times in the individual periods must not overlap.
Note
The “Time” recording type defines the time win-
dow where a recording is made.
The other events (e.g. motion detection and/or
alarm) only trigger the recording after the specific
event has occurred.
At
Copy
you can take on this setting for other days or
the whole week.
6. Finalize your settings in the record screen with
Apply
and then
OK.
Application example
Recording should run from 11:00 to 07:00. 2 time
zones must be set up for this:
1. 11:00 AM - 24:00PM
2. 00:00 AM - 7:00 AM
Summary of Contents for TVHD80120
Page 3: ...Geräteübersicht 3 Geräteübersicht Rückseite Vorderseite Siehe S 4 ...
Page 6: ...Fernbedienung TVAC40930 ...
Page 56: ...Technische Daten 56 HDMI CVBS VGA CVBS HDMI only VGA only CVBS only ...
Page 62: ...ABUS 16 channel HD SDI digital recorder TVHD80120 User guide Version 1 0 ...
Page 67: ...System operation 67 Remote control TVAC40930 ...
Page 69: ...System operation 69 ...
Page 120: ...GlossaryTechnical data 120 HDMI CVBS VGA CVBS HDMI only VGA only CVBS only ...
Page 126: ...ABUS 16 kanaals HD SDI digitale recorder TVHD80120 Gebruikershandleiding Version 1 0 ...
Page 128: ...Overzicht 128 Overzicht Achterkant Voorzijde ...
Page 131: ...Bediening van het systeem Afstandsbediening TVAC40930 ...
Page 183: ...Technische gegevens 183 HDMI CVBS VGA CVBS HDMI only VGA only CVBS only ...
Page 189: ...ABUS Enregistreur numérique HD SDI 16 canaux TVHD80120 Notice d utilisation Version 1 0 ...
Page 191: ...191 Vue d ensemble de l appareil Panneau arrière Face avant ...
Page 194: ...Commande du système 194 Télécommande TVAC40930 ...
Page 245: ...Spécifications techniques 245 HDMI CVBS VGA CVBS HDMI only VGA only CVBS only ...
Page 251: ...251 ABUS 16 kanal HD SDI digitaloptager TVHD80120 Betjeningsvejledning Version 1 0 ...
Page 253: ...Oversigt over apparatet 253 Oversigt over apparatet Bagside Forside ...
Page 256: ...Systembetjening 256 Fjernbetjening TVAC40930 ...
Page 308: ...Tekniske data 308 HDMI CVBS VGA CVBS HDMI only VGA only CVBS only ...
Page 314: ...ABUS 16 kanałowa nagrywarka cyfrowa HD SDI TVHD80120 Instrukcja obsługi Wersja 1 0 ...
Page 316: ...Przegląd urządzenia Przegląd urządzenia Widok z tyłu Przód ...
Page 369: ...Dane techniczne 369 HDMI CVBS VGA CVBS HDMI only VGA only CVBS only ...
Page 375: ...ABUS 16 канальный цифровой рекордер HD SDI TVHD80120 Инструкция по эксплуатации Version 1 0 ...
Page 377: ...Обзор устройства 377 Обзор устройства Обратная сторона Вид спереди ...
Page 380: ...Системное управление 380 Пульт управления TVAC40930 ...
Page 432: ...Технические характеристики 432 HDMI CVBS VGA CVBS HDMI only VGA only CVBS only ...


