15
Inserting HDDs
This system supports two 2.5
”
hard disk drives,
and you can add hard disk drives to expand
your storage size as you need. Also, you can use
these two drives to make RAID configuration or
hot-swap hard disk drives while the system is
operating. Please follow the instructions to
setup your hard disk drives:
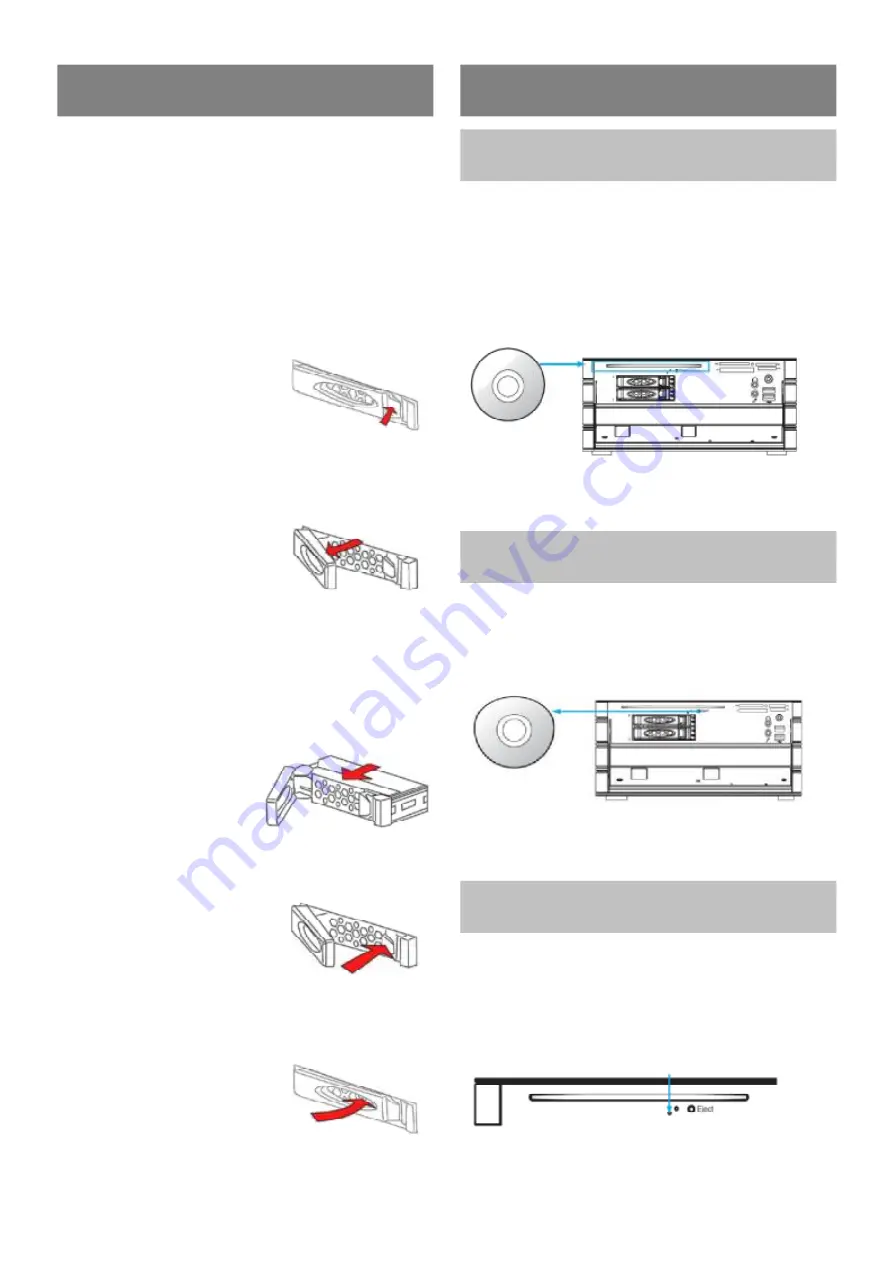
Step1. Push the blue clip to
release the drive to
eject the installed
hard disk drive
cage.
Step2. Hold the black bar
to pull the hard disk
drive out from the
tray.
Step3. You can follow the similar way to add or
remove hard disk drives. When you add
or replace a hard
disk drive, do the
following steps
to fix the drives.
Step4. Push the hard disk
drive back into the
ray, press and hold
the blue clip.
Step5. Push the black bar
back to the position,
then release the blue
clip to fix the hard disk drive.
Inserting/Removing Discs
Inserting Discs
Step1. Press power button to turn on the server.
Step2. Place the disc into the slot-in optical
drive, then the disc will be loaded
automatically.
Eject Discs
Step1. Press the eject button to release disc.
Step2. Remove the disc from the optical drive.
Manually Eject Discs
Step1. Make sure your system if off.
Step2. Locate the manual ejecting hole as
shown in the images below.


