Abilia VocaFlex Colour User Manual Download Page 16

16 

RECHARGING AND CHANGING THE BATTERIES 

 
You must use the battery charger included with your 

VocaFlex® Colour 

for charging. 

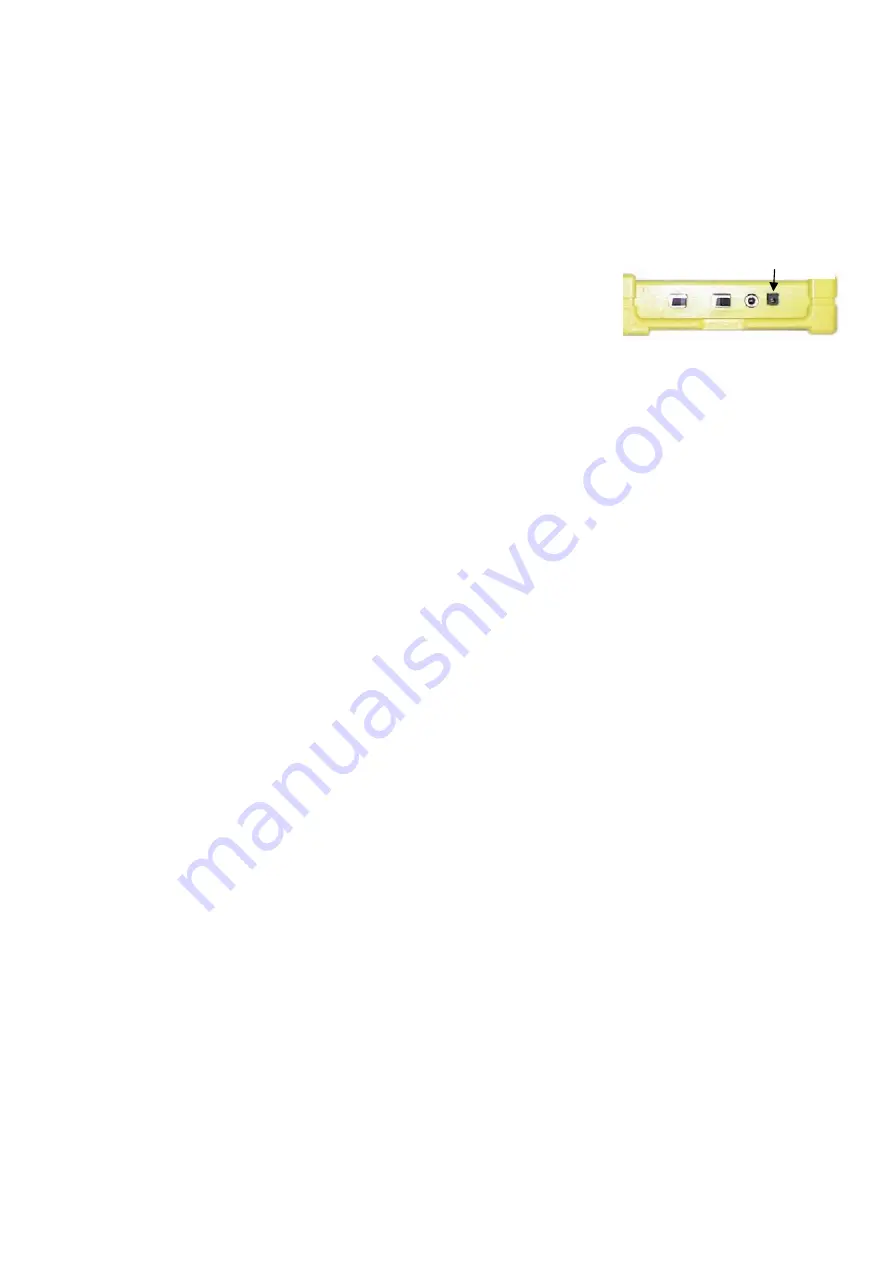
Recharge the batteries by plugging the battery charger in the input for charging on the 
back of 

VocaFlex® Colour 

(see illustration). The charging time is 4 hours for flat 

batteries. 
LED number 2 (see illustration page 9) will start flickering red 
when the batteries are nearly flat. It is now time to plug in the 
battery charger. If the batteries are 

flat 

when you connect the 

charger, LED number 2 (see illustration page 9) will start 
flickering red when the batteries are nearly discharged. It is 
now time to plug in the battery charger. If the batteries are 

discharged 

when you connect 

the charger, LED number 2 will light red and will continue to light red until the batteries 
are fully recharged (approximately 4 hours). When the batteries are fully charged, the 
LED will turn green. If the batteries are 

not

 discharged when you connect the charger, 

you will have to press one of the keys on the user panel to check if the charging has 
started – if so, LED number 2 will light red. If the LED is not lighting at all, it is because 
the plug is not connected properly to the 

VocaFlex® Red.

  If the led is lightening green, 

the


batteries are fully charged. The LED lights red until the batteries are fully recharged. 

We recommend you to recharge the 

VocaFlex® Red 

every night so that it is ready for 

use in the morning. You can recharge the batteries even when they have not been used 
much, without causing any damage to them 
 
When changing the battery use only the combined battery and battery compartment that 
is meant for the VocaFlex. A new battery pack can be purchased from your VocaFlex 
supplier. 
It is possible to use an alkaline battery as well.  This could be useful as a backup if it is 
inconvenient to charge the VocaFlex battery. This is not recommended, though, because 
of the danger of accidentally charging this battery. 
 

Decontamination Procedure 

There may be a requirement to decontaminate a 

VocaFlex® Colour 

and/or associated 

equipment after use to reduce the risk of infection transmission to other people. The 
following decontamination procedure is recommended for this type of low-risk equipment:  

  clean the external surfaces with a disposable paper wipe moistened with warm 

detergent solution.   

  Allow the surfaces to dry.   

  Wipe the surfaces with a commercially-available alcohol-impregnated disposable 

wipe. 


ENVIRONMENT: 

When it is time to discard the 

VocaFlex® Colour 

or the batteries, you must treat it as 

special waste or return it to your supplier. The 

VocaFlex® Colour 

packaging can be 

recycled as regular paper waste.  
 

Input for charging 

Summary of Contents for VocaFlex Colour

Page 1: ...VocaFlex Colour User manual...

Page 2: ...CH 9 In general 9 How to record 10 Recording speech in single keys 10 Recording speech in sequence 10 Interrupted recording 11 PLAYING SPEECH 11 Playing speech messages using single keys 11 Playing sp...

Page 3: ...Deleting all speech messages in VocaFlex Colour 15 BATTERIES 15 RECHARGING THE BATTERIES 16 DECONTAMINATION PROCEDURE 16 ENVIRONMENT 16 EXTRA EQUIPMENT 17 TROUBLE SHOOTING 18 TECHNICAL SPECIFICATIONS...

Page 4: ...kills can change SmartGuides and administer VocaFlex Colour on their own Just like with other communication aids the user may activate the recorded speech by pressing keys which contain recorded speec...

Page 5: ...inate both sides of the overlay do not laminate the side with the barcode GETTING STARTED You are recommended to read the whole user manual before you start making overlays and recording messages Howe...

Page 6: ...ficult to do it incorrectly Small magnets on VocaFlex Colour keep the SmartGuide in place and they make sure the SmartGuide doesn t fall off during transportation The magnets are not strong enough to...

Page 7: ...per on the laminate Glue the laminate on the overlay on the side with the pictures text symbols Mount the overlay on the SmartGuide with the laminate against the glue on the SmartGuide Do not glue lam...

Page 8: ...tch for changing the volume is on the back of the VocaFlex Colour The volume switch is raised LED Number 1 Recording and Playing When you press a key that contains recorded speech the LED will illumin...

Page 9: ...tionally activating and erasing pre recorded messages RECORDING SPEECH Instructions on how to record speech are also printed on the back of VocaFlex Colour In general It is important to hold the VocaF...

Page 10: ...essage Hold the loudspeaker approximately 15 cm from your mouth Hold it at a slight angle Read the message Release the key Set the record play switch to Play Check that the recording was satisfactory...

Page 11: ...speech messages using single keys Make sure the record play switch is set to Play Press the desired key The green LED will light until the message has been played Switch position for playing recorded...

Page 12: ...d for persons who tend push repetitively You will therefore find a ServiceGuide included with the VocaFlex Colour for setting Hold down delay and Release delay Hold down delay Hold down delay is the d...

Page 13: ...1 second MEMORY AND CHOOSING OVERLAYS Each SmartGuide can be combined with overlays with maximum speech duration of 10 or 20 seconds per field In order to save the memory of the VocaFlex Colour you ar...

Page 14: ...ording a new message over it You may also record silence to delete an existing message Using this procedure will not free up any memory Deleting all speech messages in a SmartGuide An overlay labelled...

Page 15: ...able Lithium ion batteries with a capacity of 600mAh or 8 4 V VocaFlex Colour uses 0 6 mAh in stand by modus 50 mAh when playing and 75 mAh when recording If the VocaFlex Colour is not in use the batt...

Page 16: ...en the batteries are fully charged The LED lights red until the batteries are fully recharged We recommend you to recharge the VocaFlex Red every night so that it is ready for use in the morning You c...

Page 17: ...FingerGuides Falck SmartGuide 4 locations Falck SmartGuide 8 locations Falck SmartGuide 16 locations Falck 3553 PointingBook Complete set with introduction cards notepad plastic pockets with room for...

Page 18: ...too far apart from the sound source during recording The microphone was covered during recording Set the Volume switch to 2 or 3 Hold VocaFlex Colour approximately 20 cm from the sound source and a l...

Page 19: ...s no bar code The bar code on the overlay is damaged The SmartGuide is improperly placed on the VocaFlex Colour The overlay is improperly placed in the SmartGuide The batteries are empty Hold down del...

Page 20: ...our Universal Black 128 min Falck VocaFlex Colour 4 fields Red 32 min Falck VocaFlex Colour 8 fields Yellow 64 min Falck VocaFlex Colour 16 fields Blue 128 min Overlays 51 pieces for adjusting individ...

Reviews: