Page 8
Infinity S_Dual V_old_QSG
Version 4.0
© 2021 ABB. All rights reserved.
Step 6 –
Set Controller Signals
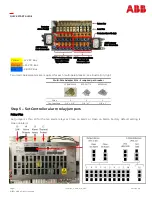
Connect per site engineering instructions.
Pulsar Plus
-
Connect to J2, J3, J4, and J5.
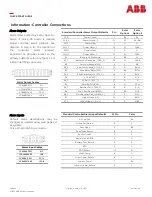
See Information Controller Connections & Information Battery Connections.
Step 7 – Installation of Power Modules (Rectifier / Converter)
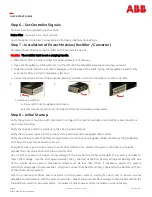
Universal Power Shelves accept rectifier and converters in any slot
Caution:
The rectifier latch is not a carrying handle.
1. Slide the rectifier into the rectifier slot approximately ¾ of the way.
2. Open the faceplate by sliding the latch to the left until the faceplate releases and swings outward.
3. Slide the rectifier into the slot until it engages with the back of the shelf. Swing the faceplate closed to fully
seat the rectifier. Verify the faceplate is latched.
4. Correct insertion of the rectifier will automatically add the unit to the controllers
’
inventory of units.
Step 8 –
Initial Startup
Verify the system is mounted with minimum 3 inch gap in the rear for ventilation and rectifiers and converters
use forced air colling.
Verify the chassis and DC return bus to the site ground reference.
Verify the AC power input circuits to the system positions and is equipped with rectifier.
Verify the positive cables of battery string to battery return bus and negative cables of battery string to Battery
HOT bus of the system as shown in step 4.
Energize the AC input circuits and slot one rectifier module only. Wait for the system controller to energize,
establishing communication with the slotted rectifier.
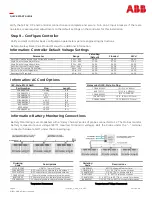
Use a VOM to measure the open string voltage of the first battery string and adjust the system controller to
match that voltage. Use the VOM again between the (
-
) cable(s) of the first battery string and Battery HOT bus
of the Infinity power system. Measured voltage must be less than 0.05V. If necessary, adjust the system
controller voltage again to achieve that. Only then connect that battery string (
-
) cable(s) to the Battery HOT bus
of the Infinity power system.
Slot the remaining rectifiers and converters into the power system, waiting for each unit to power up and
establish communication with the system controller. Adjust the controller float voltage to the desired setting for
the batteries used in the power system. Complete all other power system installation work necessary.
To remove a rectifier:
A. Open latch fully to release and remove.
B. Enter Inventory section of controller and remove hardware to clear alarm.
1.
2.
3.
QUICK START GUIDE


