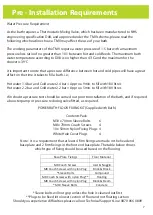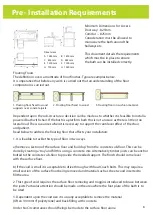
Panel Fixing
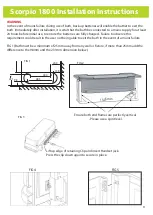
The bath shell comes complete with the outer upper panels fitted. These should fit outside the inner
lower panels and should not touch them. Note: if the upper and lower panels touch, marking will occur.
Adjustment is possible on the bayonet clip if required.
Inner Panel Fitting
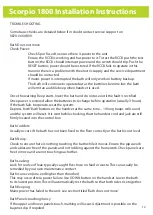
Offer the corner inner end panels (right and left) up to the bath and secure
using the M4 x 12mm white plastic topped machine screws
supplied (Fig. a) Screw through holes in panels and into
the rivnuts positioned in the frame uprights.
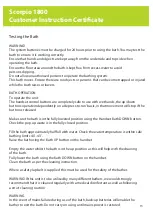
Use the white plastic binding fixings (Fig. b) to secue the inner panels together.
There will be one half of the screw assembly already bonded in each hole. Use
a quantity of 2 to connect the right corner inner panel to the left corner inner panel.
Use a quantity of 2 to connect the inner centre panel to the right and left corner
panels either side.
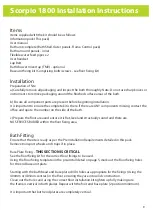
Sliding Panels
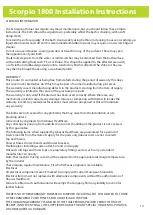
The Bath will be delivered with the sliding bracket metal-work
assembled (Fig. c)
This assembly will be fixed to the bath using 2
M8 Hex bolts through the slots and into the threaded
holes in the bath support bars.
It is important that the plate is square to the support
bars as it is crucial that the sliding brackets are
parallel to the sliding panel. If not the
panel will not rise and
fall as intended.
Scorpio 1800
Customer Instruction Certificate
Testing the Bath
WARNING!
The system batteries must be charged for 24 hours prior to using the bath. You may test the
bath to ensure it is working correctly.
Ensure that hands and objects are kept away from the underside and topside when
operating the bath.
Ensure the floor area around the bath is kept free from excess water to avoid
persons slipping.
Do not allow unauthorised persons to operate the bathing system.
This bath moves. Ensure there are no objects or persons that can become trapped or injured
while the bath raises or lowers.
BATH OPERATION
To operate the unit:
The handset control buttons are completely safe to use with wet hands, the up/down
buttons operate independently on a ‘depress-to-run’ basis, in that movement will stop if the
button is released.
Make sure the bath is in the fully lowered position using the Handset Bath DOWN button.
Check the pop up waste is in the fully closed position.
Fill the bath approximately half full with water. Check the water temperature is within safe
bathing limits 40˚-43˚.
Raise the bath using the Bath UP button on the handset.
Empty the water whilst the bath is in the up position as this will help with the draining
of the bath.
Fully lower the bath using the Bath DOWN button on the handset.
Clean the bath as per the cleaning instruction.
Where a safety lap belt is supplied this must be used for the safety of the bather.
WARNING! If this unit is to be utilised by many different bathers, we would strongly
recommend that it is cleaned regularly with a medical disinfectant as well as following
a strict cleaning routine.
WARNING
In the event of mains failure during use of the bath, back-up batteries will enable the
bather to exit the bath. Do not carry on using until mains power is restored.
13


