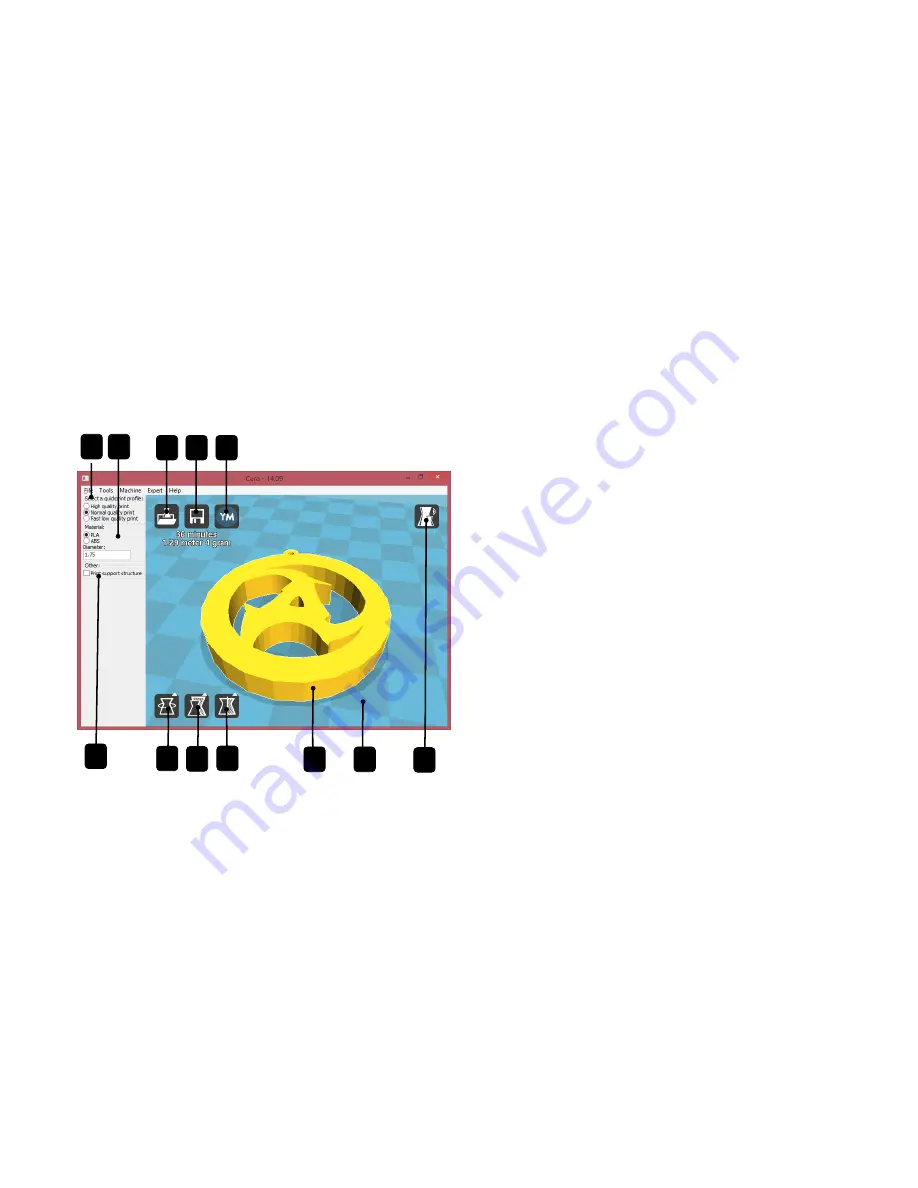
CURA SOFTWARE INTERFACE
This is the main screen of Cura. Here you can choose which
object or objects to print. And how you want them to be printed.
1. Load file
Click this button to load an object to your print area. You can add
as many objects as you can fit on the plate.
2. Save tool path (SD)
When you press this button the prepared tool path will be saved
on the SD card.
3. Share on YouMagine.com
Through this button you can share your 3D files on YouMagine.
4. Menu bar
In this bar you can change to Full settings, preferences and more
expert settings.
5. Print type profiles
1
2
3
4
5
5
8
12
7
11
9
10
Summary of Contents for AAKARv2
Page 1: ...USER MANUAL...
Page 3: ...Welcome to AAKAR v2...
Page 9: ...Graphic LCD Push and rotate button Play Pause Button...
Page 10: ...Print head cable Extruder face panel Mounting guides Filament inlet Extruder cold end fan...
Page 11: ...GETTING STARTED WITH SOFTWARE...
Page 20: ...GETTING STARTED WITH HARDWARE...
Page 38: ...MAINTAINANCE...
Page 45: ...Good luck from Aakar Team...


