18
19
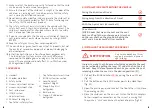
11. Make sure that the buckle is correctly fastened so that the child
can be quickly freed in case of emergency.
12. Ensure that no part of the child seat is caught in the door of the
vehicle or in a reclining seat. In addition, ensure that the safety
seat is correctly installed and secured.
13. Do not disassemble, modify, or add any piece to the child seat or
harness, as this would seriously affect its basic functioning and
the safety that the child seat provides.
14. the safety seat must remain installed in the vehicle with the
safety belt, even if the child is not seated in the child seat. the
child must never be left unattended while seated in the safety
seat, not even outside the vehicle.
15. If you are in any doubt as to the use or installation of the child
seat, please contact our Customer services by c34 943
833 013
16. Keep the safety seat away from corrosive products.
17. the manufacturer guarantees the quality of its products, but not
the quality of second-hand products or products belonging to
other companies.
18. Instruction illustrations are for informational purposes only.
the child restraint system may contain small differences
compared to the photographs or images in the instruction
manual. these variations do not affect its certification under
ECE regulation r44/04.
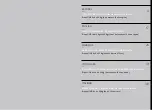
1. ovErvIEW
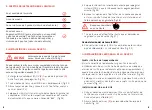
2. INsTAllATIoN PoINTs WIThIN ThE vEhIclE
facing the direction of travel
facing away from the direction of travel
With the 2-point belt (car seatbelt)
on seats with:
IsofIx hooks (between the seat and the seat
back) and Top Tether anchorage points (such as
on the rear shelf, on the ground or behind the
seat) and a 3-point seatbelt (car seatbelt)
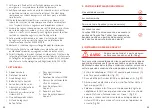
a. headrest.
B. shoulder protectors.
C. safety buckle.
D. harness adjustment button.
E. harness adjustment strap.
F. seat recline lever.
G. IsoFIX system
adjustment lever.
h. Child seat locking pin.
I. top tether safety system.
J. top tether adjustment clamp.
K. IsoFIX system connectors.
l. lever to adjust
headrest height.
M. Group 2-3 vertical
belt guides.
n. Buckle cover.
o. Group 2-3 abdominal
belt guides.
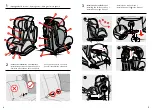
3. INsTAllINg ThE chIld sEAT for grouP 1
only for use with group 1 from
approx. 9 months to 4 years of
age (9-18 kg)
NoTIfIcATIoN
In order to make the child as comfortable as possible, the seat
can be reclined by pulling the lever
(f)
under the front part of
the seat. Keep the lever pressed down as you recline the seat,
releasing it when the seat is in the desired position (3.1).
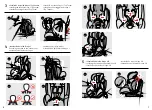
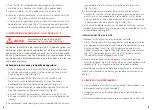
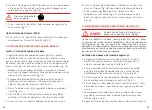
1. pull out the IsoFIX adapters
(K)
by pulling the lever
(G)
out
(fig. 3.2).
2. pull the button on the IsoFIX anchor points to unlock them
(fig. 3.3).
3. open the plastic panel and take out the top tether strap. Close
the panel again (3.4).
4. place the child seat on the car seat. Fasten the IsoFIX adapters
to their respective connectors on the car seat, ensuring that
they make a “click” sound when they lock into place (fig.3.5).


