5
6
Note: Your cup is made from
aluminum. Certain solvents
containing Methylene Chloride and
Trichloromethane are not chemically
compatible with aluminum.
Read, understand and follow all
safety statements as well as wear
appropriate, approved personal
protective equipment per the
applicable MSDS and material
container labels for cleaning solutions.
Set Up Instructions:
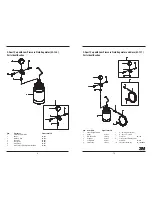
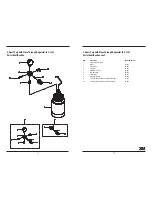
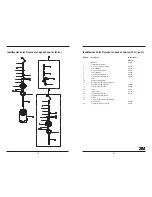
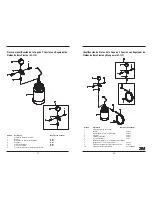
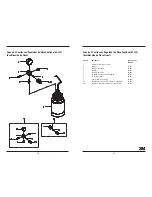
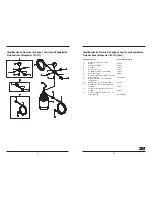
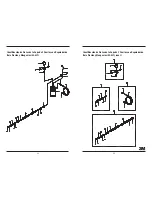
With material in your cup, tighten the lid
and pressure relief screw. Attach your
incoming high-pressure air to the
1
/
4
”
quick disconnect fitting on the regulator.
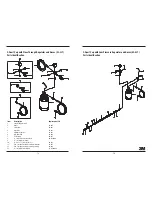
Attach one end of your fluid hose to the
fluid inlet fitting on the spray gun with
a
3
/
4
” open-end wrench. Use a
11
/
16
”
open-end wrench to apply counter force
to the fluid inlet fitting. Attach the other
end of your fluid hose to the cup with
a
3
/
4
” open-end wrench. Use an
11
/
16
”
open-end wrench to apply counterforce
to the 2-Quart fitting.
Installation Notes:
Your gun wrench PN 91-145 or
PN 97-047 can be used in place of all
3
/
4
” wrench references in this booklet.
Note:
Spray solvent through the spray
gun and 2-Quart cup before using it for
the first time.
Note:
Refer to your Spray Gun Owner’s
Manual for component references and
additional set up instructions. Pressure in
the cup should not exceed 50 psi
(3.5 BAR).
Fluid Pressure Range:
Using fluid pressures over 20 psi may
create heavy center effects in the spray
patterns. Changing the fluid nozzle to the
next larger size, then reducing the fluid
pressure will reduce the heavy center
effects in the spray patterns.
Note:
Relieve the pressure from the
2-Quart cup before servicing.
Cup Care and Cleaning
It is important to clean your cup after
every use.
Before removing the cup lid from
the cup, be sure to relieve the cup
pressure through the relief valve.
Unscrew the cup lid and remove the
remaining material from the cup. To
prevent damage to the pressure cup,
never place cup lid in a gun washer
without removing the regulator, gauge
and safety valve. The cup may be
placed in a gun washer, or pour out the
contents, then flush the cup with clean
solvents and wipe it dry.
If not using a gun washer, unscrew
the cup lid and remove the remaining
material from the cup and then rinse
with a suitable solvent.
Note:
Gun washers are designed for
cleaning, not storage of spray equipment.
Cup Installation, Cleaning and Maintenance
Gasket Notes
These cups are pressure cups, therefore
the gasket must be in good condition.
The lid must be firmly seated on the cup
to prevent air and fluid leakage. Inspect
the gasket, lube the gasket channel, and
pay attention to the fit with each use.
Replace the gasket when necessary.
To extend the life the gasket: Clean and
dry gasket surface and store with cup
when not using.
To replace gasket:
1) Pull out the old gasket. Thoroughly
clean surface inside lid.
2) Inspect and clean lid of cup for dried
paint and burrs. Clean with solvent
or ultra-fine steel wool.
3) Place a small amount of petroleum
jelly on finger and lightly rub over
gasket channel inside lid. Carefully
install new gasket. Make sure that
the gasket is seated flat.
4) Tighten lid securely onto cup. Wait a
few minutes, then retighten. This will
ensure positive positioning of gasket
onto lid for optimum seal.
Cup Installation, Cleaning and Maintenance cont.


