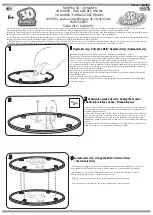
Attach the left side to the front forming an L-shape that
will stand up on its own, then attach one L and one R
connector at the back. Remember to slip the panel
over the vent, and attach the vent with the lip on the
outside of the panel.
The CR-10 Max design adds a side door for easy
access to the extruder. The latch mounts are smaller
than the front, although the magnetic latch attaches
in the same way with wood screws. The parts for
the side door will be in a separate packet.
Attach the door hinges, latch mounts,
strike plates, and the knob, and the
assembly will look like the illustration to
the right. Don’t forget the mid-panel
connectors at the back left and top.
As with the front door, adjust how the
door hangs by loosening the hinge
screws, using the strike plates to hold
the door to the latches, and then
tightening the hinge screws.
The doors do not meet in the middle!
This is because this is where the filament
will feed into the extruder.
Copyright 2021
3DUpfitters LLC12


