


Installing a Fan Tray
41
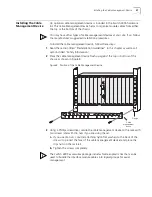
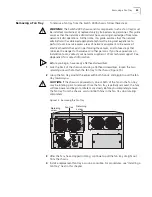
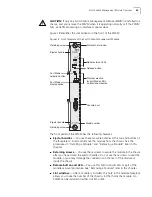
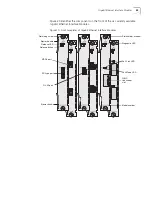
Figure 17 Rear View of a Switch 4005 Fan Tray
4
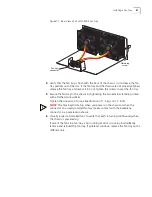
Verify that the fan tray is flush with the back of the chassis; do not leave the fan
tray partially out of the slot. If the fan tray and the chassis are not properly aligned,
remove the fan tray and reseat it. Do not tighten the screws to seat the fan tray.
5
Secure the fan tray to the chassis by tightening the two external retaining screws
with a flathead screwdriver.
Tighten the screws to a Torque Specification of 1.5 kg-cm (1.3 in-lb).
NOTE:
The fans begin rotating when you power on the chassis or when the
connector on a newly inserted fan tray makes contact with the backplane
connector in a powered-on chassis.
6
Visually inspect all installed fans to verify that each is turning continuously when
the chassis is powered up.
If one of the fans in a fan tray is not running at all or is running intermittently,
remove and reinsert the fan tray. If problems continue, replace the fan tray with a
different one.
Fan tray
connector
Retaining
screw
Summary of Contents for 4005
Page 28: ...28 CHAPTER 4 SWITCH 4005 CHASSIS ...
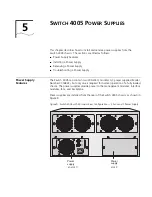
Page 36: ...36 CHAPTER 5 SWITCH 4005 POWER SUPPLIES ...
Page 76: ...76 GLOSSARY ...


