background image

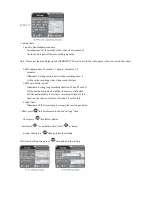
Note: in the state of this mode, you can short press the " led light

" to turn on the light, can be used as a USB

table lamp.

10. PC camera function

> Install the CD driver software at the computer.

> Turn on the camera, after the vibration stopped, please

connect it with the computer, at that time, a " camera" Icon

will be appeared in "my computer", it enters into PC camera

function.

> Using the " third-party" applications software can also view

real-time video of PC camera and save real-time video into

the local computer, e.g. Amcap etc.

Note: in the state of this mode, you can turn on the white LED lights for a better image effect.

11. Charging

> Put the matched AC adaptor into socket, then connect with

camera for Li-battery recharging. The red indicator turns on

when charging, it turns off after the battery is full charged.

The charging time is about 3 hours.

> To avoid the charge time be longer, it is proposed to charge

with the adapter, and the

computer charging is not

recommended.

Note: After connect with charger, camera will turn off automatically after 3 minutes, it's still charging after turns

off.

12. Taking video when charging

Put the AC adaptor into socket, then connect with camera, the camera will turn on automatically and enter into the

standby mode. The red light will constantly on indicating it's charging. In the mean time, each function is still

available for operating.

Note: when the camera turns off automatically, if you want to use it again, disconnect the camera from the adaptor

for about 5 seconds and then connect it again, the camera will restart

13

TV-out function

> Please connect the plug of 2.5' AV cable with the camera’s

TV-OUT port, the yellow plug connect with TV video input

port(yellow), white plug connect with TV audio input

port(white). Please set the signal input according to the user

manual of TV.

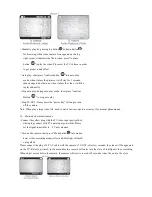
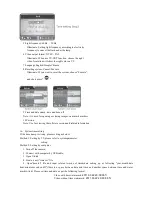
> Turn on camera, after few seconds, the red and blue light

turn on at the same time, the last photo or video will be

appeared on the TV. The interface is shown as picture 1.

Содержание RD32

Страница 1: ...ed for diving Water proof feature makes it possible to take photos and record videos under water up to 20 meters within 180mins With high definition camera lens and low light level sensitivity you wil...

Страница 2: ...g Waterproof cover 8 Camera lens 9 Led indicator 10 USB port 11 TF card port 12 Charging indicator 13 TV OUT port 14 Base stand 15 Stand 16 Tail dot Installation Installation Installation Installation...

Страница 3: ...tion GS Mark German Power Certification CCC Mark China Power Certification PSE Mark Japan Power Certification BS Mark UK Power Certification Notes During the service of power rising of surface tempera...

Страница 4: ...ode transfer key short it will circle in 4 modes Mode1 Manual video recording standby mode blue indicator will be constantly on Mode2 Manual photo taking standby mode red indicator will be constantly...

Страница 5: ...objects it will record video for 10 seconds and save the video automatically then it record next video and loop recording Motion detect recording loop coverage when the TF Card is fully loaded will d...

Страница 6: ...can reduce power consumption Mode3 Turn off all the white LED light Note Press and hold down the led light to turn off all the led functions The camera will shake when it is operated successfully 8 T...

Страница 7: ...ed to charge with the adapter and the computer charging is not recommended Note After connect with charger camera will turn off automatically after 3 minutes it s still charging after turns off 12 Tak...

Страница 8: ...to turn off the camera Note When play a large video file need to wait a few seconds to a minutes it s a normal phenomenon 14 Motion detect monitor mode Connect the yellow plug with the TV video input...

Страница 9: ...system setting please refer system setting instruct Stop motion detect monitor mode Please press the power key to turn off the camera Note 1 During the recording short press Mode button can change vi...

Страница 10: ...rding video when reach this time 3 MD auto delete on off Illuminate Setting loop recording function When TF card is full under the motion detect mode the camera will delete old file automatically to s...

Страница 11: ...Version Note Use for viewing the software version and related information 16 System time setting If the time stamp is wrong please setting as below Method 1 Setting by TV please refer to system param...

Страница 12: ...Parameters Parameters Parameters Parameters Effective Pixels 5 0 Mega CMOS SENSOR Photo format JPG 2560 1920 Video format AVI HD 1280 720 Frames 30fps MD time setting 10sec 1min 5 min 10 min MD loop...

Страница 13: ...indows2000 XP VISTA WIN 7 2 CPU Intel Pentium III processing 667MHZ or equivalent CPU 3 256MB sound card and graphics card support DircetX8 or more advanced version More than a multiple drive a standa...

Отзывы: