


Chapter 7 Home Networking
P-2601HN(L)-F1 Series User’s Guide
115
Every Ethernet device has a unique MAC (Media Access Control) address. The MAC
address is assigned at the factory and consists of six pairs of hexadecimal
characters, for example, 00:A0:C5:00:00:02.
7.3.1 Before You Begin
Find out the MAC addresses of your network devices if you intend to add them to
the Static DHCP screen.
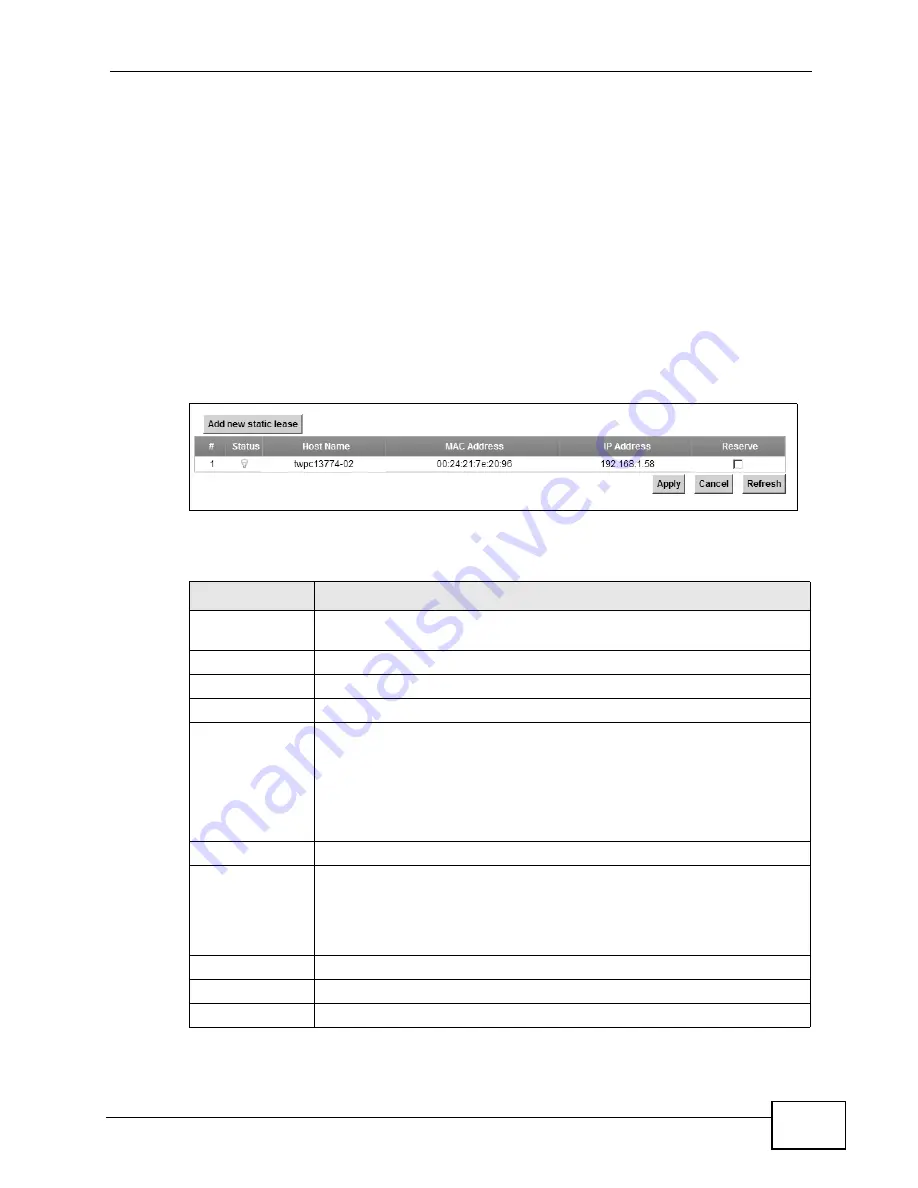
Use this screen to change your ZyXEL Device’s static DHCP settings. Click
Network Setting > Home Networking > Static DHCP to open the following
screen.
Figure 35
Network Setting > Home Networking > Static DHCP
The following table describes the labels in this screen.
Table 21
Network Setting > Home Networking > Static DHCP
LABEL
DESCRIPTION
Add new static
lease
Click this to add a new static DHCP entry.
#
This is the index number of the entry.
Status
This field displays whether the client is connected to the ZyXEL Device.
Host Name
This field displays the client host name.
MAC Address
The MAC (Media Access Control) or Ethernet address on a LAN (Local
Area Network) is unique to your computer (six pairs of hexadecimal
notation).
A network interface card such as an Ethernet adapter has a hardwired
address that is assigned at the factory. This address follows an industry
standard that ensures no other adapter has a similar address.
IP Address
This field displays the IP address relative to the # field listed above.
Reserve
Select the check box in the heading row to automatically select all
check boxes or select the check box(es) in each entry to have the
ZyXEL Device always assign the selected entry(ies)’s IP address(es) to
the corresponding MAC address(es) (and host name(s)). You can select
up to 128 entries in this table.
Apply
Click Apply to save your changes.
Cancel
Click Cancel to restore your previously saved settings.
Refresh
Click Refresh to reload the DHCP table.
Содержание P-2601HN(L)-F1 Series
Страница 2: ......
Страница 8: ...Safety Warnings P 2601HN L F1 Series User s Guide 8 ...
Страница 10: ...Contents Overview P 2601HN L F1 Series User s Guide 10 ...
Страница 19: ...19 PART I User s Guide ...
Страница 20: ...20 ...
Страница 59: ...59 PART II Technical Reference ...
Страница 60: ...60 ...
Страница 110: ...Chapter 6 Wireless P 2601HN L F1 Series User s Guide 110 ...
Страница 130: ...Chapter 8 Routing P 2601HN L F1 Series User s Guide 130 ...
Страница 134: ...Chapter 9 DNS Route P 2601HN L F1 Series User s Guide 134 ...
Страница 178: ...Chapter 16 VoIP P 2601HN L F1 Series User s Guide 178 Figure 81 VoIP SIP SIP Service Provider ...
Страница 202: ...Chapter 16 VoIP P 2601HN L F1 Series User s Guide 202 ...
Страница 206: ...Chapter 17 Logs P 2601HN L F1 Series User s Guide 206 ...
Страница 212: ...Chapter 18 System Monitor P 2601HN L F1 Series User s Guide 212 ...
Страница 220: ...Chapter 21 SNMP P 2601HN L F1 Series User s Guide 220 ...
Страница 232: ...Chapter 26 Backup Restore P 2601HN L F1 Series User s Guide 232 ...
Страница 290: ...Appendix B Setting Up Your Computer s IP Address P 2601HN L F1 Series User s Guide 290 ...
Страница 298: ...Appendix C Pop up Windows JavaScript and Java Permissions P 2601HN L F1 Series User s Guide 298 ...
Страница 322: ...Appendix D Wireless LANs P 2601HN L F1 Series User s Guide 322 ...
Страница 332: ...Appendix F Open Software Announcements P 2601HN L F1 Series User s Guide 332 ...
Страница 344: ...Index P 2601HN L F1 Series User s Guide 344 ...


