background image

Optional

Backing

Plate

ZPass™ MOUNTING SYSTEM

7

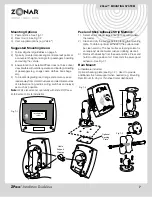
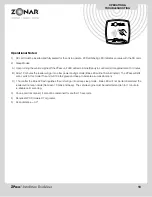
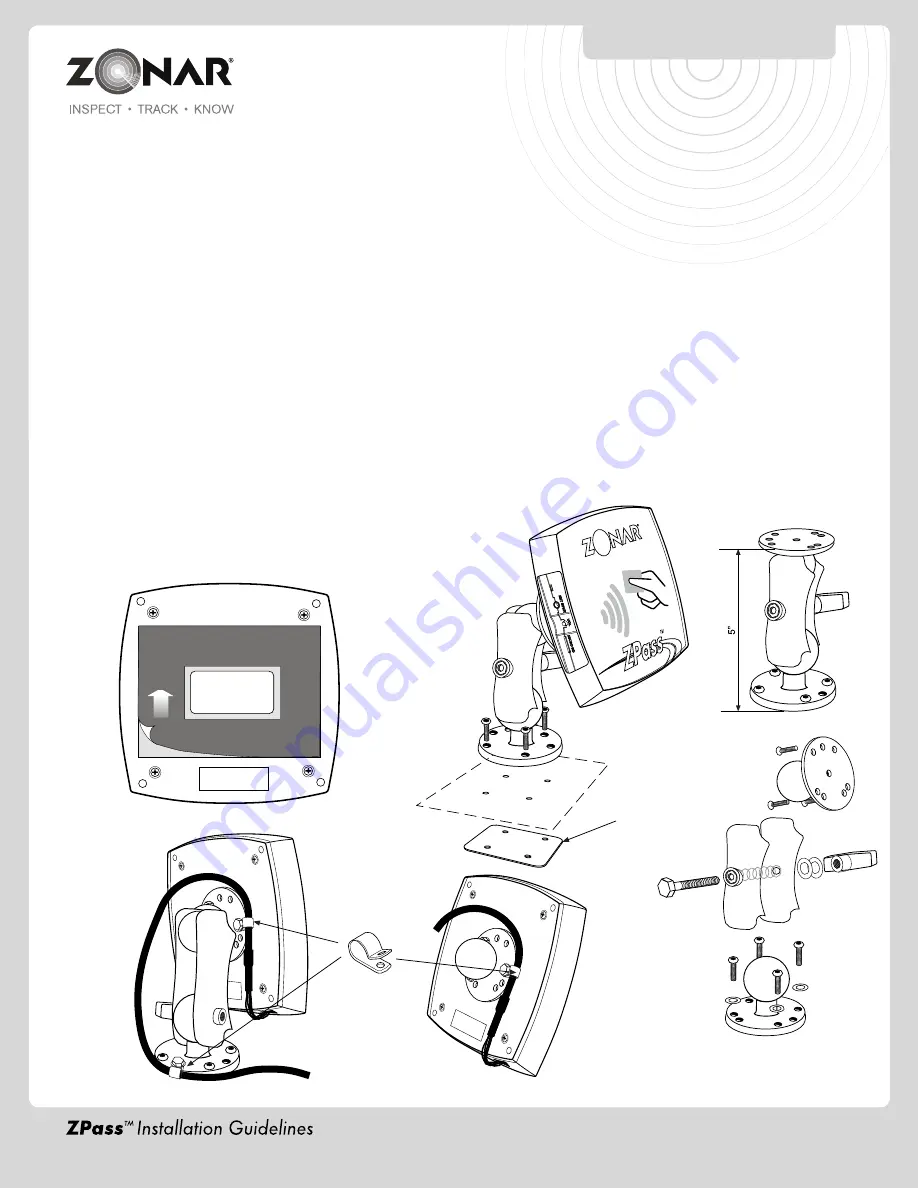
Peel and Stick Adhesive Strip Method:

1) Select a flat surface, large enough to accommodate

the reader.

2) Clean and dry the surface before placing the mounting

plate. To obtain optimum adhesion, the surface must
be clean and dry. The best surface cleaning solvent is
an isopropyl alcohol/water mixture (rubbing alcohol).

3) Remove the backing from the peel and stick. Press and

hold mounting position for 10 seconds to assure good
adhesion. See Fig.7-1

Ram Mount:

All hardware included.
Optional backing plate (see Fig 7-2) - Used to provide
additional structural support when needed (e.g. Mounting
Ram Mount to Vinyl or thin sheet metal dashboard)

Mounting Options:

1) Peel and stick. See Fig 7-1
2) Ram mount. See Fig 7-2
3) User supplied options (e.g. Velcro

®

)

Suggested Mounting Areas:

1) Follow all general guidelines on page 5.
2) Typically mounted at passenger entrance/exit points at

a convenient height and angle for passengers boarding
and exiting the vehicle.

3) Ensure location of installed ZPass does not block driver

view, interfere with vehicle operation and loading/unloading
of passengers (e.g. snags coats, clothes, book bags,
etc).

4) To prevent degrading read range and accuracy, keep

reader away from metal structures and electrical sources
of interference (e.g. radios, wiring, switches and relays)
as much as possible.

Note:

 Verify placement acceptability with state DOT/Law

Enforcement prior to installation.

Fig. 7-1

Fig. 7-2

Fig. 7-3

INFORMATION

LABEL

Cable

Support

Clamps

Содержание ZPass

Страница 1: ...REV 02 28 11 ...

Страница 2: ...e most common installation questions and issues common sense good housekeeping procedures attention to detail safety adherence and technical competence of the professional installer is critical for a successful installation Please refer to your specific vehicle manufacturer guidelines for the installation of electrical components and wiring A professional team of Zonar support technicians and engi...

Страница 3: ...es 5 Schematic 6 ZPass Mounting 7 Operation and Troubleshooting 8 10 www zonarsystems com CONTACT US TODAY CALL TOLL FREE 877 843 3847 EMAIL customercare zonarsystems com 2011 Zonar Systems All rights reserved Products and services protected by one or more patents REV 02 28 11 ...

Страница 4: ...LIGATION UNDER THESE LIMITED WARRANTIES for defective equipment is the repair and replacement of the equipment free of charge by Zonar Zonar shall not be liable to Customer or any third party for any general special punitive incidental indirect or consequential damages or any lost profits or business arising out of Zonar s Subscription Agreement FCC Compliance Statement Part 15 19 This device comp...

Страница 5: ...f power as possible Drill Holes 1 Capture all drill chips during drilling operations Do not allow chips to fall onto equipment furnishings etc 2 Deburr all drill holes on both sides of drilled surface Example deburr tool See Fig 5 1 or visit http www grainger com Grainger items 3VB51 3 All drill holes must have a rubber grommet or similar anti chaffing system installed to protect cable assemblies ...

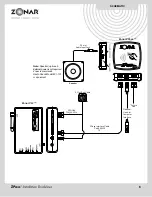
Страница 6: ...optional External power is not required Zonar recommends Radio Shack Model 21 131 or equivalent Speaker 3 5 mm Audio Input Jack ZPass Interface Cable Part 80438 15 Optional Used for Computer Interface Future Use 9 Pin JBus Cable Vehicles Diagnostics ...

Страница 7: ...l or thin sheet metal dashboard Mounting Options 1 Peel and stick See Fig 7 1 2 Ram mount See Fig 7 2 3 User supplied options e g Velcro Suggested Mounting Areas 1 Follow all general guidelines on page 5 2 Typically mounted at passenger entrance exit points at a convenient height and angle for passengers boarding and exiting the vehicle 3 Ensure location of installed ZPass does not block driver vi...

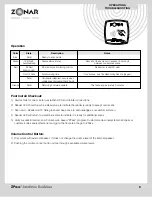
Страница 8: ...and go to the home tab the go to ZPass Volume Control Button 1 Only works with external speaker It does not change the volume level of the internal speaker 2 Pushing the volume control button cycles through 4 available volume levels Color State Description Notes Blue Solid Ready to scan cards Green 1X Blink Successful card scan Rescan of the same card requires 15 seconds Audible Beep between conse...

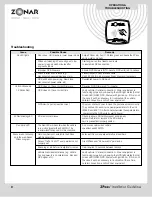
Страница 9: ... device port speed incorrect You must contact Zonar to have the port speed set correctly They will need to send two special parameters to the unit 8065 0 and 8091 1 After Zonar schedules these parameters power cycle the GPS units or wait 4 hours 2X Red Blinking LED SD memory card issue Check to ensure SD card is present and properly seated Reformat or replace if the SD memory card is present and p...

Страница 10: ...will not be illuminated The ZPass will still scan cards in this mode The unit will 1X blink green and beep to indicate a successful scan C 1 hour after the Blue LED extinguishes the unit will go into a deep sleep mode Blue LED will not be illuminated and the reader will not scan cards No Green 1X blink and beep The vehicle engine must be restarted and ran for 1 minute to re enable card scanning 3 ...

Отзывы: