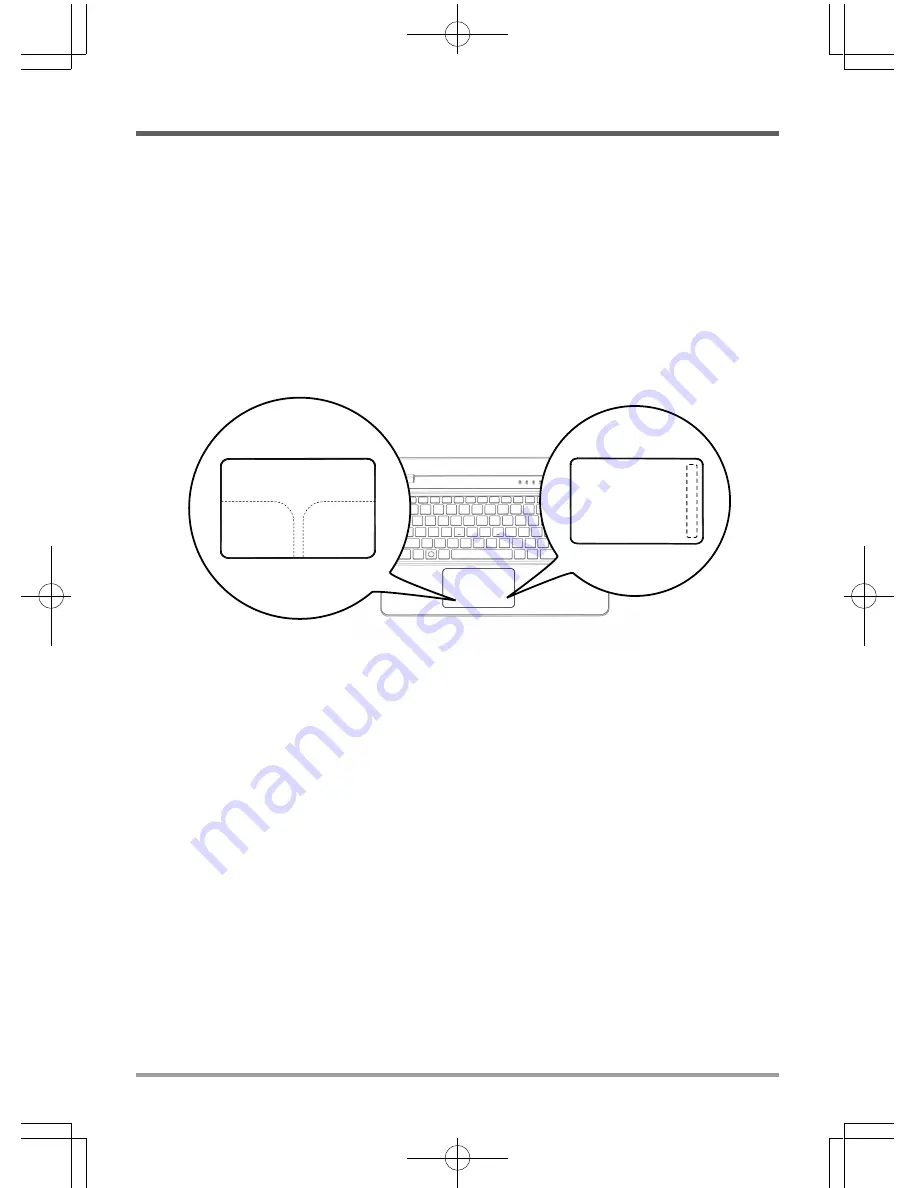
background image

Left button

area

Right button

area

Scroll area

GETTING STARTED

19

USING THE TOUCHPAD

A TouchPad pointing device comes built into your computer. It is used to control the movement

of the pointer to select items on your display panel.

The cursor

Clicking

Clicking means pushing and releasing a button. To left-click, move the cursor to the item you

wish to select, press the left button once, and then i mmediately release it. To right-click, move

the mouse cursor to the item you wish to select, press the right button once, and then immediately

release it. You also have the option to perform the clicking operation by tapping lightly on the

TouchPad once.

Double-Clicking

Double-clicking means pushing and releasing the left button twice in rapid succession. This

procedure does not function with the right button. To double-click, move the cursor to the item

you wish to select, press the left button twice, and then immediately release it. You also have the

option to perform the double-click operation by tapping lightly on the TouchPad twice.

Dragging

Dragging means pressing and holding the left button, while moving the cursor. To drag, move the

cursor to the item you wish to move. Press and hold the left button while moving the item to its

new location and then release it. Dragging can also be done using only the TouchPad. First, tap

the TouchPad twice over the item you wish to move making sure to leave your finger on the pad

after the final tap. Next, move the object to its new location by moving your finger across the

TouchPad, and then release your finger. Using the Scroll bar allows you to navigate through a

document quickly without using the window's scroll bars. This is particularly useful when you

are navigating through on-line pages.

Control works the same way a mouse does, and moves the cursor around the display. It only 

requires light pressure from the tip of your finger. The touchpad includes the left and right 

buttons that function as mouse buttons. The actual functionality of the left and right buttons 

may vary depending on the application that is being used. Finally, the scroll bar allow you 

to navigate quickly through pages, without having to use the on-screen cursor to manipulate 

the up and down scroll bars.

Содержание X501H

Страница 1: ...USER S MANUAL July 2012 ENGLISH X501H Notebook Computer...

Страница 2: ...EFT SIDE OVERVIEW 9 RIGHT SIDE OVERVIEW 10 BACK OVERVIEW 12 BOTTOM OVERVIEW 13 GETTING STARTED 14 Power Sources 14 CONNECTING THE POWER ADAPTERS 14 RECHARGING THE BATTERY 15 Starting Your Notebook 16...

Страница 3: ...pressure on it subject the computer to magnetic fields To prevent possible overheating of the computer s processor make sure you don t block the openings provided for ventilation place on uneven or u...

Страница 4: ...t and never pick up or hold your notebook by the display If you are traveling with your computer remember to carry it as hand luggage Do not check it in as baggage DO NOT place near fire or other sour...

Страница 5: ...D Quick Start Guide or User Guide Depending upon the configuration of your notebook you may also need the following items Dual DVD RW Application CD Super Multi DVD RW Application CD Blu ray DVD RW Ap...

Страница 6: ...BEFORE YOU START 6 Familiarize yourself with the computer OPENING THE DISPLAY PANEL...

Страница 7: ...ront of the notebook Camera Camera The built in HD VGA camera allows you to snap a photo or create a video chat or video conference with just a click Microphone The built in microphone allows for the...

Страница 8: ...d Pointing Device The TouchPad pointing device is a mouse like cursor control with a touch sensitive movement pad Status Indicator Lights The Status indicator lights correspond to specific operating m...

Страница 9: ...rt Memory Card Reader Power status LED LEFT SIDE OVERVIEW The following is a brief description of the left side of the notebook Memory Card Reader Power status LED The memory card reader offers the fa...

Страница 10: ...n of the right side of the notebook USB Ports HDMI Port The HDMI port allows you to connect a video device such as a television a projector or a VCR to your computer HDMI Port LAN RJ 45 Port The LAN p...

Страница 11: ...BEFORE YOU START 11 BACK OVERVIEW The following is an overview of the back of the notebook...

Страница 12: ...ottom of the notebook Fan Outlets These are open ports for the fan to dissipate heat from the computer s internal components Do Reset For system reset power will shutdown not block or place the comput...

Страница 13: ...ng the battery Connecting the AC Adapter 1 Plug the DC output cable into the DC power jack of your notebook PC 2 Plug the AC adapter into an AC electrical outlet Switching from AC Adapter Power to Bat...

Страница 14: ...nt There is danger of explosion of an incorrect battery type is used for replacement For computers equipped with a replaceable lithium ion battery pack the following applies if the battery is placed i...

Страница 15: ...shocks or vibration as you risk damaging the hard disk When you power on your notebook it will perform a Power On Self Test POST to check the internal parts and configuration for correct functionality...

Страница 16: ...Status Indicator GETTING STARTED 16 STATUS INDICATORS The status indicator lights correspond to specific operating modes These modes are Powervv on Suspend status Battery AC Adapter status and hard d...

Страница 17: ...s Lock indicator show you the keyboard case on or off being accessed and if so how fast Suspend Status Indicator Caps Lock Status Indicator Number lock indicator show the Number keyboard on or off Num...

Страница 18: ...s network connection FN F3 Allows you to change your selection of where to send your display video Each time you press the combination of keys you will step to the next choice The choices in order are...

Страница 19: ...on the TouchPad twice Dragging Dragging means pressing and holding the left button while moving the cursor To drag move the cursor to the item you wish to move Press and hold the left button while mov...

Страница 20: ...ove the card from the slot thus eliminating it as a possible cause of failure 4 Make sure that any devices connected to the external connectors are plugged in properly You can also disconnect such dev...

Страница 21: ...nstallation This equipment generates uses and can radiate radio frequency energy and if not installed and used in accordance with the instructions maycause harmful interference to radio communications...

Страница 22: ...MEMO...

Отзывы: