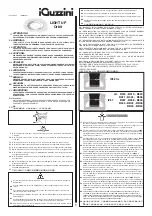
Installation
2.1 Recommendations
WARNING: THE PH PERFECT MUST BE INSTALLED BY AN EXPERIENCED POOL
PROFESSIONAL.
> SHOULD PH PERFECT REQUIRE ANY ELECTRICAL MAINTENANCE ALWAYS DISCONNECT
THE APPLIANCE FROM THE POWER SUPPLY.
>
Before installing the pH Perfect controller, make sure that you have all the components required and
that you have read the instruction manual carefully.
>
Failure to comply with the instructions contained in this manual can be dangerous, cause damage to
the appliance and may void the warranty.
>
While installing the pH Perfect controller, make sure of the following:
• The supply voltage is as indicated on the label attached to the side of the appliance
• The electric installation is compliant with NF C15-100 standards (or equivalent for other European
countries).
• The pressure at the injection point is less than 1.5 bar
• The protective housing on the pump is properly clipped into position
• The suction tube is immersed with the intake pipe in the container of corrective solution to be
injected and is connected to the pump (on the left). Then retighten the nut on the connector
• The inlet tube will then be connected to both the pump (on the right), and the inlet pipe to the
pool through the injection fl ap valve.
>
Do not use hydrochloric acid, use pH corrective products as recommended by your pool specialist.
Zodiac Pool Care Europe cannot be held liable if unsuitable products are used.
2.2 Technical details
Dimension (L - W - H)
240 x 200 x 90 mm
Weight (appliance, sensor, tube and pipes) 1.7 kg
Power feed 50Hz
220-240 V AC/50 Hz
Consumption
12W
Pump fl ow rate
1.5 l/hr
Maximum backpressure
1.5 bar
pH control range
0.0 pH-14.0 pH
Appliance accuracy
+/- 0.1 pH
Calibration of the sensor
Semi-automatic in 2 points (1 point possible)
2.3 Installation diagram
Installation of the pH Perfect on the fi ltration system:
THE DISTANCE BETWEEN THE
SENSOR AND THE INJECTION POINT
MUST NOT BE LESS THAN 60 CM.
The injection point must be the last
element on the return line before the
pool.
Keep the sensor cable away from other
power cables and large pump supply
cables in order to prevent electrical
interference.
The maximum pressure in the pipes must
not exceed 1.5 bar.
To increase the life span of the peristaltic
pipe, the pressure should not exceed
1 bar.
If the pool has a heating system or any
other equipment, they must be situated
after the pH sensor but before the liquid
chlorine injection point.
2
60 cm mini
4
OPTION: NOT INCLUDED I N THE PACKAGING: POD KIT
The “POD Kit” is an accessory used to group together the measurement
sensors when jointly using a pH Perfect and a Zodiac Chlor Perfect (or
other regulation with a 12 mm diameter sensor).
The “POD Kit” includes a multi-diameter fi xing collar (DN 50 mm or DN
63 mm) and a measurement chamber in order to obtain more reliable
results (+ assembly accessories).
The “POD Kit” is available from your reseller.
2.4 Installing the control unit and electrical connections
Install the pH Perfect controller on a rigid support (vertical wall) in an easily accessible place.
The electrical connections for the pH Perfect must be done by an experienced pool professional.
“Standard” pH Perfect electric connection:
2.5 Installing the sensor and the injection point
The sensor must be vertical or up to 45° maximum, and always above the rigid pipe. It must NEVER be
located horizontally or below the rigid pipe.
Correct positions
✔
Incorrect positions
✗
Drill a hole between 16 and 22 mm on the pipe at the location selected for the pH sensor and for the
injection point (see diagram in paragraph 2.3). Next fi t the fi xing collars by aligning them opposite the
drilled holes.
Use the Tefl on
®
tape to make sure that the threads of the sensor holder, injection valve and adapter
are watertight.
CT
220-240 V AC
50 Hz
L
30 mA
N
220-240 V AC
50 Hz
220-240 V AC
50 Hz
5
22
23
EN