background image

ZK-D3180

User Manual

Copyright©2021 ZKTECO CO., LTD. All rights reserved

.

P a g e

|

30

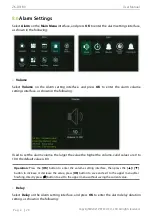
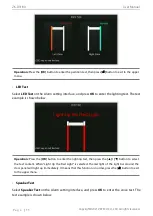
Used to set the length of time for the alarm to ring, the effective value is 1 to 99 seconds, the
default value is 1 second.

Operation:

Press the

[OK]

button to enter the alarm delay duration setting interface, then press the

[

]/ [

]

button to increase or decrease the value, press

[OK]

button to save and exit to the upper

menu after finishing, directly press

[

]

button to exit to the upper menu without saving the current

value.

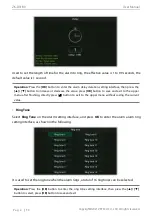
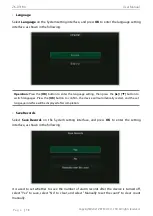
Ring Tone

Select

Ring Tone

on the Alarm setting interface, and press

OK

to enter the alarm alarm ring

setting interface, as shown in the following:

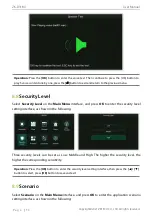
It is used to set the ringtone when the alarm rings, a total of 16 ringtones can be selected.

Operation:

Press the

[OK]

button to enter the ring tone setting interface, then press the

[

]/ [

]

button to select, press

[OK]

button to save and exit.

Содержание ZK-D3180

Страница 1: ...lease read the instructions carefully before operation Follow these instructions to ensure that the product is functioning properly The images shown in this manual are for illustrative purposes only F...

Страница 2: ...ent It is an essential pre requisite for the satisfactory operation and maintenance that the operating and maintenance personnel are fully familiar with the design and that the said personnel have rec...

Страница 3: ...c for better operation and safety of the machine unit equipment The said additions or amendments are meant for improvement better operations of the machine unit equipment and such amendments shall not...

Страница 4: ...nd development of biometric verification procedures and the productization of biometric verification SDK which was initially widely applied in PC security and identity authentication fields With the c...

Страница 5: ...3 1 SAFETY PRECAUTIONS 9 3 2 INSTRUCTIONS TO PEDESTRIANS 9 3 3 INSTALLATION SITE 10 3 3 1 STATIONARY METALLIC ITEMS 10 3 3 2 PORTABLE METALLIC ITEMS 10 3 3 3 FLOOR VIBRATION 10 3 3 4 ELECTROMAGNETIC...

Страница 6: ...PROCEDURE 22 8 1 STANDBY INTERFACE 22 8 2 MAIN MENU 22 8 3 SENSITIVITY ADJUSTMENT 24 8 4 ZONE MODE 26 8 5 CHANNEL SETTINGS 28 8 6 ALARM SETTINGS 29 8 7 AUTO TESTING 33 8 8 SECURITY LEVEL 34 8 9 SCENAR...

Страница 7: ...s courthouses and airports Metal detectors are highly sensitive to magnetic metals and have a high detection capability with less ability to detect non magnetic metals They are used to detect the conc...

Страница 8: ...Manual Copyright 2021 ZKTECO CO LTD All rights reserved P a g e 7 1 3 Components 1 Host 2 Front Beam 3 Rear Beam 4 Alarm Indicator Post 5 Built in Coil 6 Infrared Sensors 7 Waterproof Foot Cover 8 Po...

Страница 9: ...oduct Specifications 2 1 Dimensions Front View Side View 2 2 Technical Specifications Feature Specifications Power DC 12V 3A Operating Temperature 20 C to 55 C Operating Frequency 5 6KHz to 10KHz Dime...

Страница 10: ...dly as it may cause false alarms Do not disassemble the unit without the guidance of a professional technician Each device has a warranty card with which users can have their devices maintained or rep...

Страница 11: ...of at least 1 meter from the sources of electromagnetic radiation or electromagnetic interference The parameters that define the distance are determined by the installation environment and the parame...

Страница 12: ...After reading the precautions and checking the packing list please follow the steps below for installation Step 1 Open the package and then place the left and right door panels on the ground in the di...

Страница 13: ...LTD All rights reserved P a g e 12 Figure 3 2 Step 3 Install the adjustable metal bracket on the host The screws and holes on both sides of the bracket can fix and adjust the display angle of the hos...

Страница 14: ...Open the left and right cover of the front beam push out the lower cover as shown in the figure 3 4 below Figure 3 4 Step 5 Pass the Host Signal Line the Linkage Signal Line and the Network Interface...

Страница 15: ...beam cover connect the host to the front beam with bolts and tighten the screws with two Torx Thumb Screws as shown in the figure 3 6 below Figure 3 6 Step 7 Insert the left and right signal wire plug...

Страница 16: ...rier gate according to the needs to realize the linkage function of the Walk Through Metal Detector and the barrier gate The wiring circuit diagram is shown in the figure 3 8 below Figure 3 8 Step 9 C...

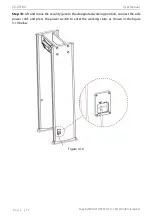
Страница 17: ...CO LTD All rights reserved P a g e 16 Step 10 Lift and move the security gate to the designated working position connect the side power cord and press the power switch to enter the working state as s...

Страница 18: ...assword Protection Only the correct password can change the sensitivity and other parameters The password contains six digits The default factory password is 100000 Digital Pulse Technology Digital si...

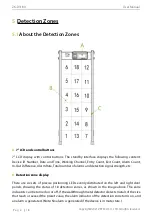
Страница 19: ...e Alarm Rate Total number of alarms and detection signal strength etc B Detection zone display There are six sets of precise positioning LEDs evenly distributed on the left and right door panels showi...

Страница 20: ...hould not alarm when the testing person did not carry any metal items while walking through the detector 2 You can exclude the small portable metal objects such as rings key belt buckle shoes and so o...

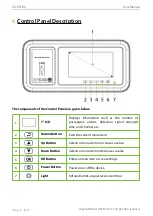
Страница 21: ...mation such as the number of passengers alarms detection signal strength time and channel etc 2 Return Button Exits the current menu item 3 Up Button Selects a menu item or increases a value 4 Down Bu...

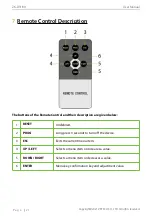
Страница 22: ...of the Remote Control and their description are given below 1 RESET Undefined 2 PROG Long press 3 seconds to turn off the device 3 ESC Exits the current menu item 4 UP LEFT Selects a menu item or incr...

Страница 23: ...wing content Device ID Number Date and Time Working Channel Entry Count Exit Count Alarm Count In Out Difference Alarm Rate Total number and detection signal strength etc 8 2Main Menu In the standby m...

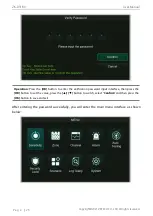
Страница 24: ...ess the OK button to enter the verification password input interface then press the OK button to set the value press the button to switch select Confirm and then press the OK button to save and exit A...

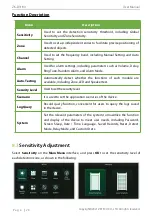
Страница 25: ...Auto Testing Automatically detect whether the functions of each module are available including Zone LED and Speaker test Security Level Usedtosetthesecuritylevel Scenario It is used to set the applica...

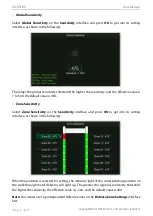
Страница 26: ...he default value is 460 Zone Sensitivity Select Zone Sensitivity on the Sensitivity interface and press OK to get into its setting interface as shown in the following When the partition is selected fo...

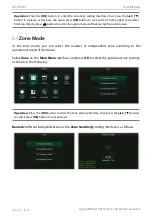
Страница 27: ...the upper menu without saving the current value 8 4Zone Mode In the zone mode you can select the number of independent zone according to the operational needs of the device Select Zone on the Main Me...

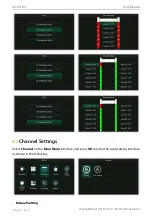
Страница 28: ...nual Copyright 2021 ZKTECO CO LTD All rights reserved P a g e 27 8 5Channel Settings Select Channel on the Main Menu interface and press OK to enter the band setting interface as shown in the followin...

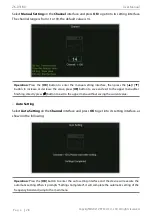
Страница 29: ...r decrease the value press OK button to save and exit to the upper menu after finishing directly press button to exit to the upper menu without saving the current value Auto Setting Select Auto Settin...

Страница 30: ...the following Used to set the alarm volume the larger the value the higher the volume valid values are 0 to 100 the default value is 80 Operation Press the OK button to enter the volume setting interf...

Страница 31: ...the value press OK button to save and exit to the upper menu after finishing directly press button to exit to the upper menu without saving the current value RingTone Select Ring Tone on the Alarm se...

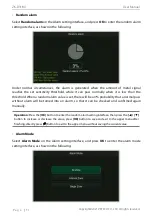
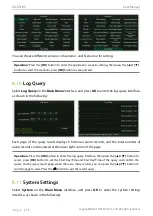
Страница 32: ...shold When a random alarm value is set there will be a n probability that a normal pass without alarm will be turned into an alarm so that it can be checked and confirmed again manually Operation Pres...

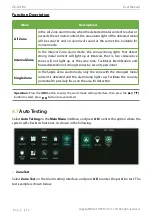
Страница 33: ...same time Facilitates identification and focused detection of stronger zones by security personnel Single Zone In the Single Zone alarm mode only the zone with the strongest metal content is detected...

Страница 34: ...est The test example is shown below Operation Press the OK button to enter the lighting test then press the button to select the test content When Light Up the Red Light is selected the red light of t...

Страница 35: ...Menu interface and press OK to enter the security level setting interface as shown in the following Three security levels can be set as Low Middle and High The higher the security level the higher th...

Страница 36: ...wing Each page of the query result displays 6 historical alarm records and the total number of alarm records can be viewed at the lower right corner of the page Operation Press the OK button to enter...

Страница 37: ...rface and press OK to enter the password setting interface as shown in the following Operation Press the OK button to enter the password setting interface then press the button to select Press OK butt...

Страница 38: ...the screen hibernation setting then press the button to select Press OK button to save and exit to the upper menu after finishing Date Time Select Date Time on the System setting interface and press...

Страница 39: ...e button to switch languages Press the OK button to confirm the device will automatically restart and the set language interface will be displayed after completion Save Records Select Save Records on...

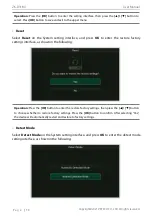
Страница 40: ...ess OK to enter the restore factory settings interface as shown in the following Operation Press the OK button to enter the restore factory settings then press the button to choose whether to restore...

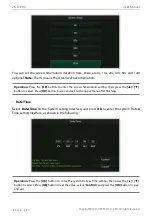
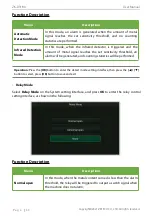
Страница 41: ...aches the set sensitivity threshold an alarm will be generated and counting statistics will be performed Operation Press the OK button to enter the detect mode setting interface then press the button...

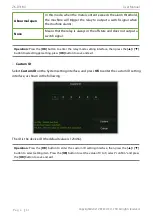
Страница 42: ...s the OK button to enter the relay mode setting interface then press the buttonto select trigger setting press OK button to save and exit Custom ID Select Custom ID on the System setting interface and...

Страница 43: ...e System Password 100000 Global Zone Sensitivity 460 Channel 14 Alarm Volume 80 Alarm Delay 1 0 s Alarm Ringtone Ring tone 1 Random Alarm 0 Alarm Mode All Zone Security Level High Application Area Non...

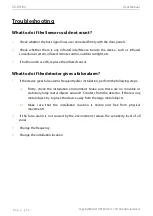
Страница 44: ...nsor What to do if the detector gives a false alarm 1 If the device gives false alarms frequently after installation perform the following steps a Firstly check the installation environment Make sure...

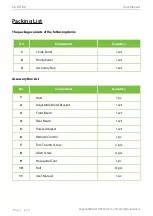
Страница 45: ...nent Quantity 1 L Side Panel 1 set 2 R Side Panel 1 set 3 Accessory Box 1 set Accessory Box List No Component Quantity 1 Host 1 pc 2 Adjustable Metal Bracket 1 set 3 Front Beam 1 set 4 Rear Beam 1 set...

Страница 46: ...er 3 This card will be regarded as invalid if the details are not filled in three guarantees column and the acknowledgment of the receipt Please confirm whether the data filled in the three guarantees...

Страница 47: ...ZK D3180 User Manual Copyright 2021 ZKTECO CO LTD All rights reserved P a g e 46 Date of Maintenance Record of Maintenance Technician...

Страница 48: ...Copyright 2021 ZKTECO CO LTD All rights reserved ZKTeco Industrial Park No 32 Industrial Road Tangxia Town Dongguan China Phone 86 769 82109991 Fax 86 755 89602394 www zkteco com...

Отзывы: