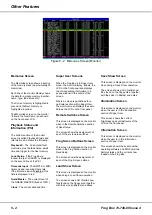
Desk Setup
Select the
Desk Setup
option from the
Super User screen and press the
GO/ENTER key. The Desk Setup
screen is shown on the LCD:
**** DESK SETUP ****
{Desk Defaults}
{Remote Switches}
{Frog Screen}
The Desk Setup options are:
•
Desk Defaults
•
Remote Switches
•
Frog Screen
•
Timecode Setup
•
Exit Desk Setup
Use the up and down arrow keys to
select the required option, then press
the GO/ENTER key to activate that
option.
Each of the Desk Setup options are
described in the following sections.
Desk Defaults
This function allows the user to
enable/disable the remote switches.
1.
Select the
Desk Defaults
option
from the Desk Setup screen and
press the GO/ENTER key. The
Desk Defaults screen is displayed
on the LCD, for example:
** DESK DEFAULTS ***
Remote Switch:
<On >
[Exit]
2.
Use the up and down arrow keys
to move the cursor through the
editable fields.
3.
Use the + and - keys adjust the
value in the selected field.
4.
Press the GO/ENTER key to exit
the Desk Defaults screen and
return to the Desk Setup screen.
Remote Switches
This function allows the user to
configure each of the remote switches.
Each remote switch may be configured
to be a Go button (
Go)
, to Go to a
specified memory (
Go Mem
), or have
no action (
None
).
1.
Select the
Remote Switches
option from the Desk Setup
screen and press the GO/ENTER
key. The Remote Switches screen
is displayed on the LCD:
* REMOTE SWITCHES *
Switch No:
< 2 >
Action: <Go Mem>
Memory: <123.4 >
2.
Use the up and down arrow keys
to move the cursor through the
editable fields.
3.
Use the + and - keys adjust the
value in the selected field.
4.
Press the GO/ENTER key to exit
the Remote Switches screen and
return to the Desk Setup screen.
Frog Screen Buttons
This function allows the user to
configure each of the 130 soft buttons
on the Frog Screen control panel.
Each soft button may be configured to
be a Go button (
Go)
, to Go to a
specified memory (
Go Mem
), or have
no action (
None
).
1.
Select the
Frog Screen
option
from the Desk Setup screen and
press the GO/ENTER key. The
Frog Screen is displayed:
FROG SCREEN BUTTONS
Button No:
< 1 >
Action: <Go Mem>
Memory: <123.4 >
2.
Use the up and down arrow keys
to move the cursor through the
editable fields.
3.
Use the + and - keys adjust the
value in the selected field.
4.
Press the GO/ENTER key to exit
the Frog Screen Buttons screen
and return to the Desk Setup
screen.
Timecode Setup
This function allows the user to set up
the SMPTE or MIDI timecode source
and frame rate for the Frog Box.
1.
Select the
Timecode Setup
option
from the Desk Setup screen and
press the GO/ENTER key. The
Timecode Setup screen is
displayed on the LCD:
** TIMECODE SETUP **
Status:
<Enabled >
Source: < SMPTE >
Frames/Sec:< 25 >
2.
Use the up and down arrow keys
to move the cursor through the
editable fields.
3.
Use the + and - keys to select the
required options in the
Status,
Source
and
Frames/Sec
fields.
4.
Press the GO/ENTER key to exit
the Timecode Setup screen and
return to the Desk Setup screen.
Exit Desk Setup
1.
Select the
Exit Desk Setup
option
from the Desk Setup screen.
2.
If any changes have been made
to the desk setup, a warning
message is displayed on the LCD:
***** WARNING ******
Desk Setup Modified
Save Changes ?
[OK]
{Cancel}
3.
Press the GO/ENTER key to save
the changes, or select the
Cancel
button and press GO/ENTER to
lose the changes. The LCD
returns to the Super User screen.
If no changes have been made to
the desk setup, the LCD returns
straight to the Super User screen.
4 - 2
Frog Box 73-749-00 Issue 4
Super User
Содержание Frog
Страница 1: ...FROG BOX OPERATING MANUAL...
Страница 2: ......
Страница 22: ...5 4 Frog Box 73 749 00 Issue 4 Other Features...
Страница 25: ......
Страница 26: ...Tel 44 0 1633 838088 Fax 44 0 1633 867880 e mail sales zero88 com Web www vari lite com 24 hour answerphone...


