


10 Plasma TV
Introduction
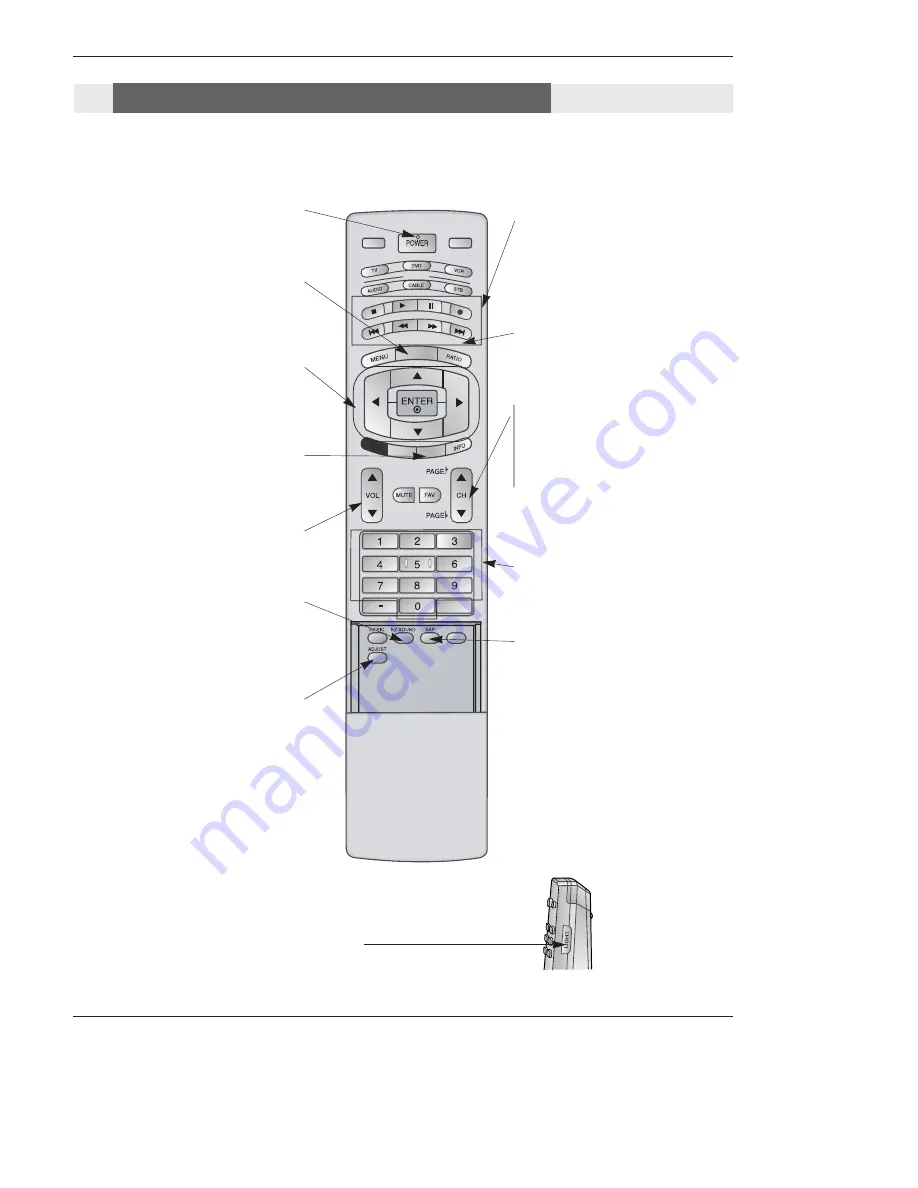
206-4022
DAY+/DAY-
Moves the Listings Grid forward or back-
ward in 24 hour increments.
MODE
DAY -
DAY +
FLASHBK
TIMER
FREEZE
TV INPUT
TV/VIDEO
EXIT
GUIDE
CC
NUMBER buttons
VCR/DVD BUTTONS
• Control some video cassette recorders
or DVD players. ("RECORD" button is not
available for DVD players.)
POWER
Turns your TV or any other programmed
equipment on or off, depending on mode.
CC
Select a closed caption:
Off, CC1~4, Text1~4.
THUMBSTICK (Up/Down/Left/Right/ENTER)
Allows you to navigate the on-screen menus
and adjust the system settings to your pref-
erence.
CHANNEL UP/DOWN
Selects available channels found with EZ
scan.
PAGE UP/PAGE DOWN
Moves from one full set of screen infor-
mation to the next one.
EZ SOUND
Selects the sound appropriate for the pro-
gram's character.
SAP
Selects MTS sound: Mono, Stereo, and
SAP in Analog mode. Change the audio
language in DTV mode.
LIGHT
Illuminates the remote control
buttons of selected mode.
VOLUME UP/DOWN
Increases/decreases the sound level.
GUIDE
Shows program schedule.
ADJUST
Adjusts screen position, size, and phase in
PC mode.
Remote Control Key Functions
Remote Control Key Functions
Содержание Z42PX2DH
Страница 58: ...58 Plasma TV 206 4022 Notes Notes ...


